Introduction
In this tutorial, you will learn how to create an environment to run a MySQL database (we will call this environment an instance), connect to the database, and delete the database instance. We will do this using Amazon Relational Database Service (Amazon RDS), and everything we do in this tutorial is eligible for the Free Tier.
What you will do
- Create an environment to run your MySQL database
- Connect to the database
- Delete the database instance.
Prerequisites
- An AWS account
Step 1 - Create a MySQL DB instance
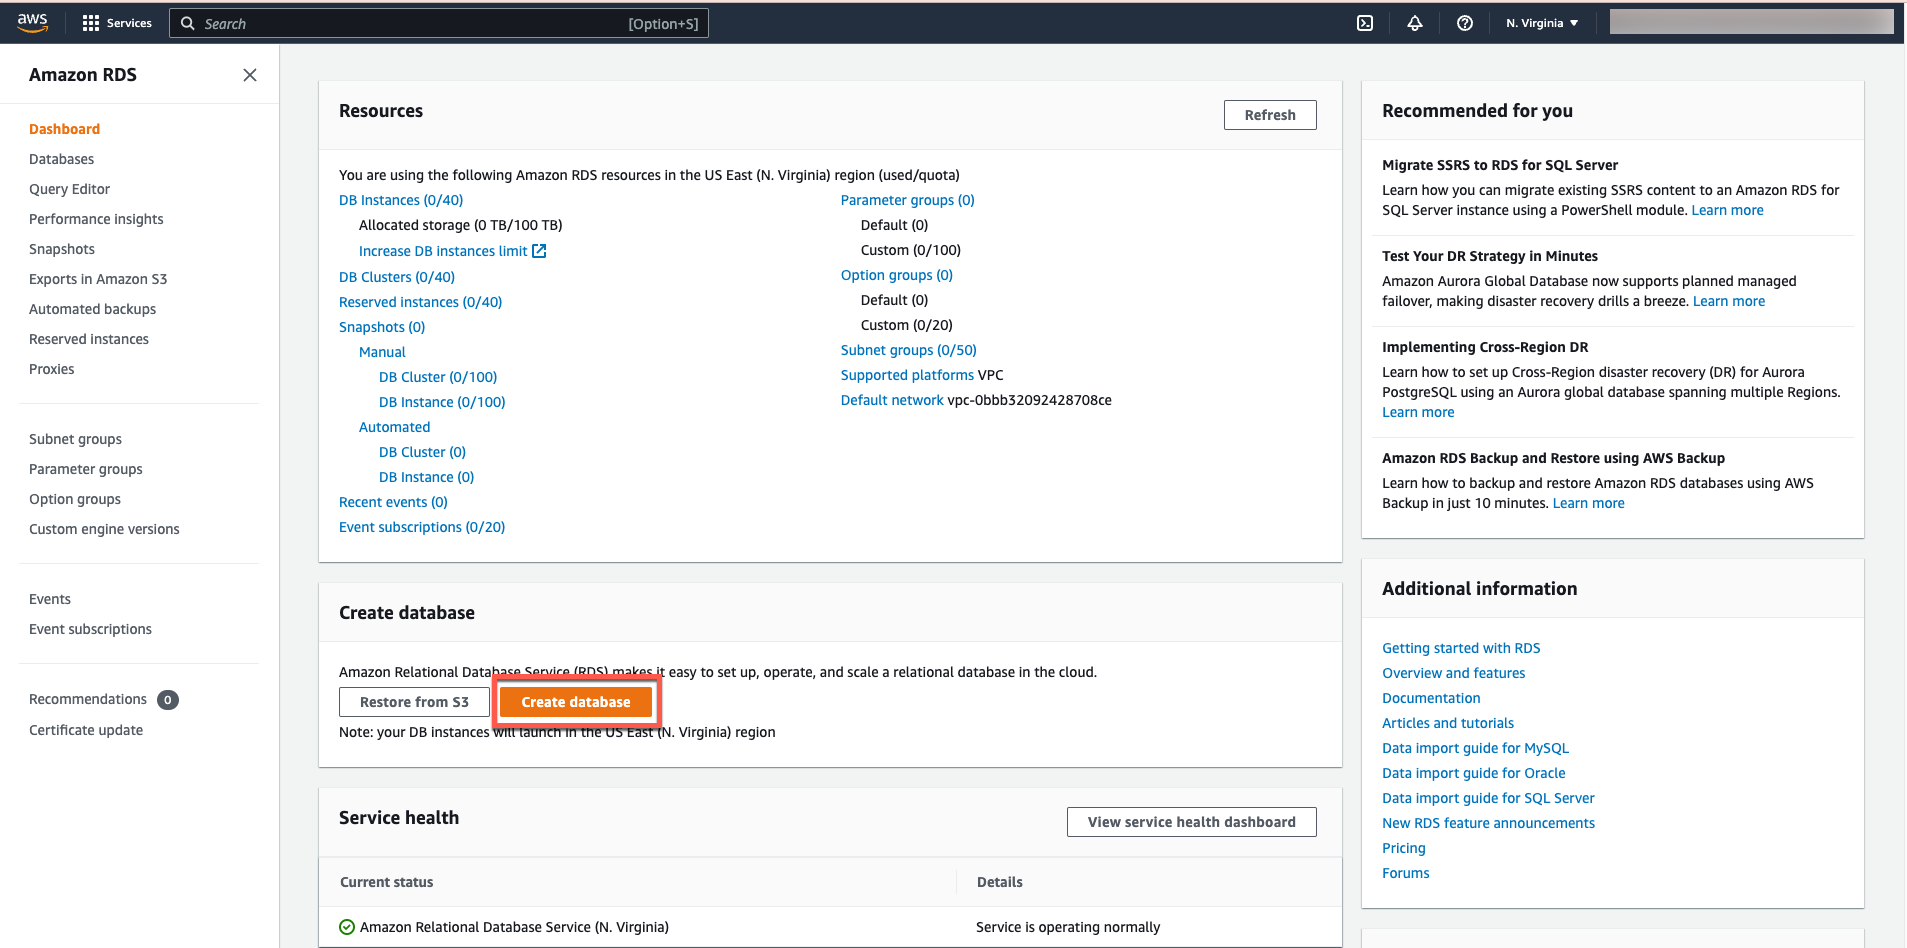
In this step, we will use Amazon RDS to create a MySQL DB instance with the DB instance class db.t2.micro, 20 GB of storage, and automatic backups enabled with a one-day retention period. As a reminder, all of these are eligible for the Free Tier. Open the AWS Management Console in a new browser window so you can keep this step-by-step guide open. Once the console opens, select Databases from the left navigation pane and select RDS to open the Amazon RDS console.

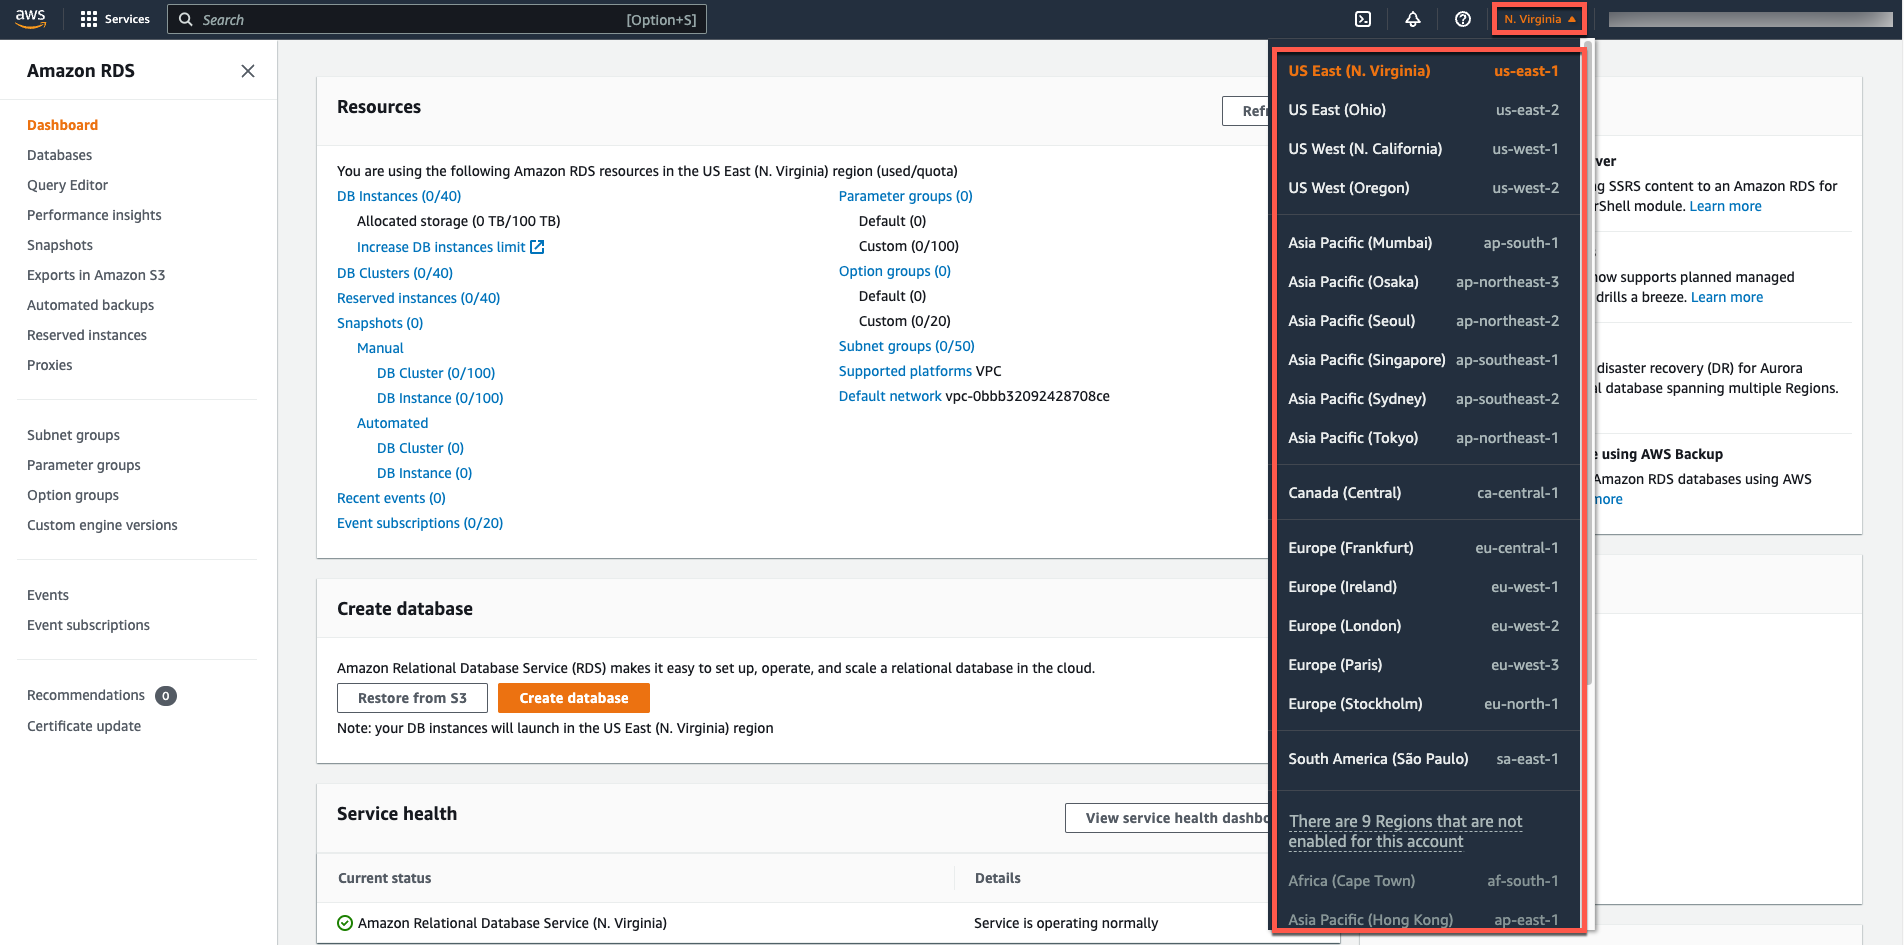
In the top right corner of the Amazon RDS console, select the region where you want to create the DB instance. Note: AWS Cloud resources are located in highly available data centers in different regions of the world. Each region consists of several distinct locations called Availability Zones. You have the ability to choose in which region you want to host your Amazon RDS activity.
In the Create database section, select the Create database option.
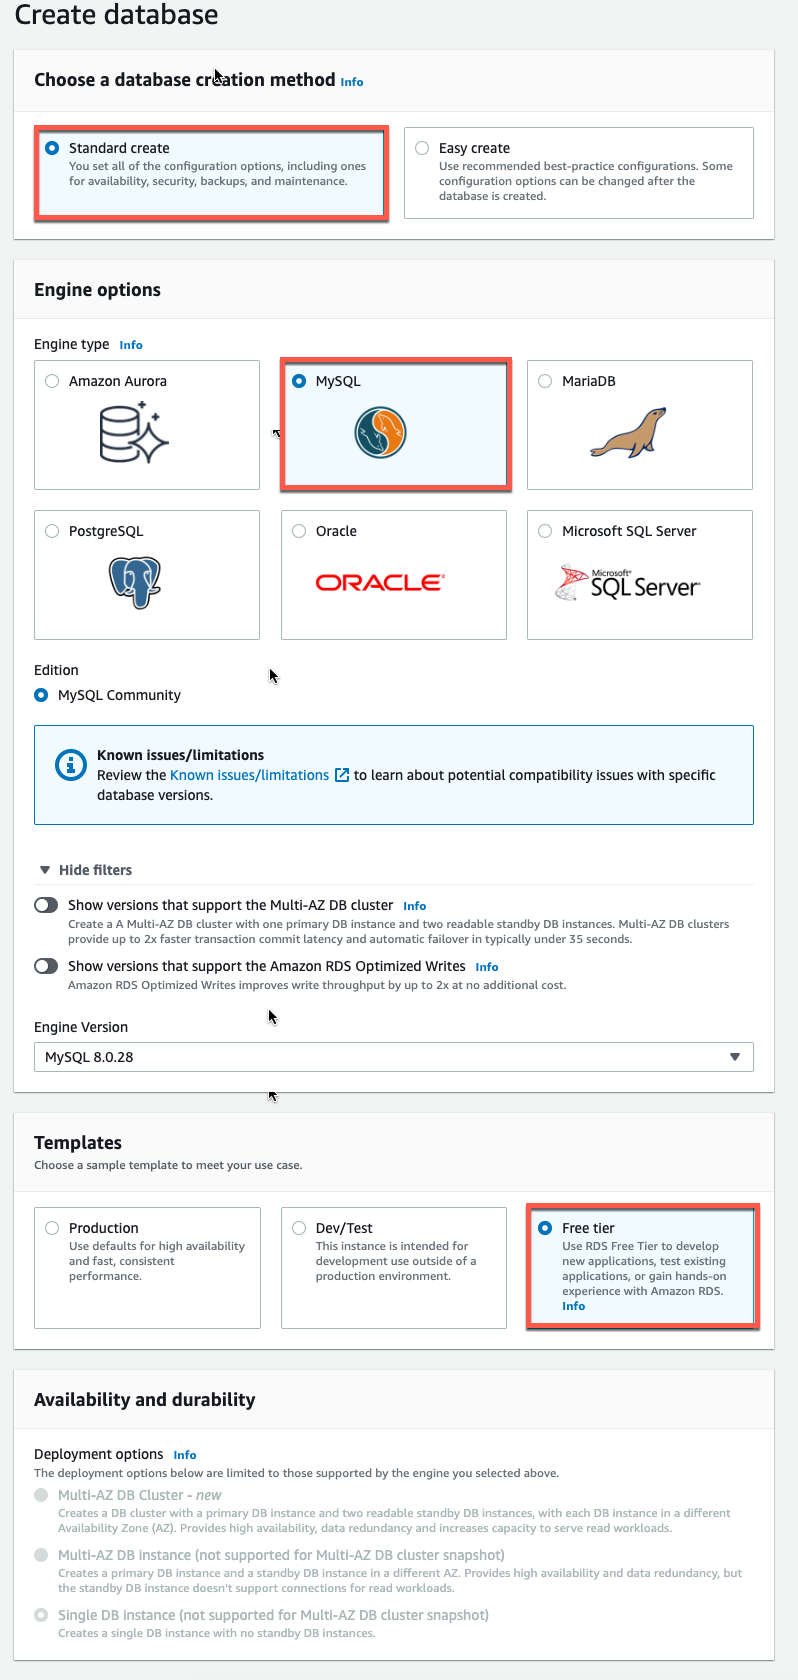
Now you have options to choose your engine. For this tutorial, select the MySQL icon, leave the default values for the version and engine version, and select the Free Tier template. Multi-AZ Deployment: Note that you will have to pay for a Multi-AZ deployment. Using a Multi-AZ deployment automatically provision and maintain a concurrent standby instance in a different availability zone.
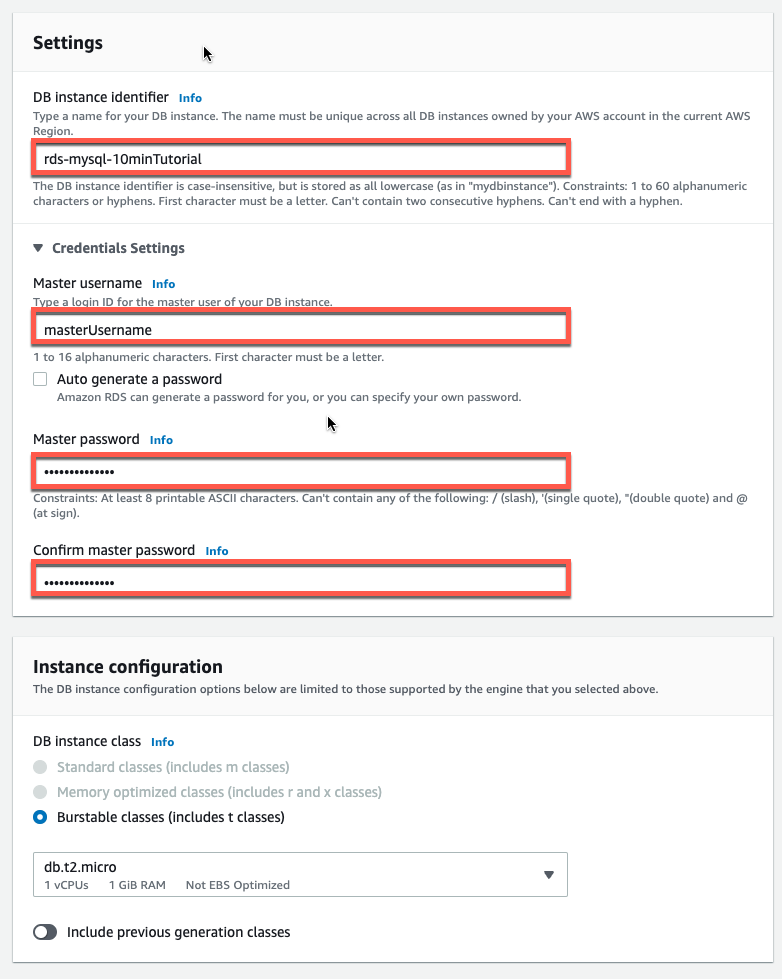
Now you will configure your DB instance. The following list shows sample settings that you can use for this tutorial:
- DB Instance ID: Type a name for the DB instance that is unique to your account in the region you selected. For this tutorial, we will name it rds-mysql-10minTutorial.
- Master Username: Type the username that you will use to log in to your DB instance. In this example, we will use masterUsername.
- Master Password: Type a password containing 8 to 41 printable ASCII characters (excluding /,” and @) for your master user password.
- Confirm Password: Retype your password.
Sample specifications:
- DB instance class: Select db.t2.micro – 1vCPU, 1GB RAM. This is equivalent to 1GB of memory and 1 vCPU. For a list of supported instance classes, see Amazon RDS Pricing.
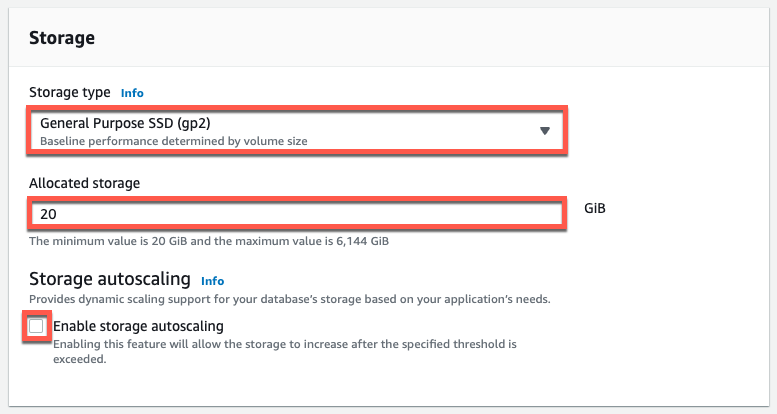
- Storage Type: Select General Purpose (SSD). For more information about storage, see Storage for Amazon RDS.
- Dedicated storage: Select the default of 20 to allocate 20 GB of storage for your database. You can scale up to 64 TB with Amazon RDS for MySQL.
- Enable Storage Autoscale: If your workload is cyclical or unpredictable, you can enable Storage Autoscale to enable Amazon RDS to automatically increase your storage as needed. This option is not applicable to this tutorial.
- Multi-AZ deployment: Note that you will need to pay for a Multi-AZ deployment. Using a Multi-AZ deployment automatically provision and maintain a concurrent standby instance in a different availability zone. For more information, see Extending high availability.
You are now in the connection section where you can provide the information that Amazon RDS needs to set up your MySQL DB instance. The following list shows our sample DB instance settings.
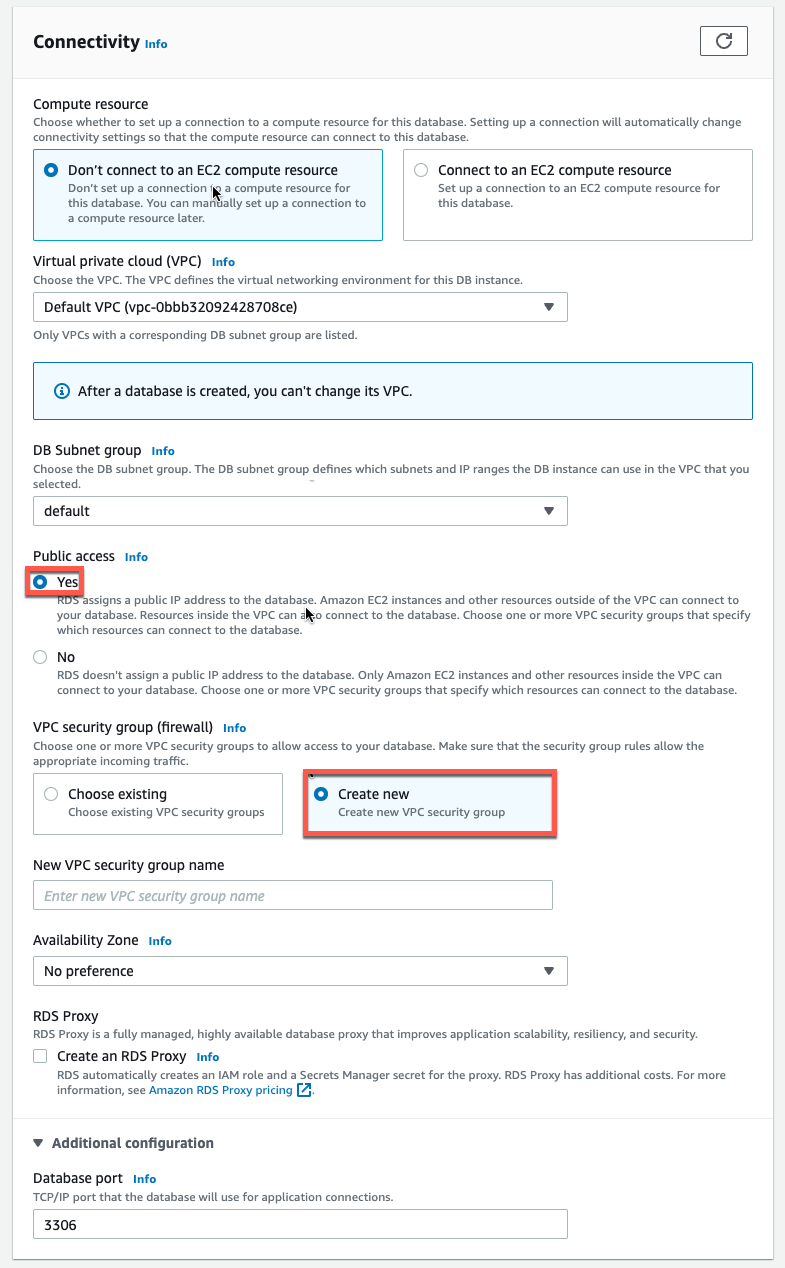
Connectivity
- Compute resource: Select the Don't connect to an EC2 compute resource option. You can manually set up a connection to a compute resource later.
- Virtual Private Cloud (VPC): Select the default VPC. For more information about VPC, see Amazon RDS and Amazon Virtual Private Cloud (VPC).
Additional connection settings
- Subnet Group: Select the default subnet group. For more information about subnet groups, see Working with DB Subnet Groups.
- Public Access: Select Yes. This assigns an IP address to your database instance so that you can connect to the database directly from your device.
- VPC Security Groups: Select Create New VPC Security Group. This creates a security group that allows you to connect to the created database from the IP address of the device you are currently using.
- Available Region: Select No Priority. See Available Regions and Zones for more details.
- RDS Proxy: Using Amazon RDS Proxy, you can allow your applications to pool and share database connections to improve their ability to scale. Leave RDS Proxy unchecked.
- Port: Leave the default value of 3306.
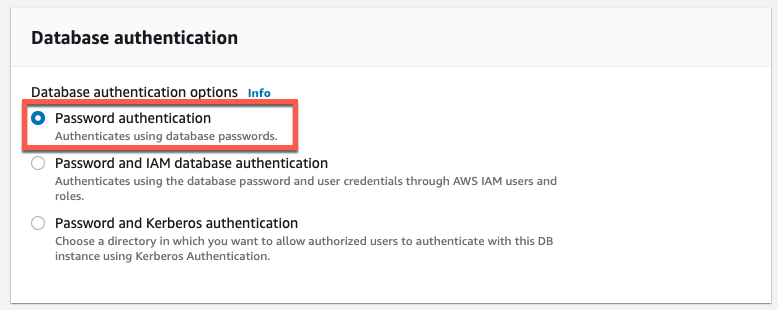
Amazon RDS supports several methods for authenticating database users. From the list of options, select Password Authentication.
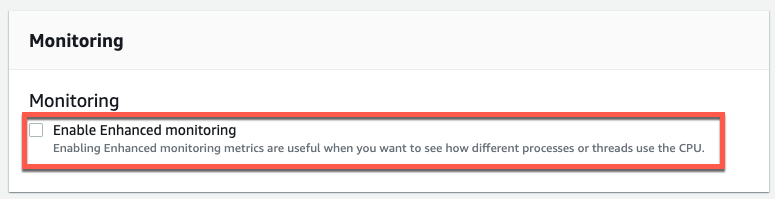
Advanced Monitoring: To stay in the free tier, leave Advanced Monitoring unchecked. Enabling Advanced Monitoring provides you with real-time metrics for the operating system (OS) your DB instance is running on. For more information, see View DB Instance Metrics.

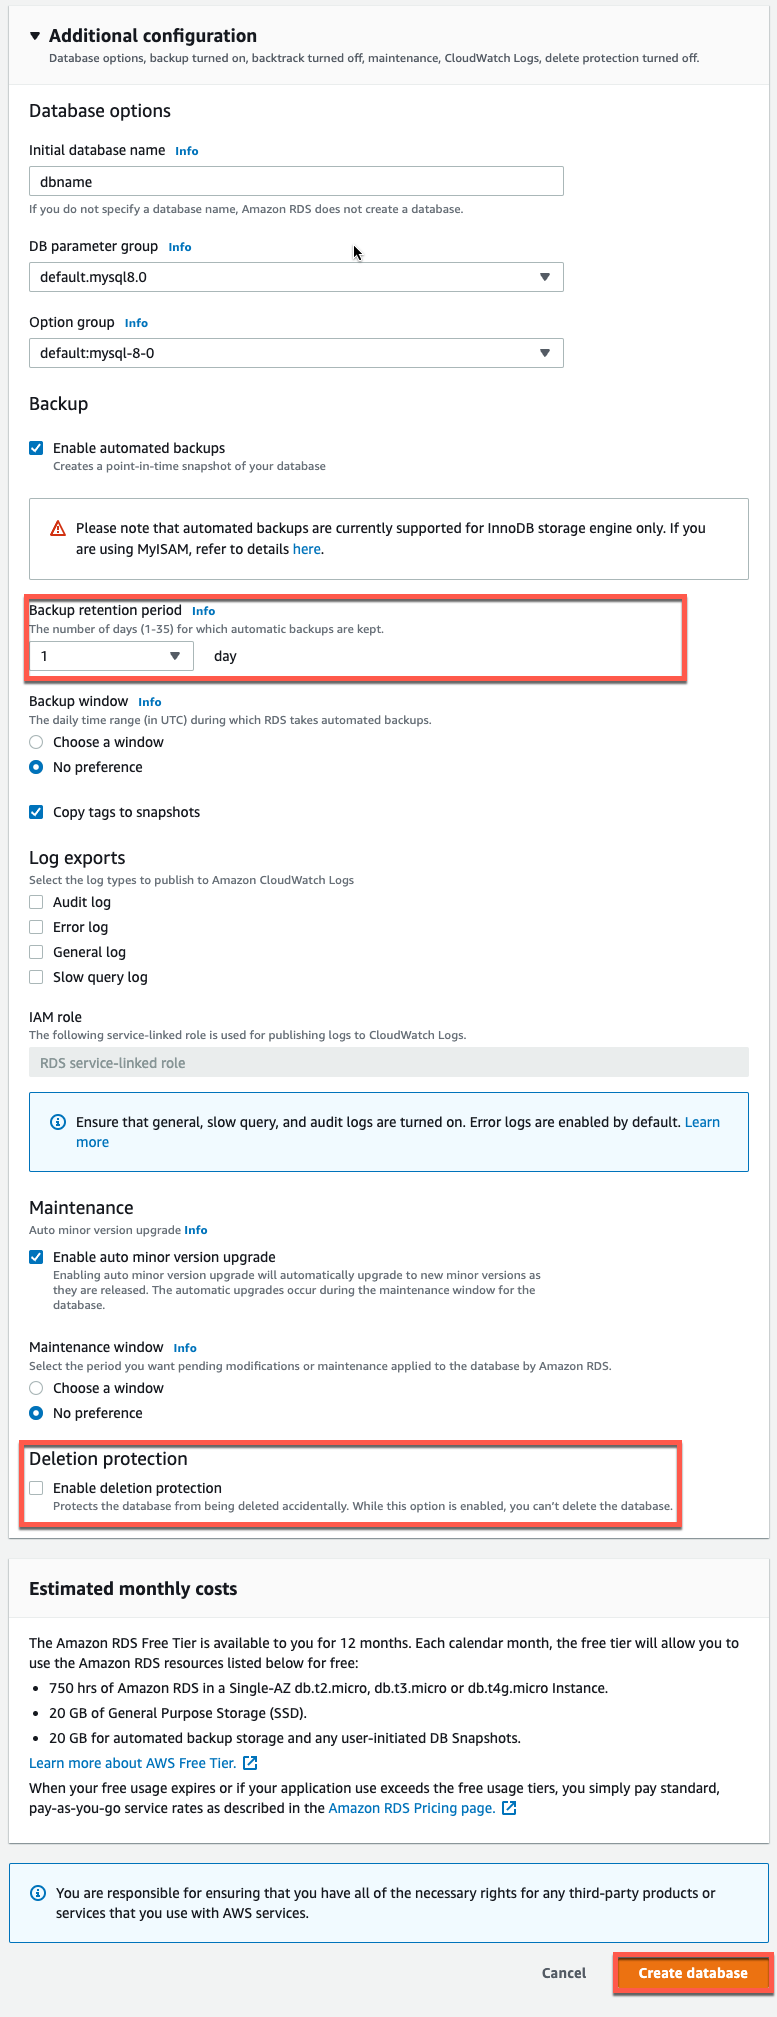
Database options
- Database Name: Enter a database name that is 1 to 64 alphanumeric characters. If you do not provide a name, Amazon RDS does not automatically create a database in the DB instance that you create.
- DB Parameter Group: Leave the default value. For more information, see Working with DB Parameter Groups.
- Option Group: Leave the default value. Amazon RDS uses option groups to enable and configure additional features. For more information, see Working with Option Groups.
- Backup Retention Period: You can choose the number of days to keep your backup. For this tutorial, set this value to 1 day.
- Backup window: Use the default No preference.
- Automatic minor version upgrades: Select Enable automatic minor version upgrades to receive automatic updates when they become available.
- Maintenance window: Select No preference.
- Delete Protection: Enable delete protection for this tutorial. When this option is enabled, accidental deletion of the database is prevented.
Select Create Database.
Your DB instance is now being created.
The new DB instance appears in the DB instance list in the RDS console. The DB instance will have a status of Creating until the DB instance is created and ready to use. When the status changes to Existing, you can connect to a database in the DB instance.
Step 2 - Download SQL Client
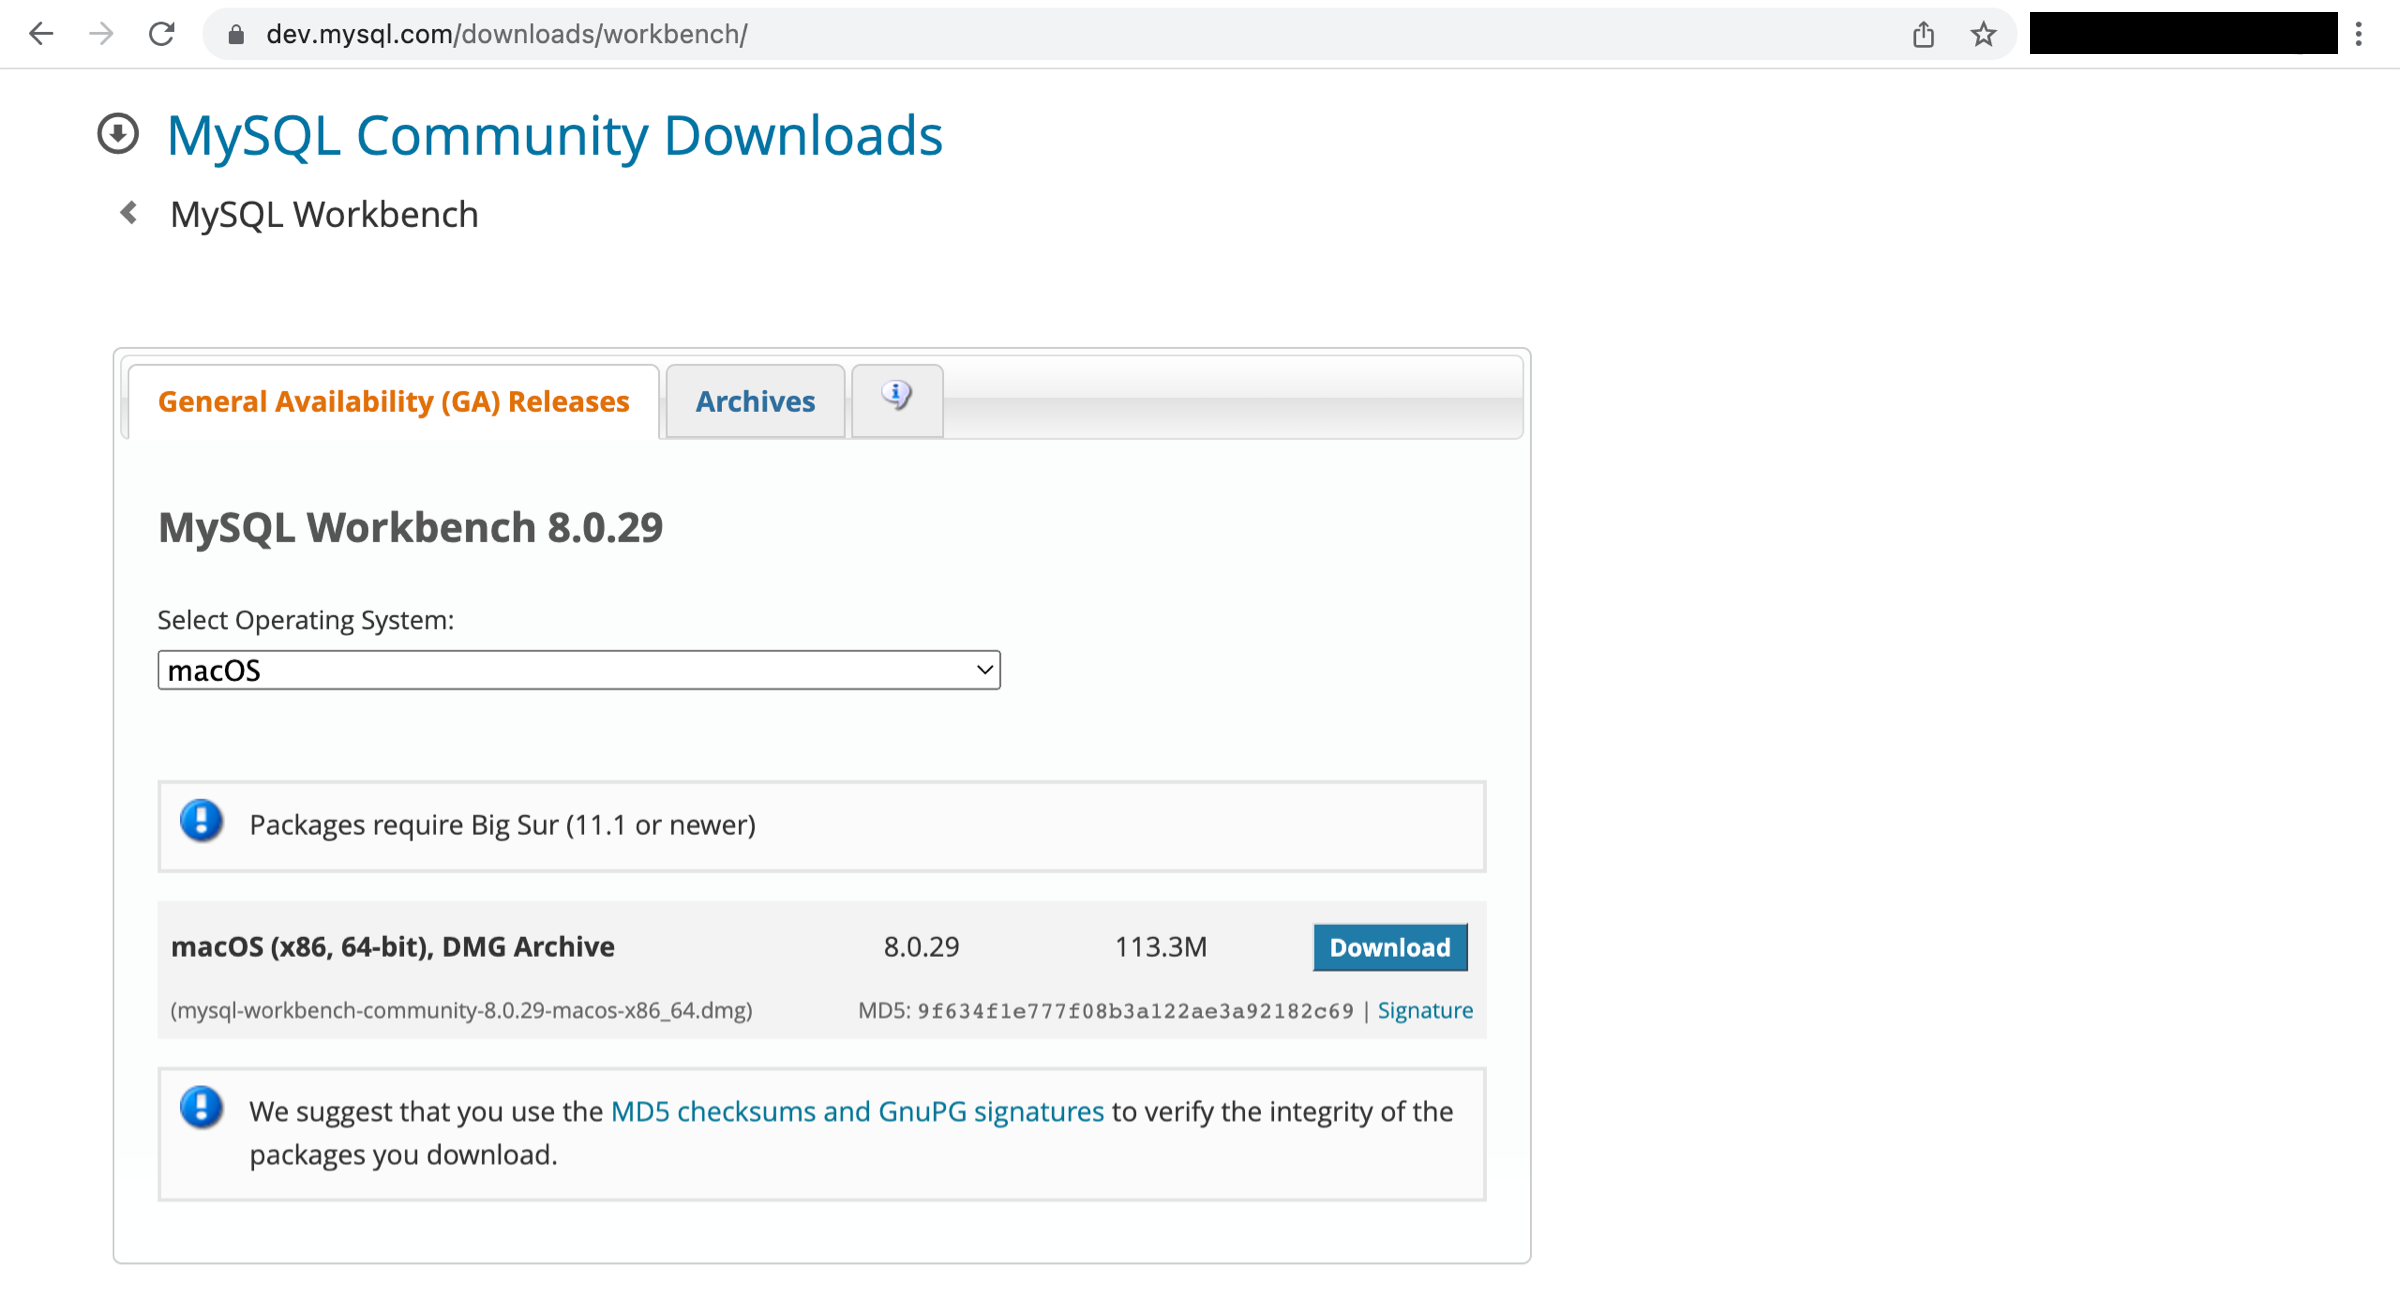
Once the database instance creation is complete and the status changes to Existing, you can connect to a database in the DB instance using any standard SQL client. In this step, we will download MySQL Workbench, a popular SQL client.
A. To download and install MySQL Workbench, go to the MySQL Workbench download page. For more information about using MySQL, see the MySQL documentation.
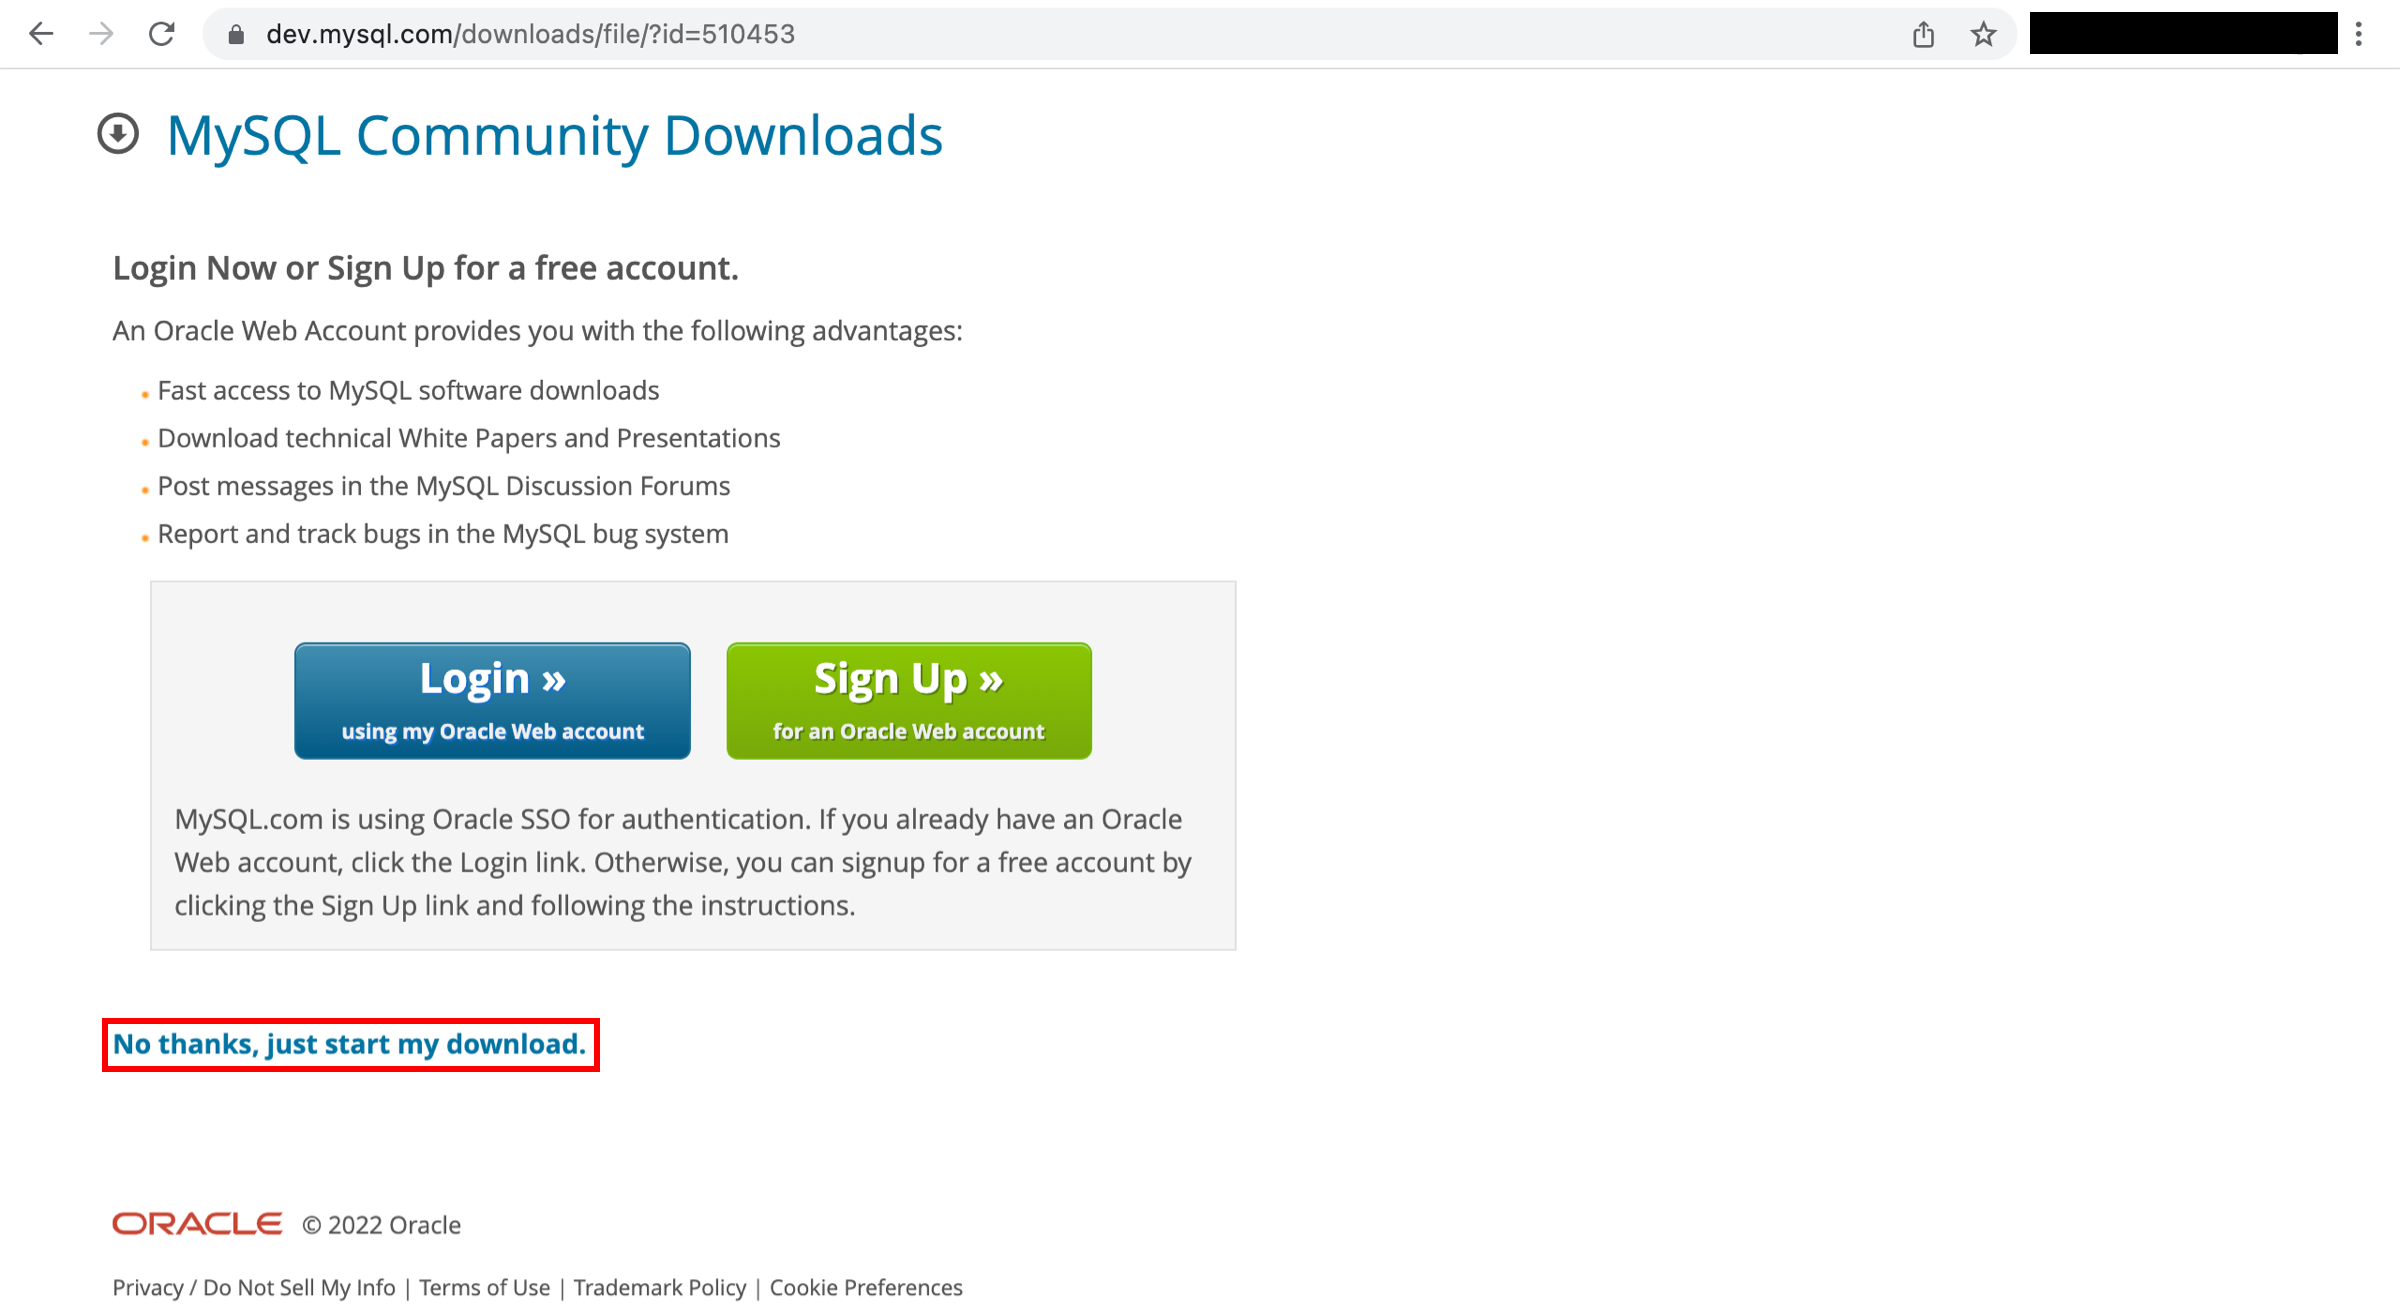
You will be asked to log in, register or start your download. You can choose No, thanks, just start my download for a quick download.
Step 3 - Connect to the SQL database
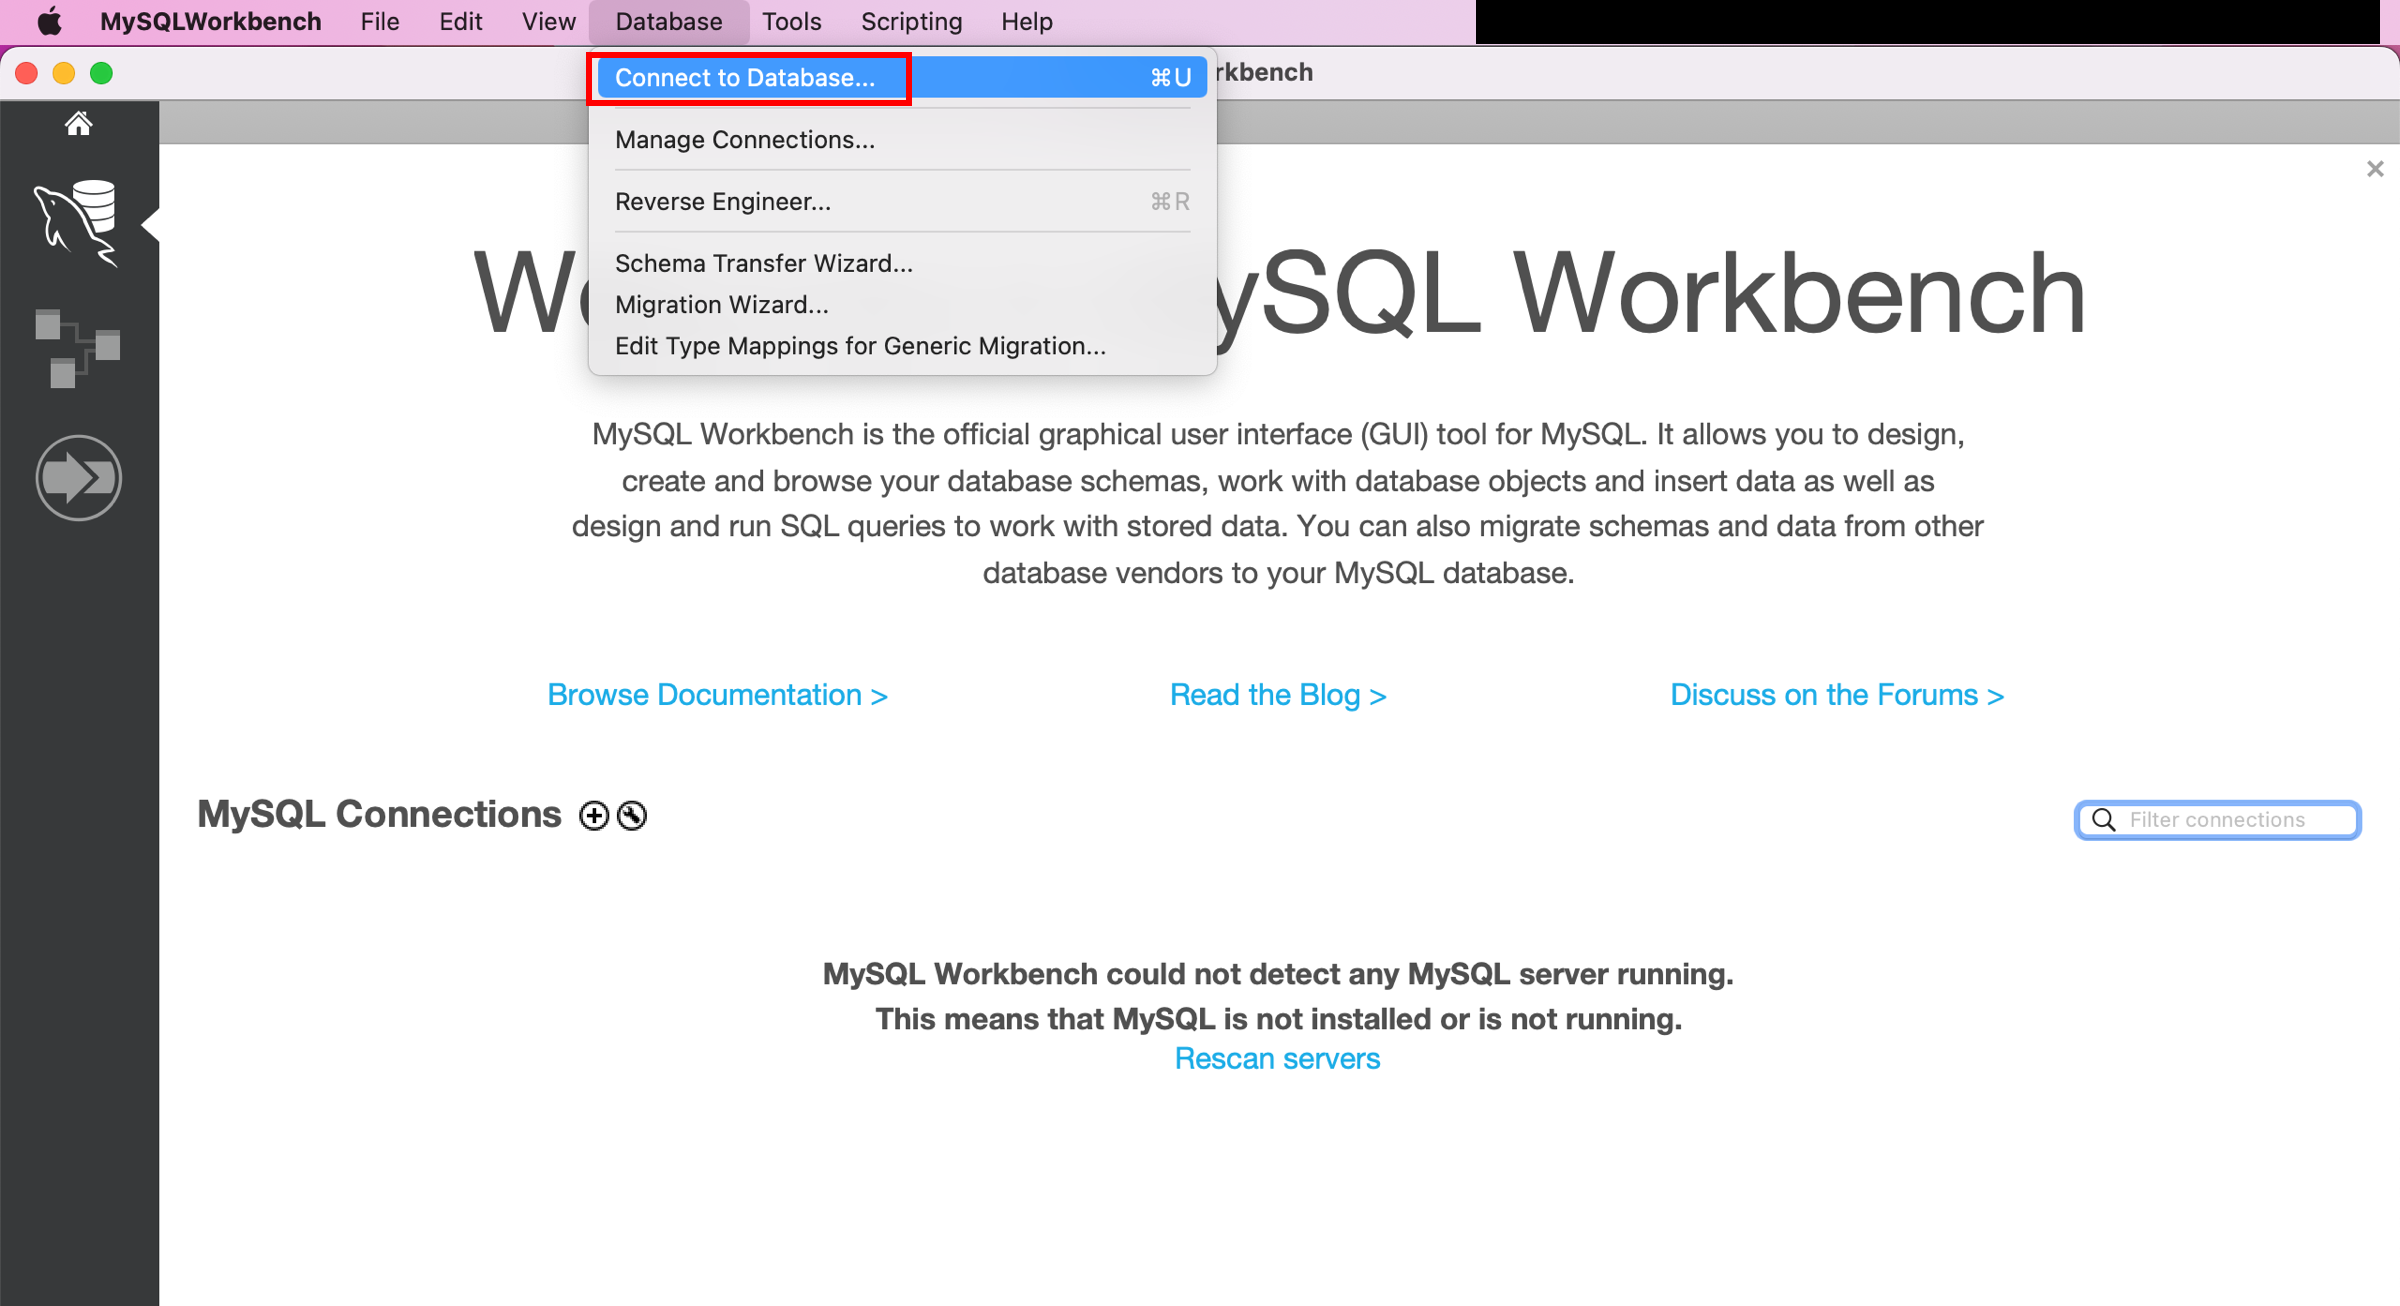
Launch the MySQL Workbench application and from the menu bar go to Database > Connect to Database (Ctrl+U).
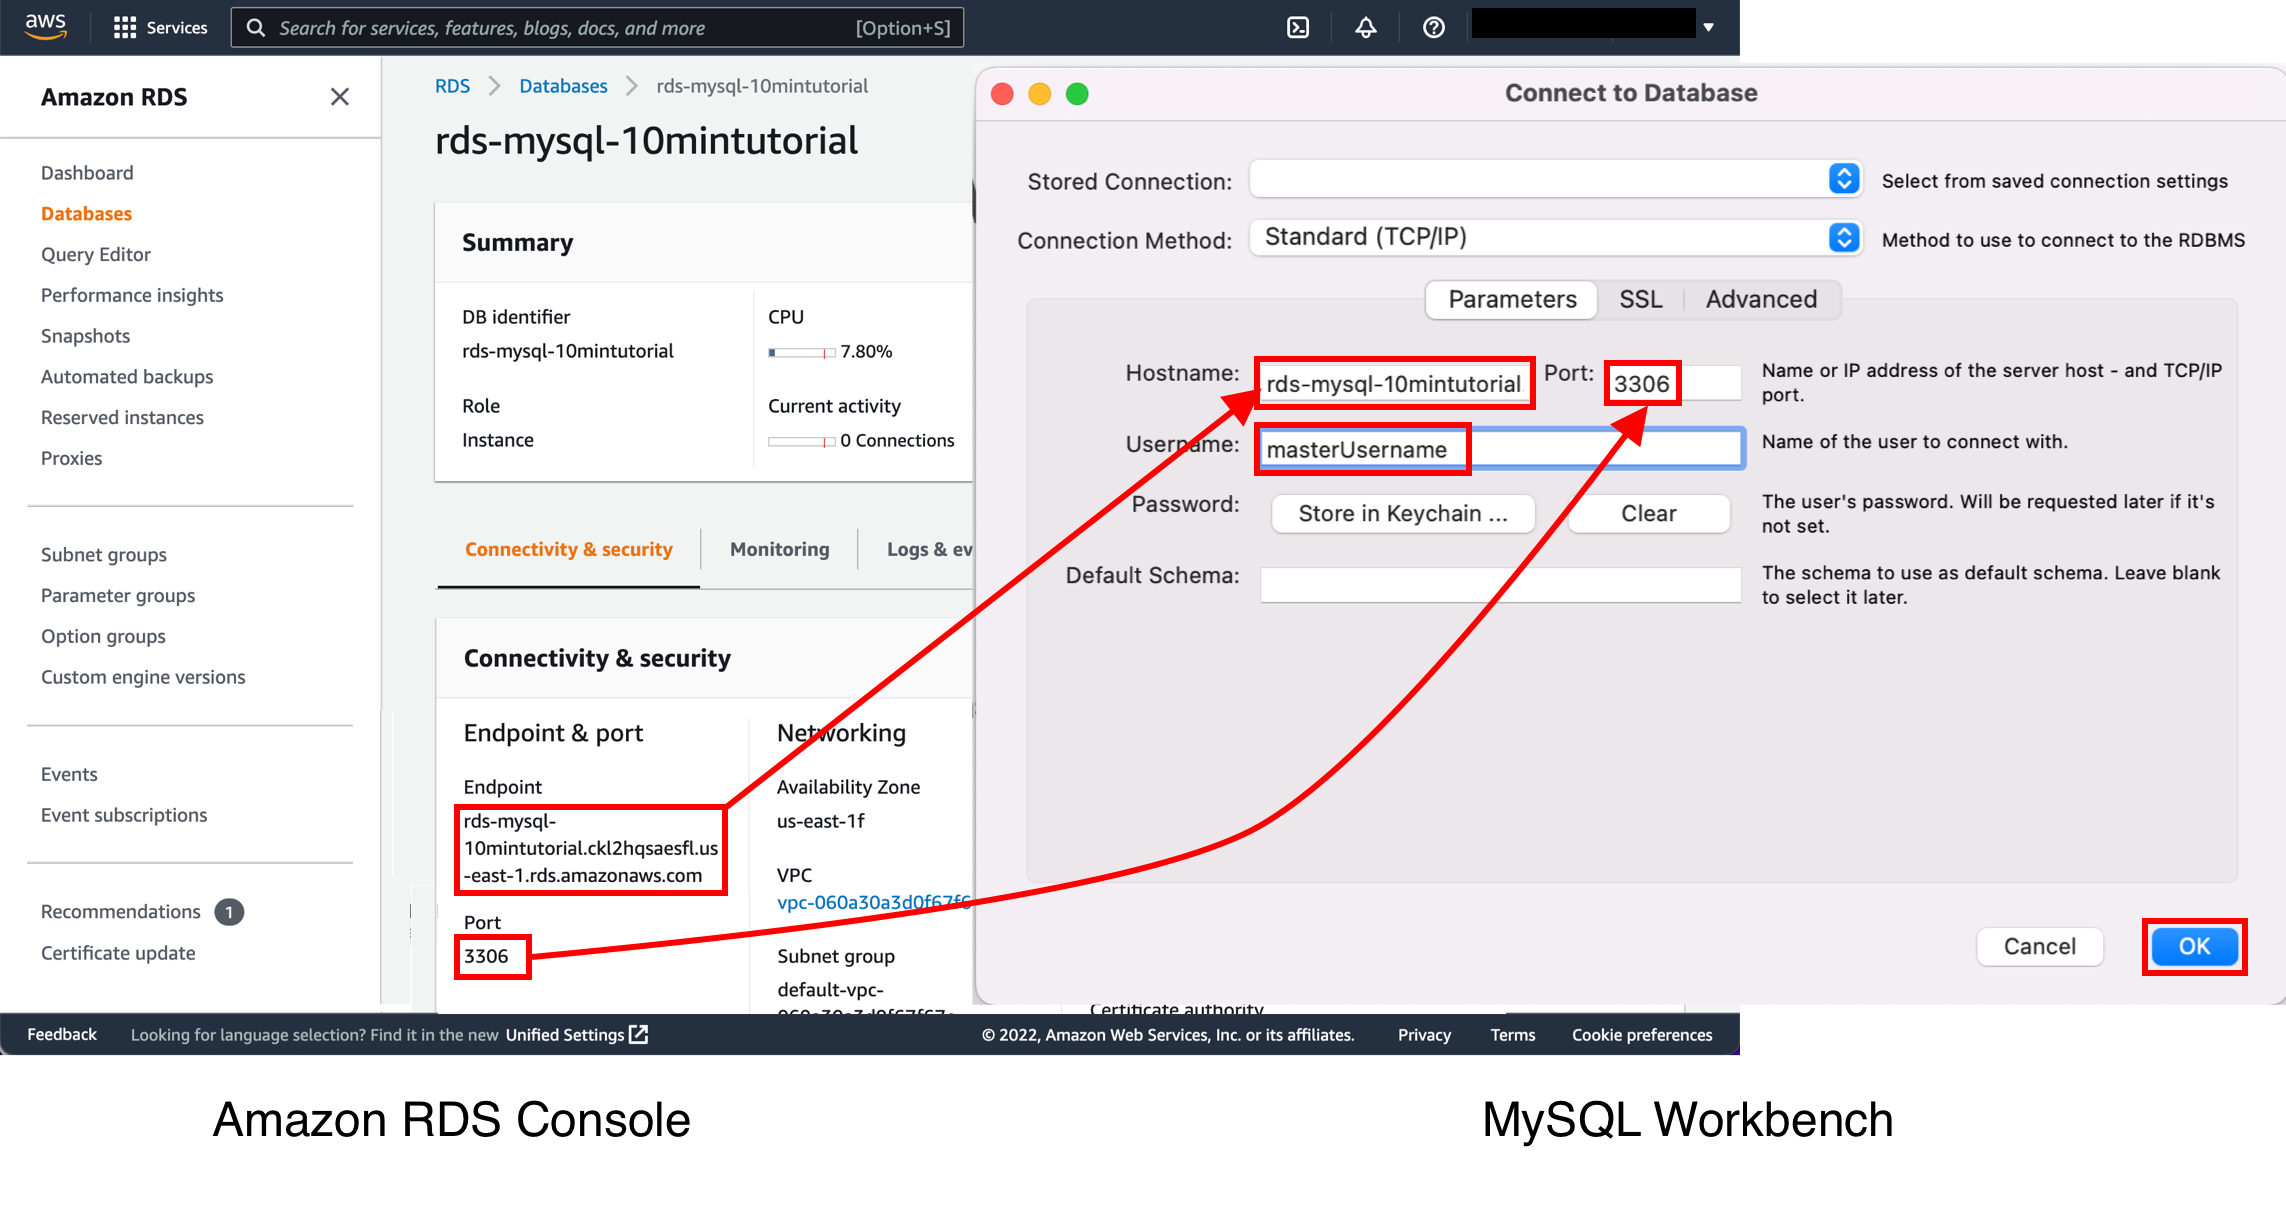
A dialog box will appear. Enter the following:
- Hostname: You can find your hostname in the Amazon RDS console, as shown in the image.
- PORT: The default value should be 3306.
- Username: Enter the username you created for the Amazon RDS database. In this tutorial, it is 'masterUsername'.
- Password: Select Store in Vault (or Store in Keychain on MacOS) and enter the password you used when creating the Amazon RDS database.
Select OK.
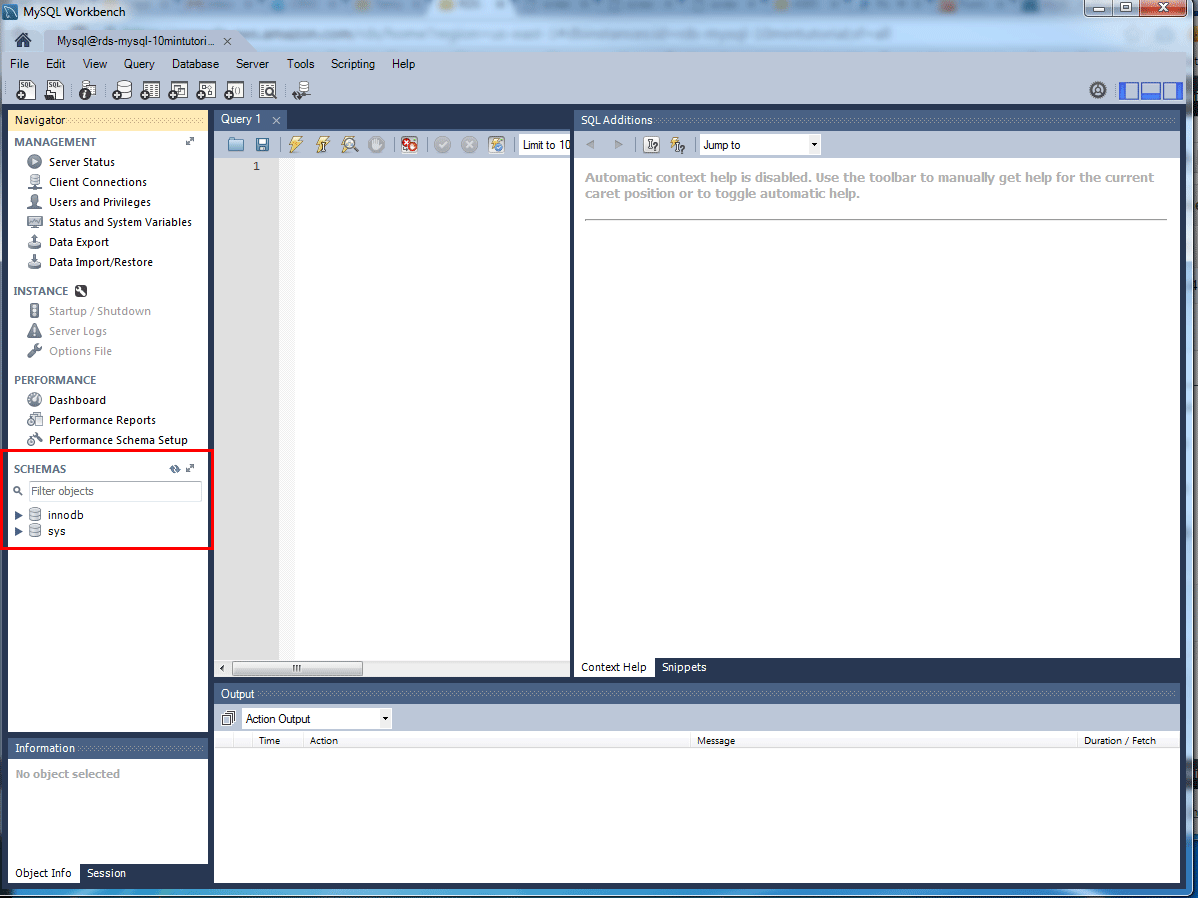
You are now connected to the database! In the MySQL Workbench, you will see the various schema objects present in the database. You can now create tables, insert data, and run queries.
Step 4 - Delete the DB instance
You can easily delete a MySQL DB instance from the Amazon RDS console. It is best to delete instances that you are no longer using so that you do not keep getting charged for them.
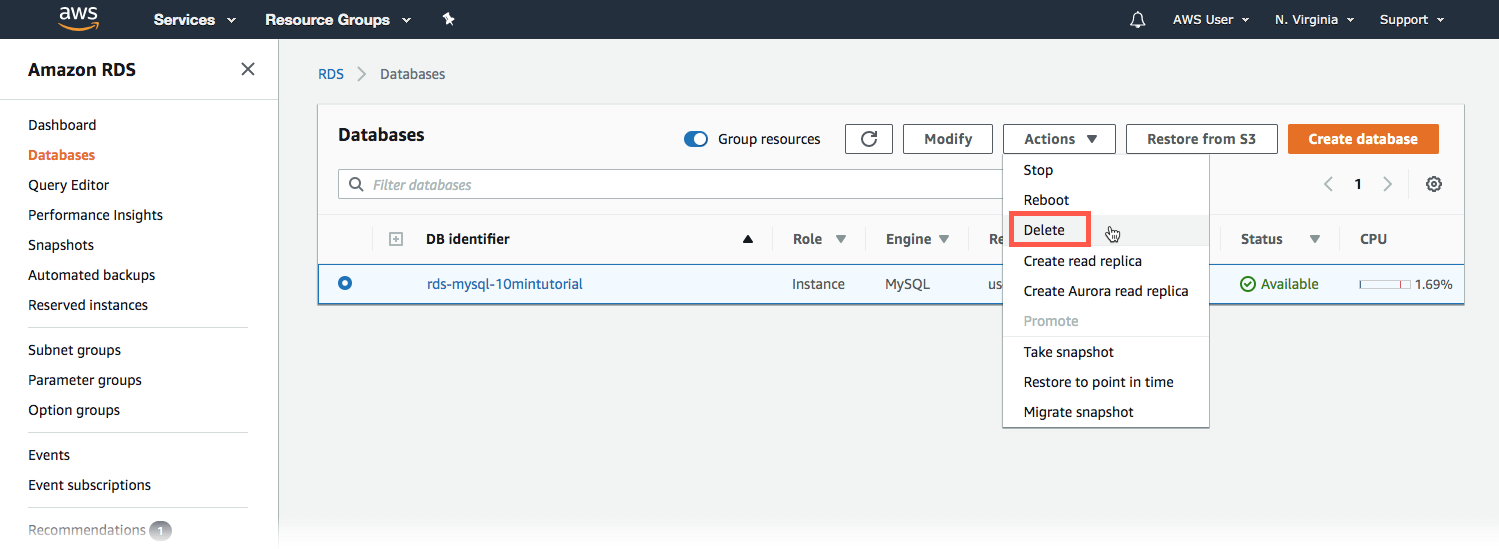
Return to the Amazon RDS console. Select Databases, select the instance you want to delete, and then select Delete from the Actions drop-down menu.
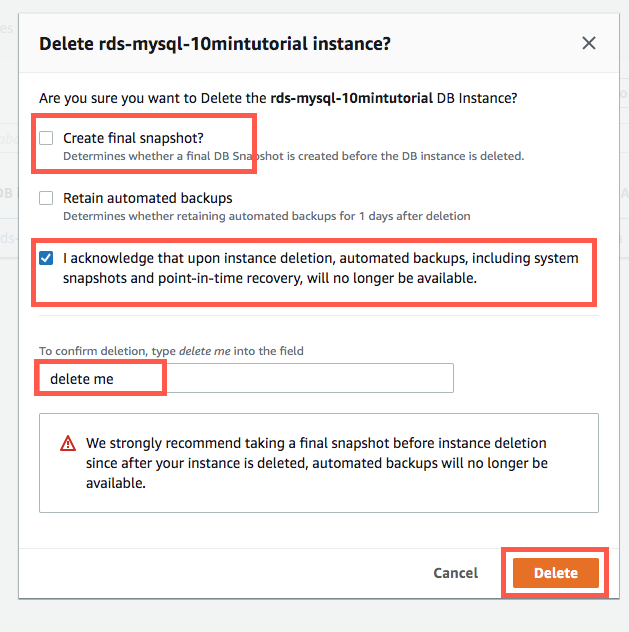
You will be prompted to create a final snapshot and confirm the deletion. For our example, do not create a final snapshot, confirm that you want to delete the instance, and then select Delete.
Result
You have created, connected to, and deleted a MySQL database instance with Amazon RDS. Amazon RDS makes it easy to set up, operate, and scale a relational database in the cloud. It provides affordable, scalable capacity while managing time-consuming database administration tasks, freeing you to focus on your applications and business.