Introduction
This tutorial explains how to use Hetzner Cloud Networks to access a MySQL database managed on one cloud server (MySQL Server) from a second cloud server (MySQL Client).
Prerequisites
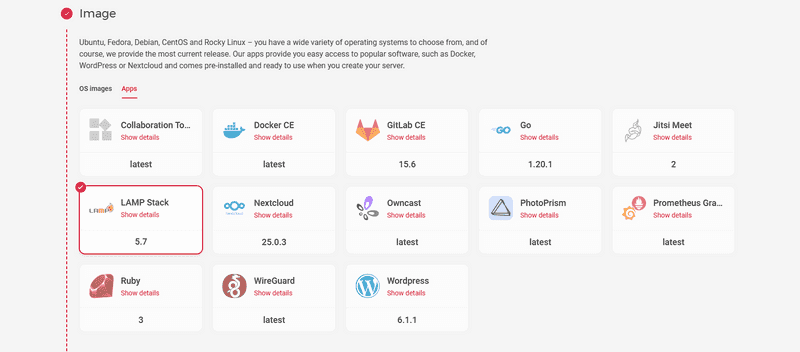
- 1 Hetzner cloud server with MySQL already installed.
You can install MySQL manually or you can simply select the “LAMP Stack” when creating the server.

Step 1 – Create a private network
Create your private network under your Hetzner Cloud project in the region you want to use.
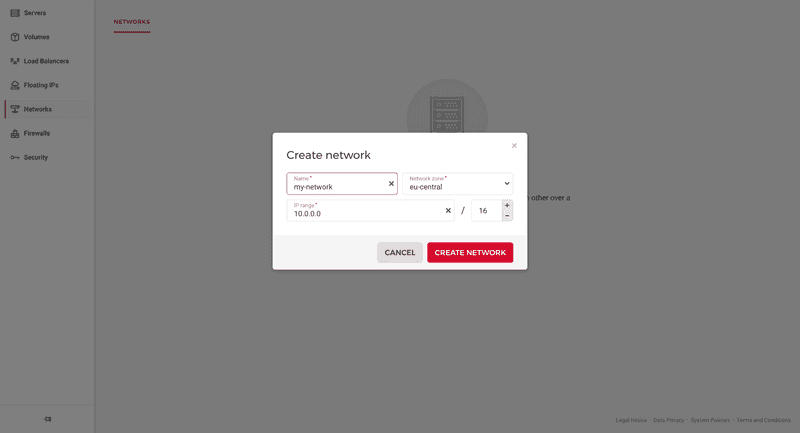
Remember that the default IP range is set to 10.0.0.0/16.
Step 2 – Connect the server to the network
Now you can connect the MySQL server to the new network. You can do this using the Cloud Console or the tool hcloud Do it.
hcloud server attach-to-network <your-server-name> --network <your-network-name> --ip <pvt-ip>
The last part with --ip; Optional. If you do not specify a specific private IP, the Hetzner Cloud system will automatically assign you a free private IP.
Step 3 – Change MySQL configuration
To access MySQL from another machine, you need to make a change to the file /etc/mysql/mysql.conf.d/mysqld.cnf Create.
File mysqld.cnf Edit
To open the MySQL configuration file, use the following command:
nano /etc/mysql/mysql.conf.d/mysqld.cnf
Parameter bind-address from 127.0.0.1 To 0.0.0.0 Change.
If you installed MySQL via the “LAMP Stack” program, you need to specify a MySQL port (by default 3306) using the tool ufw Open.
If you installed MySQL manually, you need to install the firewall with this command: apt-get install ufw
Edit the firewall
To open the port 3306 Add a rule to the firewall
ufw allow from 10.1.0.0/16 to any port 3306
10.1.0.0/16 Replace with the network IP range you created in step 1.
If you are using SSH to connect to your server, you should also allow SSH connections before enabling the firewall.
ufw allow OpenSSH
ufw enable
Step 4 – Create a new MySQL user
Enter the MySQL CLI as the root user:
mysql -u root -p
Create a new MySQL user that can be used by non-local instances.
CREATE USER '<user>'@'%' IDENTIFIED BY '<password>';
GRANT ALL PRIVILEGES ON *.* TO '<user>'@'%' WITH GRANT OPTION;
FLUSH PRIVILEGES;
Also, don't forget that after manipulating the file mysqld.cnfRestart MySQL. To exit the MySQL CLI, type CTRL+D Use and run the following command:
service mysql restart
Step 5 – Check MySQL access on the private network
Create a new server from scratch and connect it to the same private network.
Install the MySQL client. For example, you can have the MariaDB client.
apt update apt install mariadb-client -yNow you need the private IP of the first server. In the Cloud Console you can select your project and go to the server list. From there you can copy the private IP of this server.
Use this command to connect to the MySQL host:
mysql -h <mysql-host-private-ip> -u <user-created-above> -pThen just put in your password that was created for the user and voilà – you’re logged in.
Result
Here you saw just one example of how to access a database on a private network under Hetzner Cloud.