Introduction
A Virtual Private Server (VPS) is a virtual dedicated server. Unlike OVHcloud's web hosting offerings, which are managed by OVHcloud on a technical level, setting up and maintaining a VPS system is your responsibility as the server administrator.
Prerequisites
- A virtual private server on your OVHcloud account
- Access to the OVHcloud control panel
Log in to your OVHcloud control panel, go to the Bare Metal Cloud section and select your server from the Virtual Private Servers.
Control panel interface
This dashboard (home tab) contains important information about your service and allows you to perform essential operations.
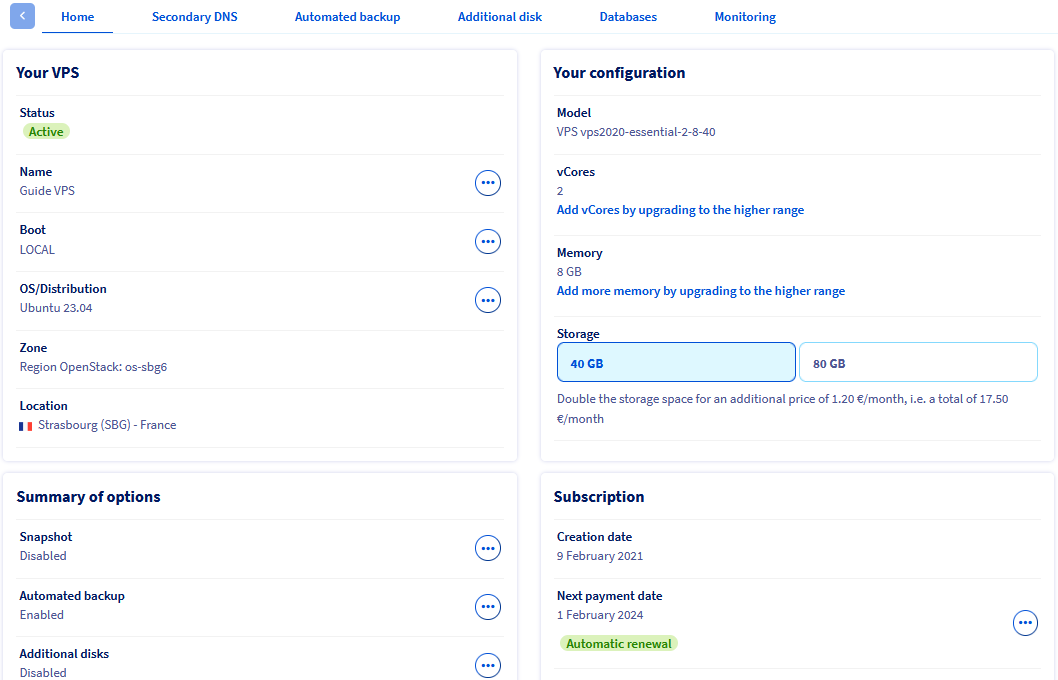
Your VPS
In this section you can find basic information about the VPS and the status of the service. Click on the tabs below to view details.
Name
If you click on … and then select Change the name, you can enter a unique name for this VPS. This is useful for easier navigation in the control panel in cases where you manage multiple VPS services, but otherwise has no effect. The internal service name remains in the format vps-XXXXXX.vps.ovh.net.
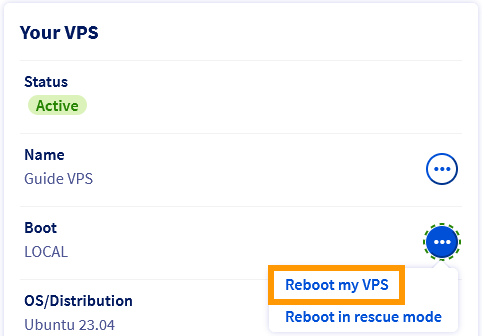
Boot
The boot mode displayed here is either the “normal” mode in which the system loads the installed operating system (LOCAL) or the rescue mode provided by OVHcloud for troubleshooting purposes. Use the … button to reboot the VPS or start it in rescue mode.
You can find more information in our Rescue Mode guide.
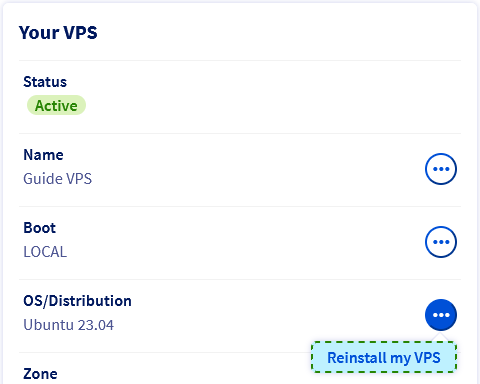
This is the operating system that is currently installed. Use the … button to reinstall the same operating system or select another from the available options.
Note that reinstalling will erase all data currently hosted on the VPS (extra disks excluded).
These sections show information about the location of your VPS. This may be useful, for example, to identify impacts on your service mentioned in status reports.
Your configuration
This shows the business reference that specifies the VPS model related to the VPS offerings on our website.
Your current VPS resources are displayed here and can be upgraded individually by clicking the corresponding button. Note that upgrades are limited by the selected VPS model and may only be available by upgrading the service to a higher tier.
IP
The VPS's primary public IPv4 address is automatically configured during installation. Find more information about IP management in our guide Configuring IP Naming.
Here you can see the public IPv6 address and the associated gateway address. These are automatically assigned to the VPS during installation. Find more information in this guide.
This feature is useful for hosting DNS services. Our guide on configuring OVHcloud's secondary DNS on its VPS explains it in detail.
Summary of options
These options relate to additional VPS services that can be ordered in the control panel.
- The Snapshot option allows you to create a manual snapshot as a single restore point.
- The Automated Backup option enables you to keep multiple snapshots of your VPS (excluding redundant disks).
- The Additional disk option attaches storage space to your VPS, for example to store backup data.
You can find all the information about the support solutions available for your service on the product page and in the relevant guides.
Subscription
These sections show the most important information regarding your service billing. Please find all the information regarding this in the relevant documents.
VPS functions available on the “Home” tab.
OVHcloud provides you with services that you are responsible for configuring and managing. It is therefore your responsibility to ensure that they function properly.
This guide is designed to help you with common tasks as much as possible. However, we recommend that you contact a specialized service provider or contact our community if you encounter problems or have any doubts about managing, using, or running services on the server.
Reinstall your VPS
You can perform a reinstallation in your control panel. Click on … next to OS/Distribution and then click Reinstall my VPS.
In the pop-up window, select an operating system from the drop-down list. The options provided represent images compatible with OVHcloud VPS and are ready to run immediately after installation.
If you have already saved it in your OVHcloud control panel, you can choose an SSH key to install on the system. To find out everything about this, please consult our guide on creating and using SSH keys.
Some operating systems or proprietary platforms such as Plesk or cPanel require licenses, which incur additional costs. Licenses can be managed from the OVHcloud control panel: go to the Bare Metal Cloud section, then click on Licenses in the left navigation.
In order for a Windows operating system to run on a VPS, it must be selected during the ordering process. A VPS with another operating system installed cannot be reinstalled with Windows in the manner described above.
An installation progress bar will appear in your control panel. Please note that this process may take up to 30 minutes.
Restart your VPS
A reboot may be required to apply updated settings or fix a problem. Whenever possible, perform a "soft reboot" from the server's GUI (Windows, Plesk, etc.) or via the command line:
sudo reboot
However, you can perform a "hard reboot" at any time in your OVHcloud control panel. From the Home tab, click on ... next to Boot in the Your VPS section. Select the Reboot my VPS option and click Confirm in the pop-up window.
Connecting to a VPS (GNU/Linux-based operating system)
During the first installation or when reinstalling from the control panel, a user with the above permissions is automatically created. This user is named according to the operating system, for example "ubuntu" or "rocky".
You will then receive an email containing the username and password needed to connect to your VPS with SSH. SSH is a secure communication protocol used to create encrypted connections to a remote host.
Most modern desktop operating systems have an Open SSH client built in. This means that your credentials will allow you to quickly connect to your VPS in the appropriate command line application (terminal, command prompt, Powershell, etc.). Enter the following command:
ssh username@IPv4_VPS
Example:
You can also use any third-party application compatible with Open SSH.
Once connected, you can replace the predefined password for the current user with a better passphrase using this command:
passwd
In GNU/Linux distributions, the password prompt does not display your keyboard inputs.
Type your current password and press Enter. Enter a new passphrase and retype it at the next prompt to confirm it.
Changing password for ubuntu.
Current password:
New password:
Retype new password:
passwd: password updated successfully
Enable the root account
You do not need to use the “root” account to start managing your server. This account must first be enabled on the server operating system to use it. Additionally, SSH connections to the “root” user are disabled by default as a security measure.
Unless otherwise noted, all administrative actions described in our documentation can be performed with the default user account, i.e. typing sudo followed by the relevant command. Learn more about this in our guide on how to configure user accounts and root access on a server.
We recommend the following steps to continue:
- Learn more about SSH connections by reading our guide to getting started with SSH.
- Use SSH keys as an advanced and more convenient method for remote connections with the help of our guide to creating and using SSH keys.
- Use our guide to securing a VPS to harden your system against automated brute force attacks and other common threats.
Please note that if you have chosen a distribution with applications (Plesk, cPanel, Docker), general security measures may not apply to your system. We recommend that you refer to our guides on getting started with pre-installed applications and deploying cPanel on a VPS, as well as the official documentation of the respective publisher.
Connecting to Windows VPS
Step 1: Finish installing Windows
After installing the Windows operating system, you will receive an email with the default Windows user account name.
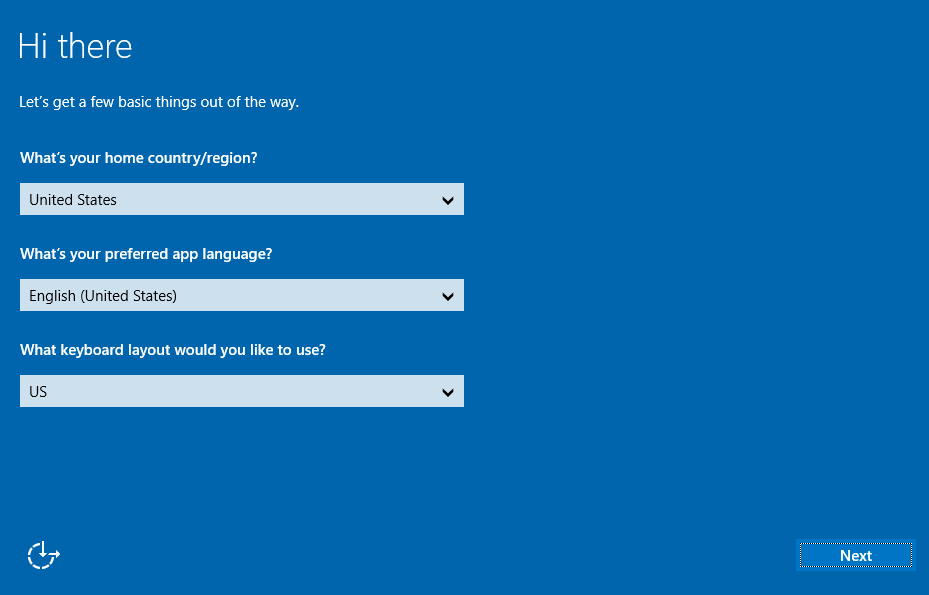
You will then need to complete the Windows installation process by defining your display language, keyboard layout, and administrator password.
This is done in the VPS KVM console: click on … next to your VPS name in the Your VPS section and select KVM. You can find more information about this tool in our KVM guide.
To complete the initial setup of your Windows VPS, follow the steps below by navigating through the tabs:
Local settings
Once the KVM session is established, you can complete the initial Windows setup by configuring your country/region, preferred Windows language, and keyboard layout. Then click the Next button at the bottom right.
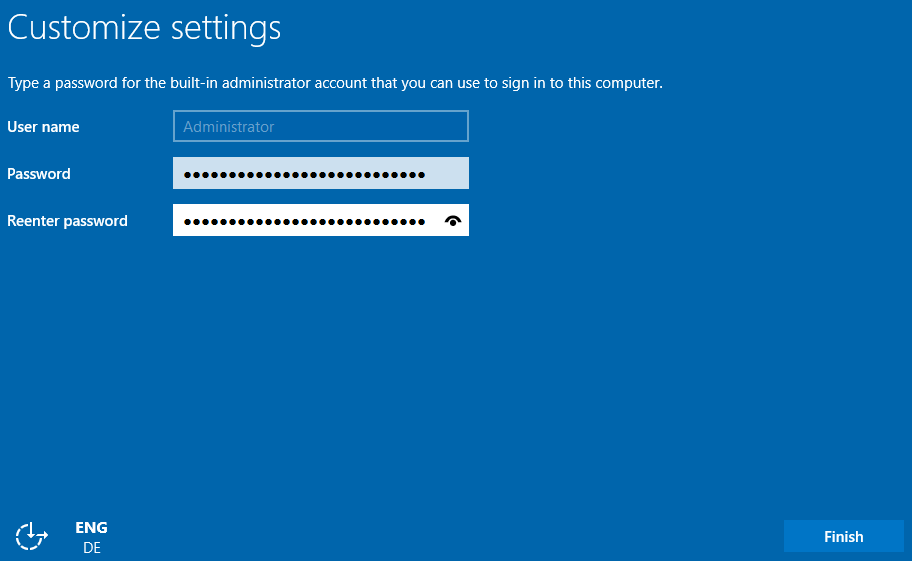
Administrator password
Set a password for your Windows Administrator/Admin account and confirm it, then click Finish.
Login page
Windows will apply your settings and then display the sign-in screen. Click the Send CtrlAltDel button in the upper-right corner to sign in.
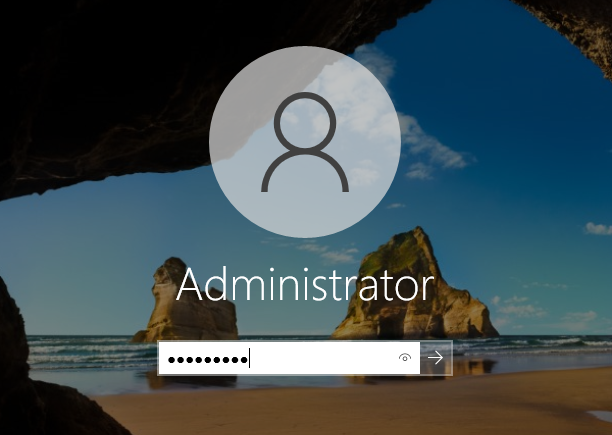
Administrator login
Enter the Administrator password you created in the previous step and click the arrow button.
Step 2: Connect to the server with RDP
On your local Windows machine, you can use the Remote Desktop Connection client program to connect to the VPS.
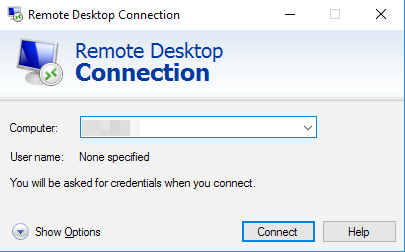
Enter your VPS IPv4 address, then your username and password. Usually, a warning message will appear asking you to confirm the connection due to an unknown certificate. Click Yes to log in.
You can also use any third-party RDP-compatible program. This is a requirement if your local machine does not have Windows installed.
If you have problems with this method, verify that remote connections (RDP) are allowed on your device by checking your system settings, firewall rules, and possible network restrictions.
Enable Windows boot logs (optional)
Windows boot logs can be useful for diagnosing server errors.
To enable them, follow the steps below by navigating through the tabs:
Connect to the server
Connect to your server via Remote Desktop or KVM Session.
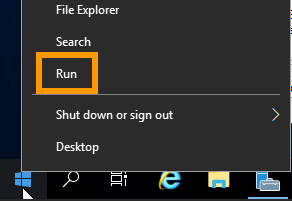
Open the “Run” tool
Open the Windows Start menu and click Run.
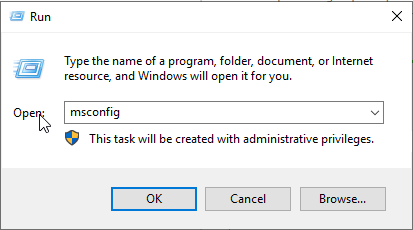
“Open ”msconfig”
“Enter ”msconfig” and click OK.
Enable logs
In the new window, enable the logs option next to Boot log. Click OK.

The next time your server boots, the logs will be saved to a .txt file. The file path is: C:\Windows\ntbtlog.txt.
To access the log file in rescue mode, please follow the instructions in the VPS Rescue Mode Guide.
VPS Security
As the administrator of your VPS, you are responsible for the security of the applications and data hosted on it.
Please refer to our guide to securing your VPS for essential advice on protecting your system.
Please note that if you have chosen a distribution with applications (Plesk, cPanel, Docker), general security measures may not apply to your system. We recommend that you refer to our guides on getting started with pre-installed applications and deploying cPanel on a VPS, as well as the official documentation of the respective publisher.
Attach a domain name
Making your VPS available on the web usually involves attaching a domain name to it via DNS. If you manage your domain name at OVHcloud, you can refer to our guide on editing an OVHcloud DNS zone for instructions.
Securing your domain name with an SSL certificate
Once you have your VPS configured, you may also want to secure your domain name and website. This requires an SSL certificate, which allows your VPS to access the internet via HTTPS instead of insecure HTTP.
You can install this SSL certificate manually and directly on your VPS. Please refer to the official documentation of your VPS distribution.
To automate this process, OVHcloud also offers an SSL Gateway solution. Please refer to our product page or documentation for more information.