Introduction
As developers, we often build projects together, whether for fun or to learn new things. These projects also serve as a showcase of our skills.
You need to have proof of work. Beyond your code, users need to be able to use your application, and for that, it shouldn't just be at localhost:3000, but accessible via a link. To achieve this, you need to deploy your application and map it to a custom domain for better readability and easy sharing.
Prerequisites
- A DigitalOcean account to access the application platform.
- A GitHub account
- Custom domain available on NameCheap or similar platform.
What is the DigitalOcean Application Platform?
The App Platform is a fully managed Platform as a Service (PaaS) that helps developers easily build, deploy, and scale applications. It eliminates much of the infrastructure management and lets you focus on code and deployment.
It can automatically parse and build code from git providers like GitHub and GitLab, and publish your applications to the cloud. It can also publish using container images you've previously uploaded to DigitalOcean Container Registry or Docker Hub.
With features like DDoS mitigation, automatic OS patching, vertical scaling, HTTP support, global CDN and domain support, the app platform simplifies publishing and managing your apps.
Step 1 – Deploy using the app platform
Once the application is ready, you can deploy it from monorepos, container images, or using GitHub Actions.
A monorepo is a version-controlled code repository that houses many projects. While these projects may be related, they are often logically independent and managed by different teams.
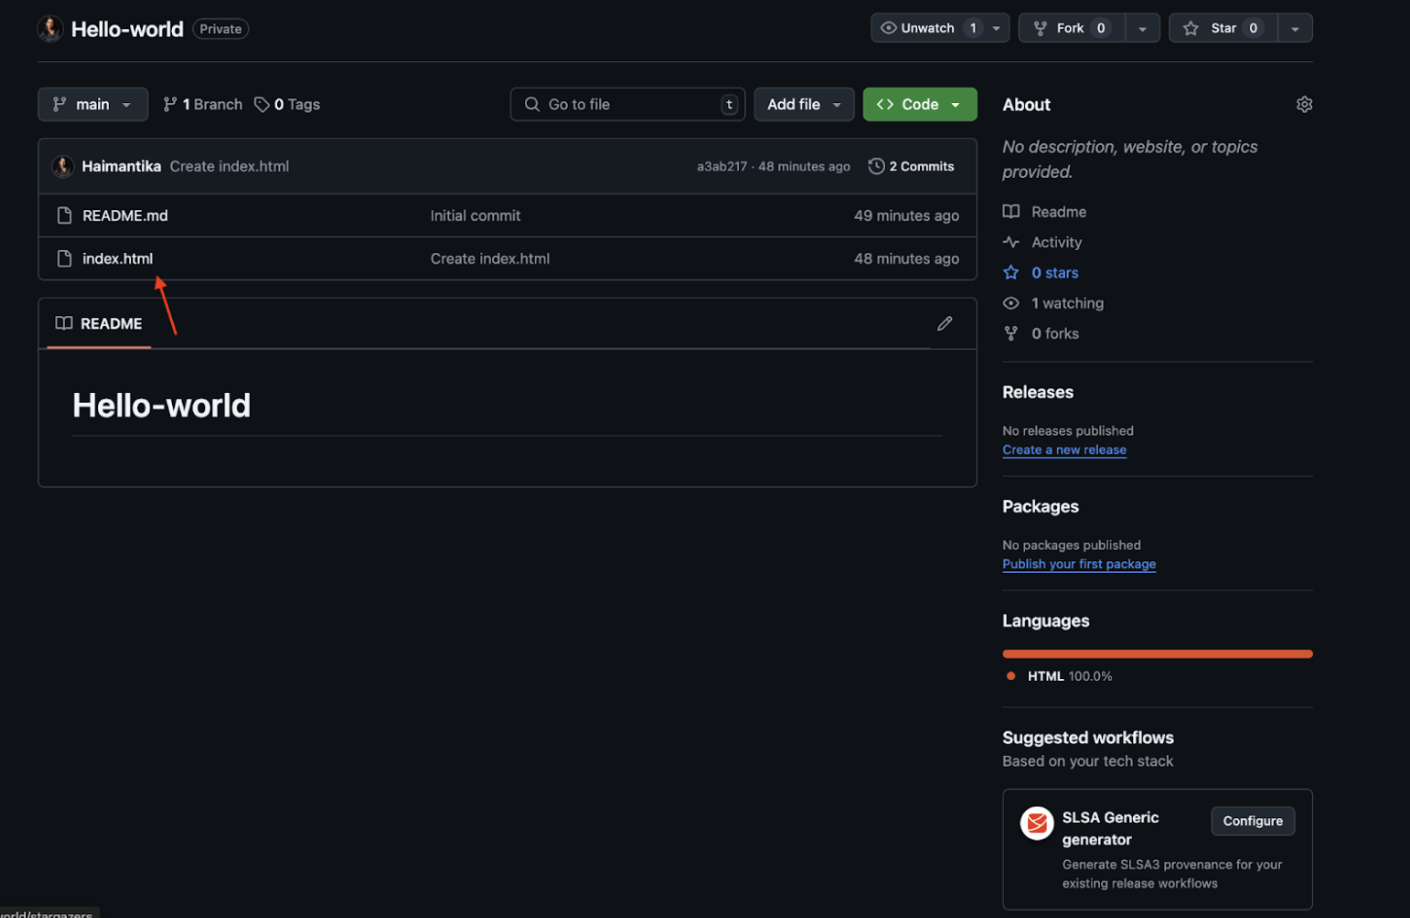
Let's see how we can deploy apps using the App Platform with GitHub. Let's say you have a private GitHub repository with an index.html file that contains this simple hello world code:
<!DOCTYPE html>
<html lang="en">
<head>
<meta charset="UTF-8">
<meta name="viewport" content="width=device-width, initial-scale=1.0">
<title>Hello World</title>
</head>
<body>
<h1>Hello, World!</h1>
<script>
console.log("Hello, World!");
</script>
</body>
</html>
Deployment using Github
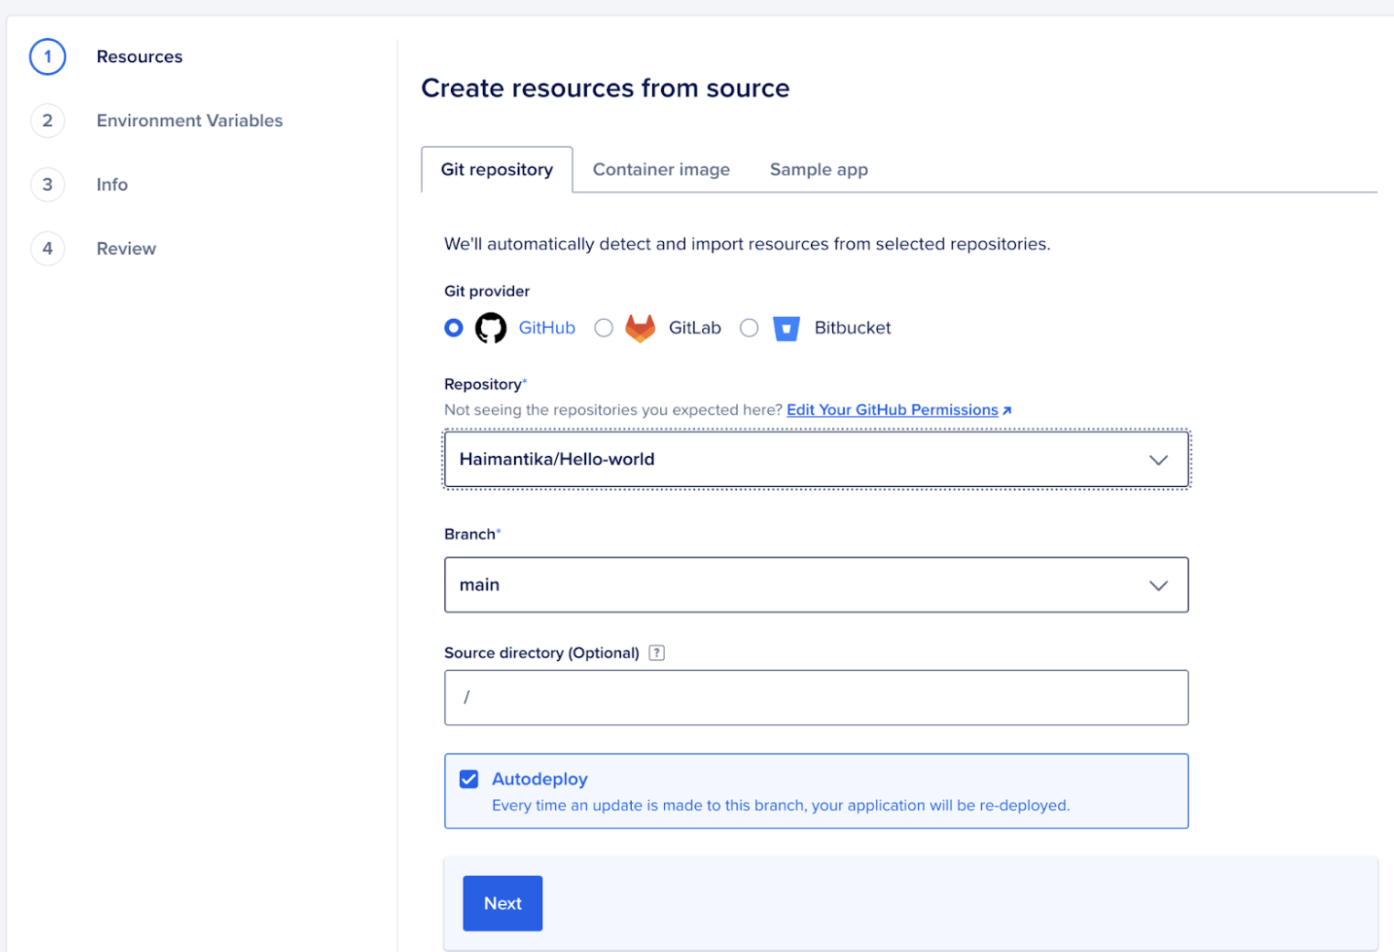
Go to the Apps page and click Create App.

Connect your GitHub account and then select the GitHub repository that contains your source code.
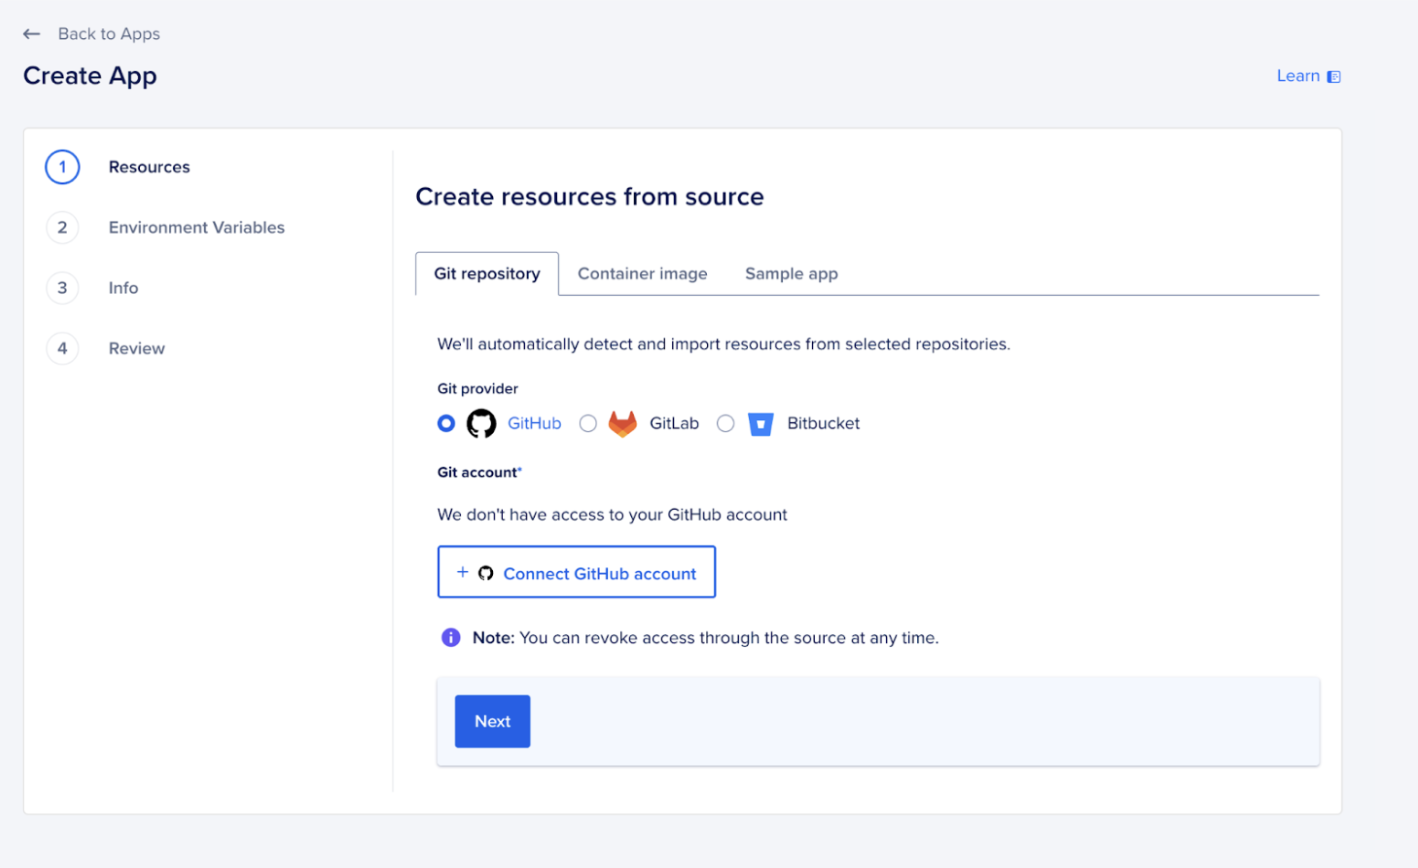
In the Source Directory section, specify the folder that contains the source, as shown in the image below. Since our demo repository consists of just an index.html file in the root directory, we will go with the default /. If your code follows the monorepo structure, make sure you select the specific directory where the code is located.
Select Auto-deploy, this will automatically redeploy whenever you apply a new change:
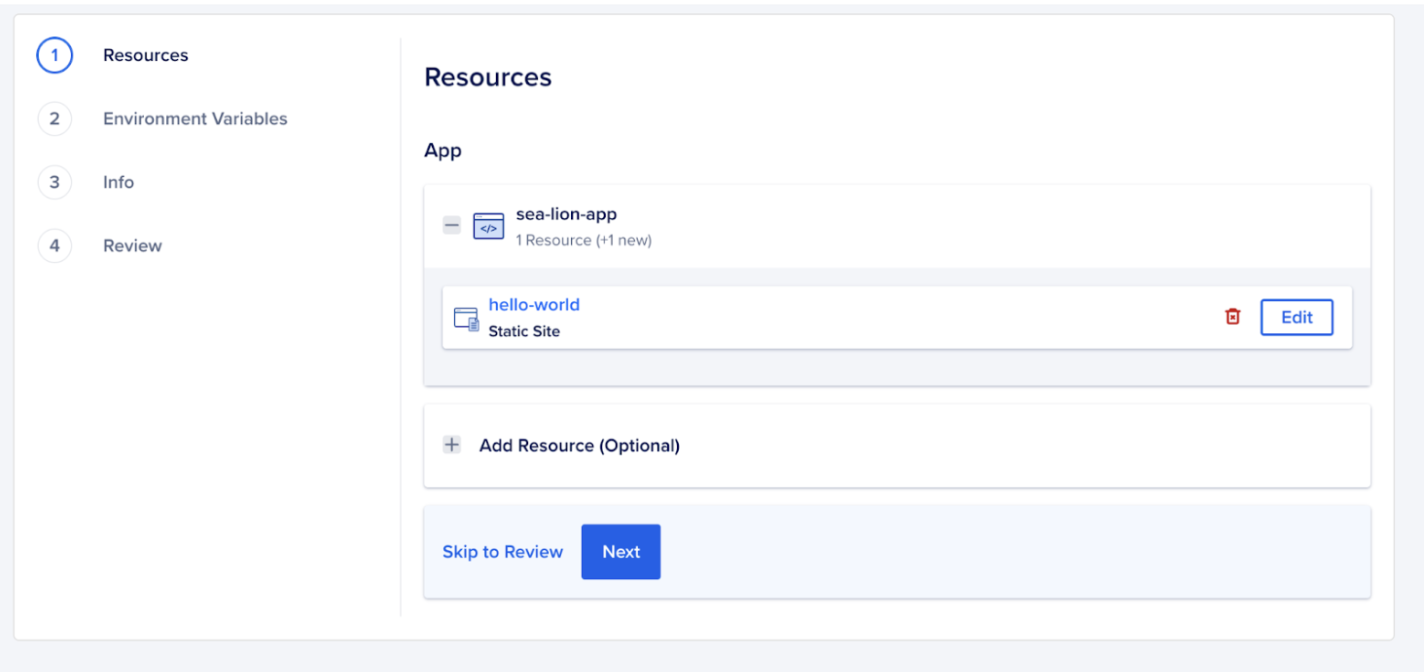
Configure the resources for your application and click Next. This is what you will see:
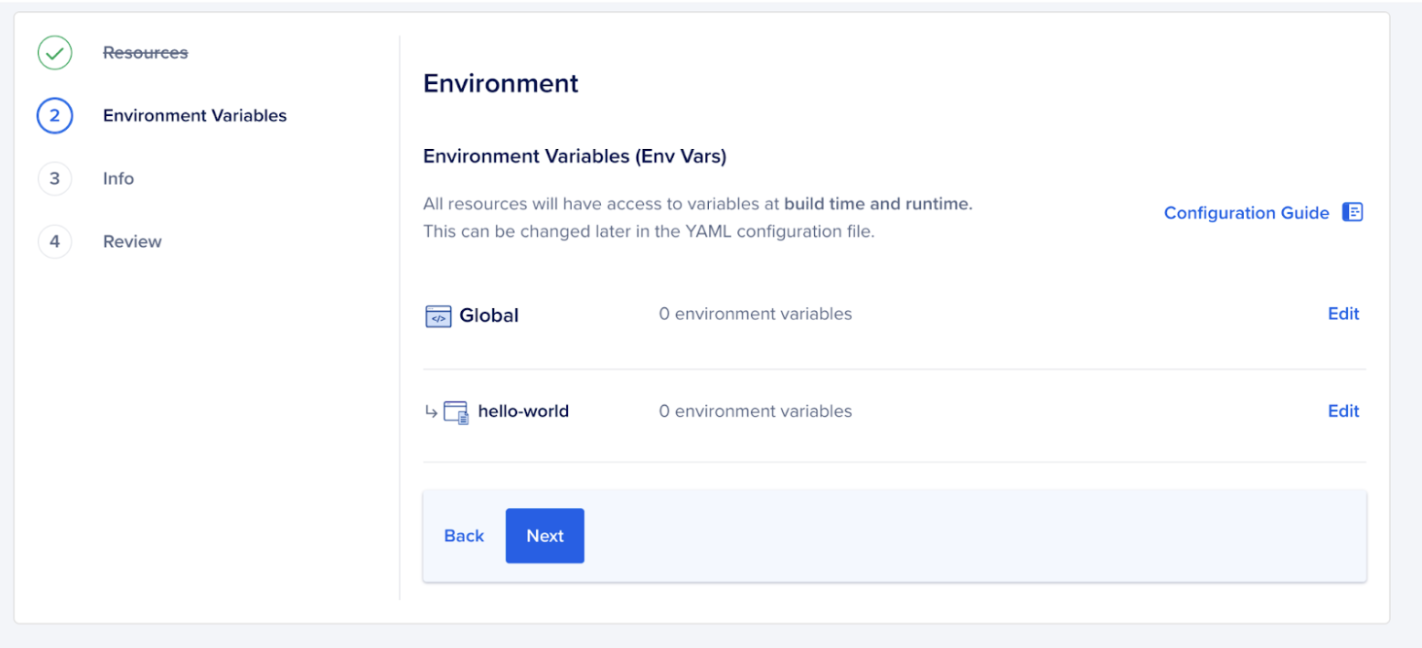
Next, it performs some checks before finally running the application. For more complex applications, such as those that use APIs, you may need to add environment variables, which you can configure on the next pages.
Next, you can edit the application name and select the repository under which your application will be deployed.
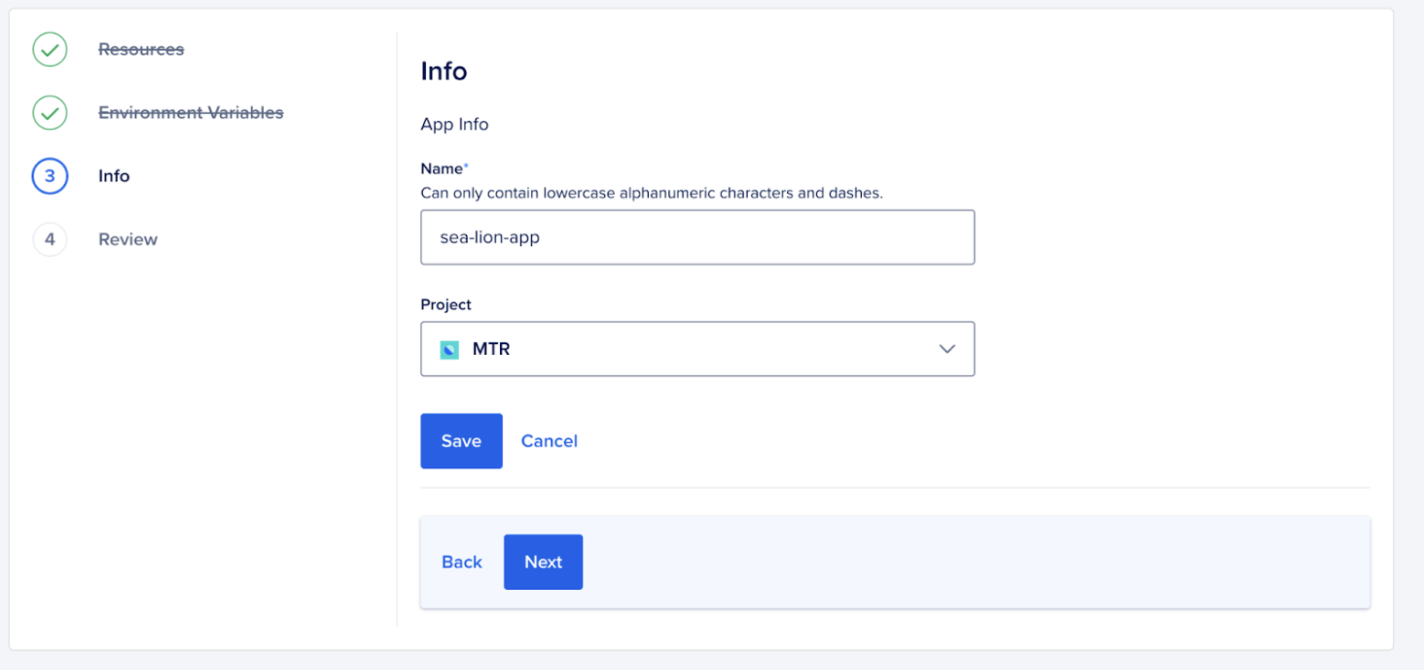
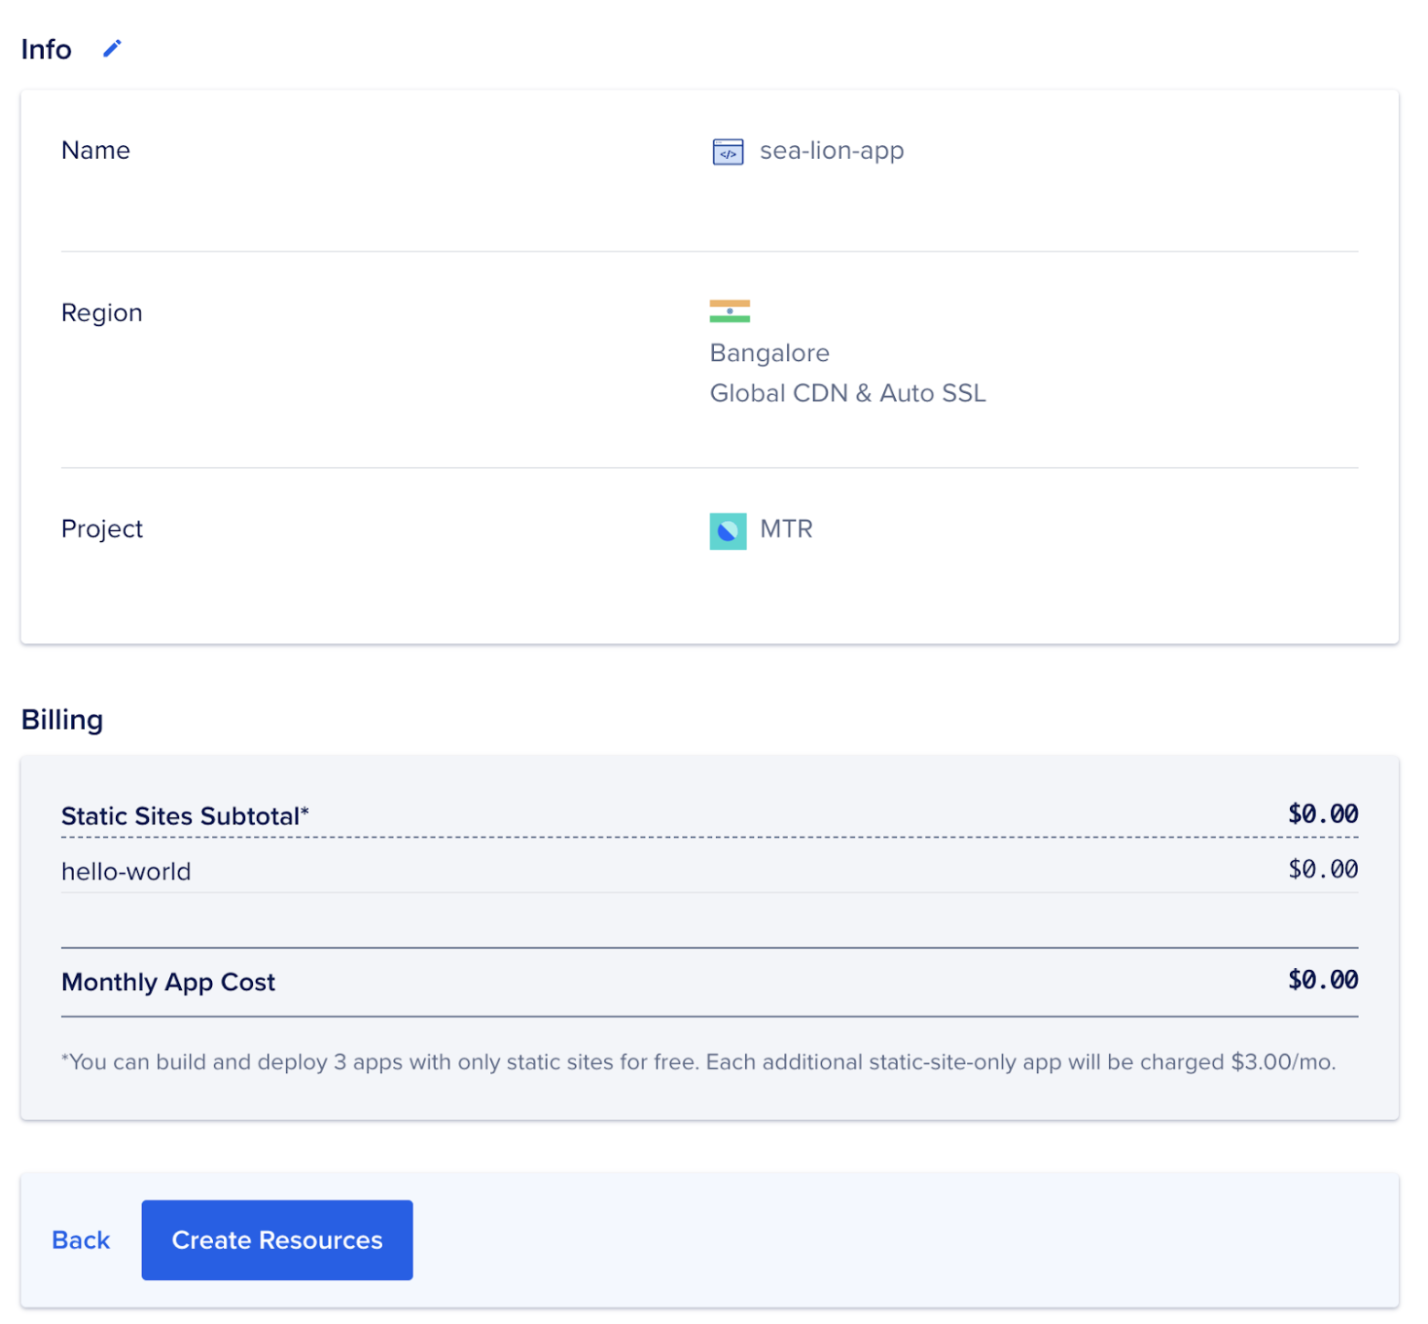
Then click Next to see the review page, where you can see other information about the app like billing, location, etc. Then finally click Create Resource to run the app.
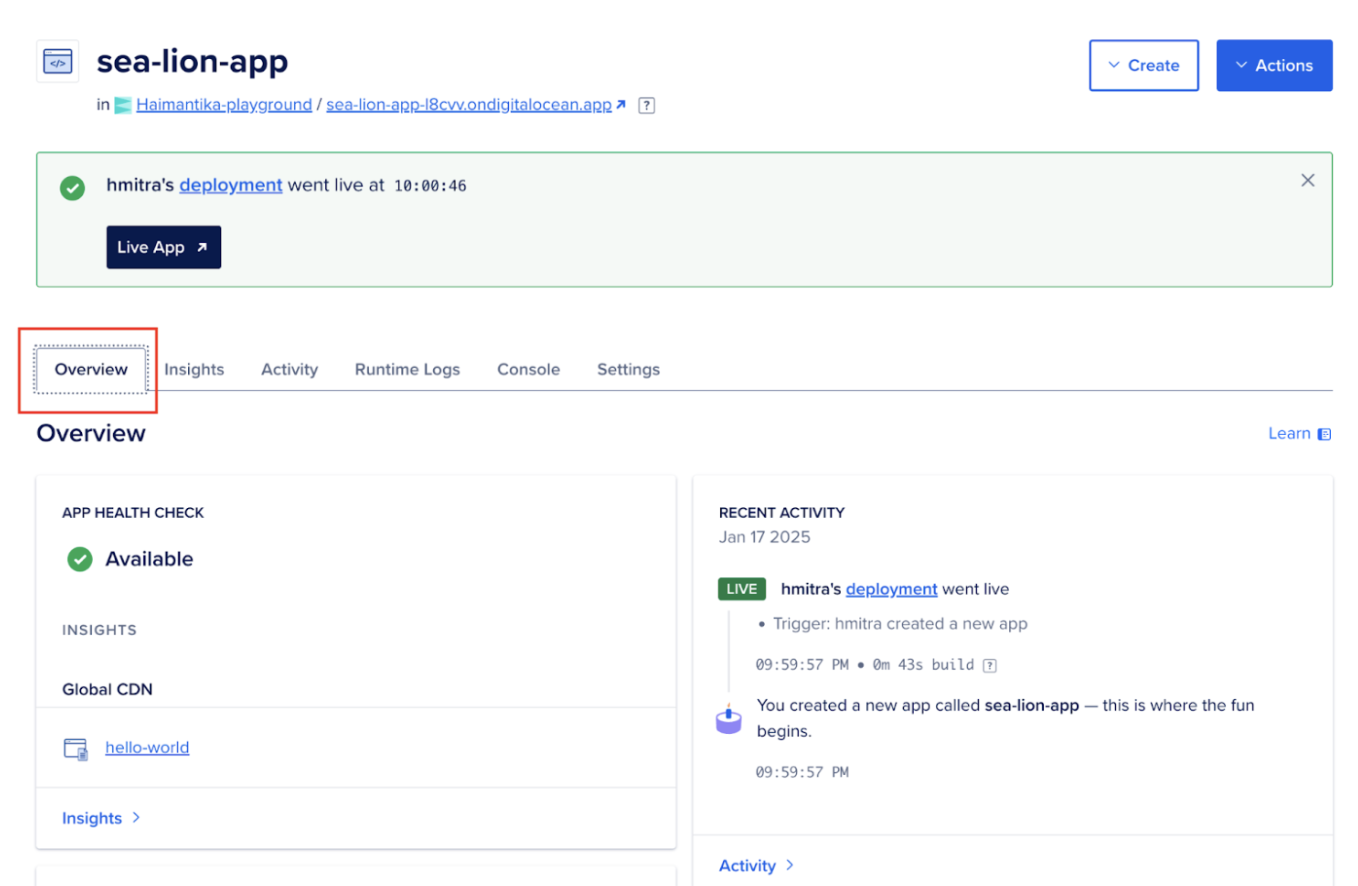
This will take a few minutes. Once the app is launched, you can see the app's URL and other details on the overview page.
Step 2: Map the app to a custom domain
Now that your app is successfully deployed and has the ondigitalocean.app domain, in this step you will see how you can map it to a custom domain.
There are two ways you can add a custom domain to your app:
- Using automation
- Using the control panel
For this article, you will see how you can configure a custom domain using the control panel.
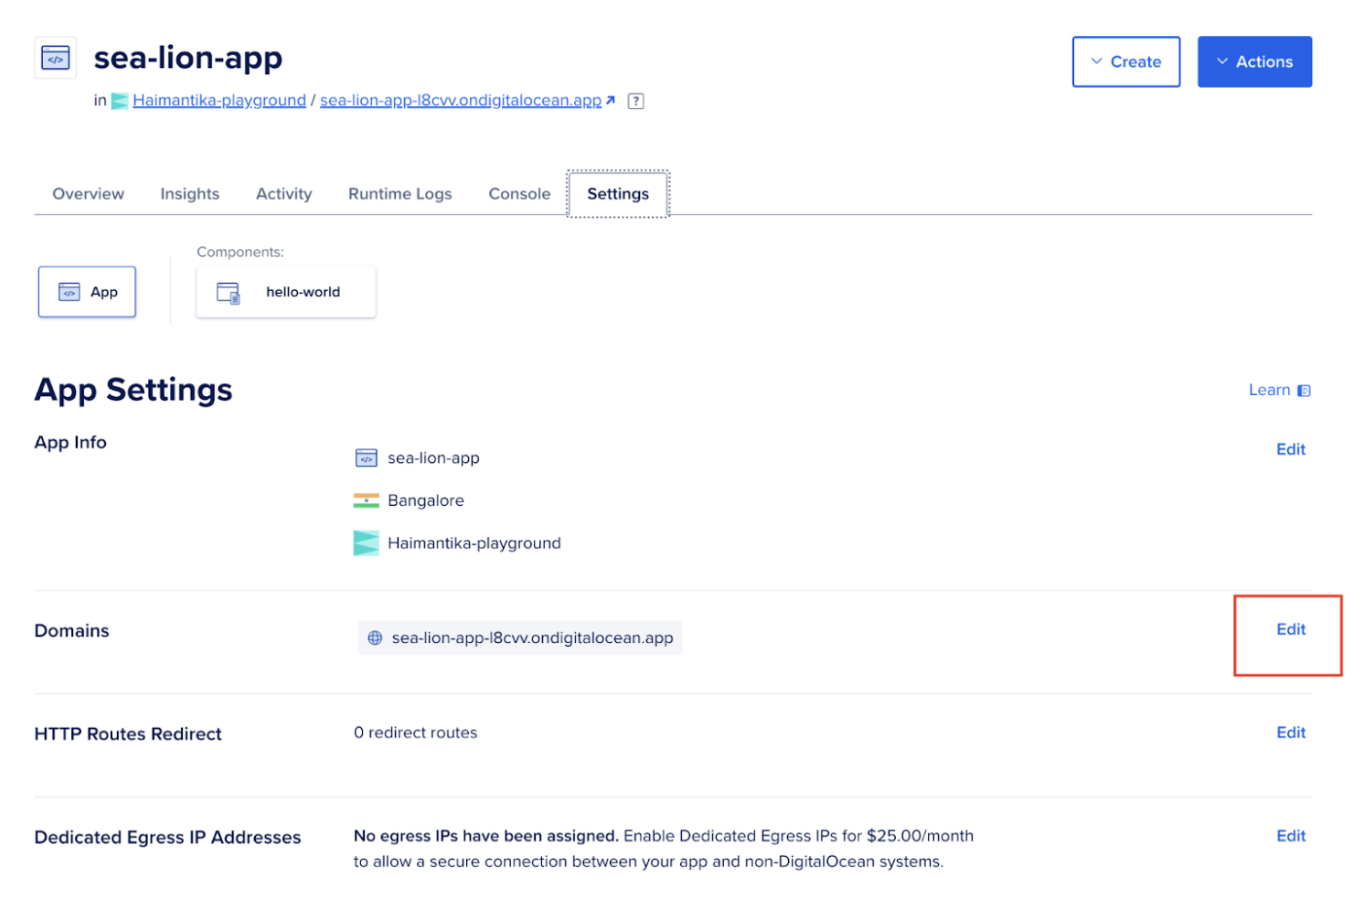
- Log in to DigitalOcean Cloud and select the application you want to add the domain to, then click the Settings tab.
- Next, click the Edit link to the right of Domains and then the Add Domain button.
Once you start typing your domain name in the text field below, you will have two options for adding your custom domain.
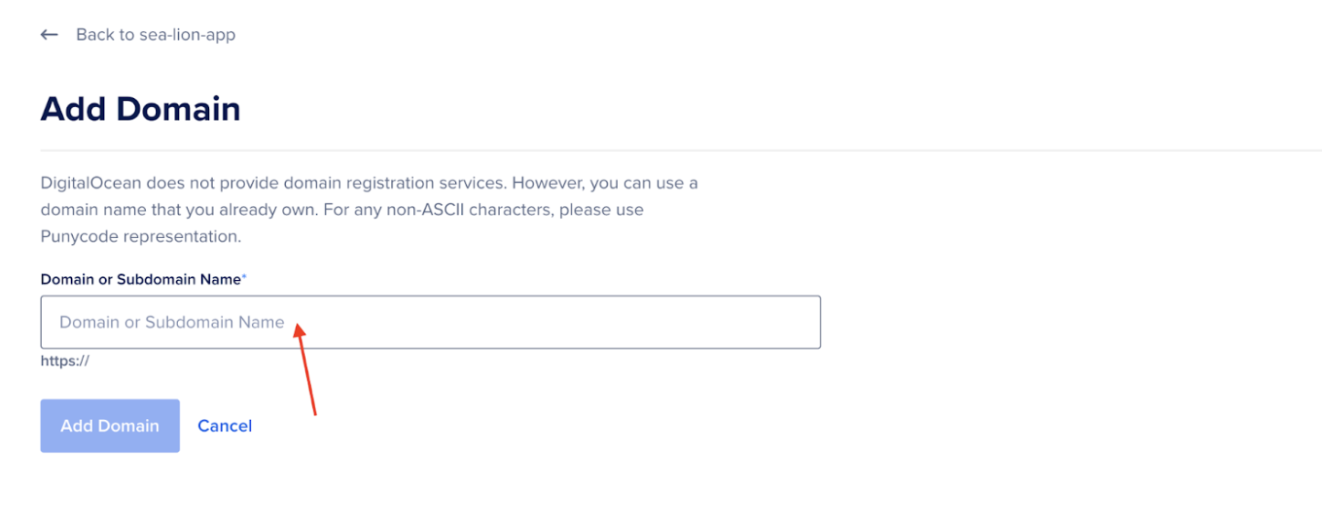
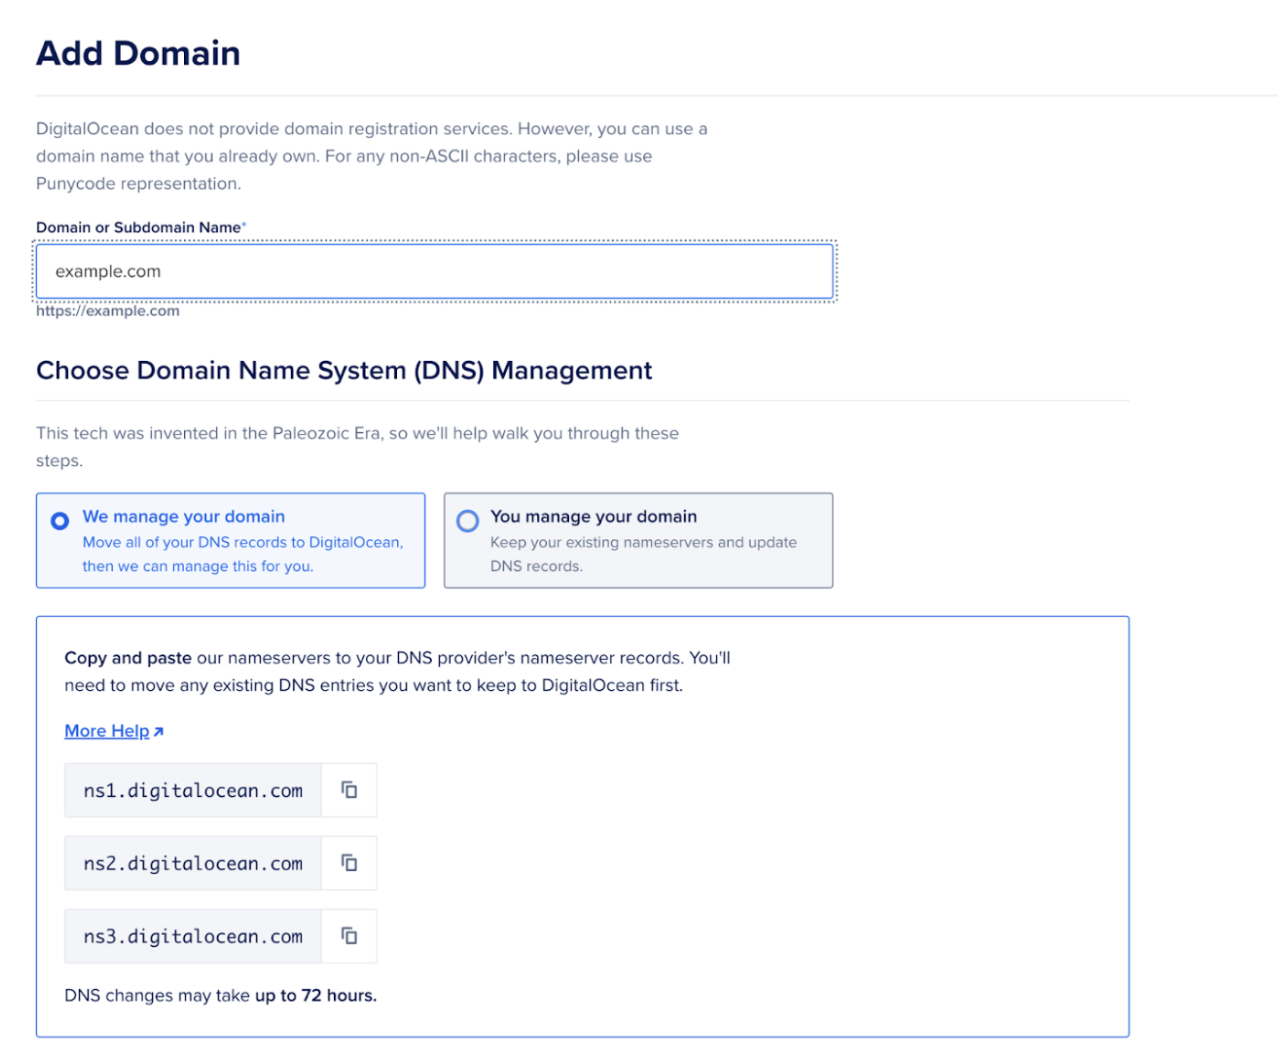
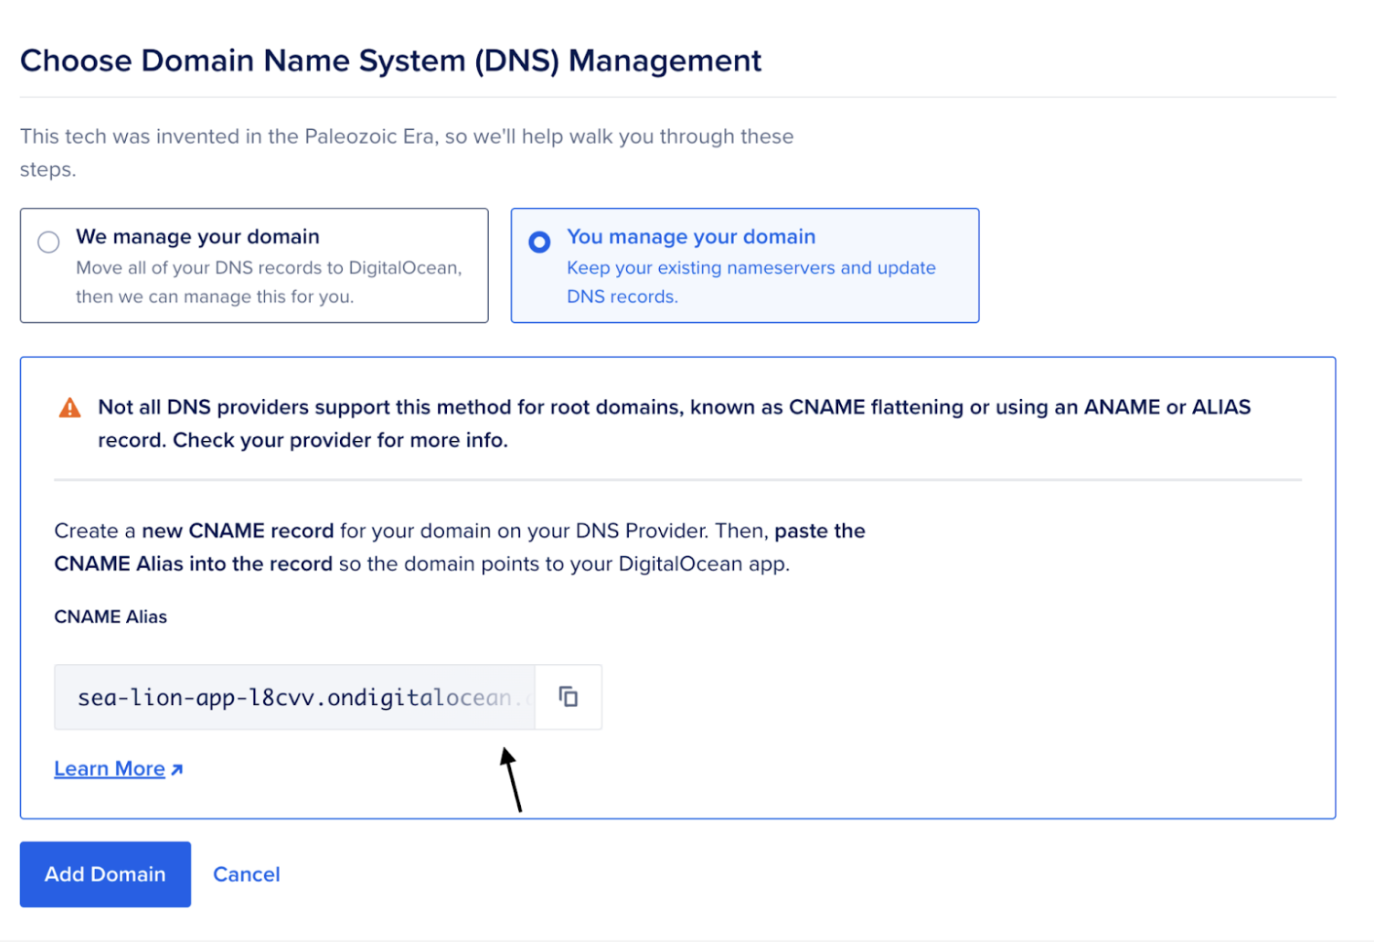
You can add a custom domain using DigitalOcean nameservers or use a CNAME provider.
To use DigitalOcean nameservers, copy and paste them (ns1.digitalocean.com, ns2.digitalocean.com, ns3.digitalocean.com) into your domain registrar's nameserver records. For instructions on assigning your domain to DigitalOcean nameservers from popular registrars, check out our tutorial on Pointing Nameservers to DigitalOcean from Popular Domain Registrars.
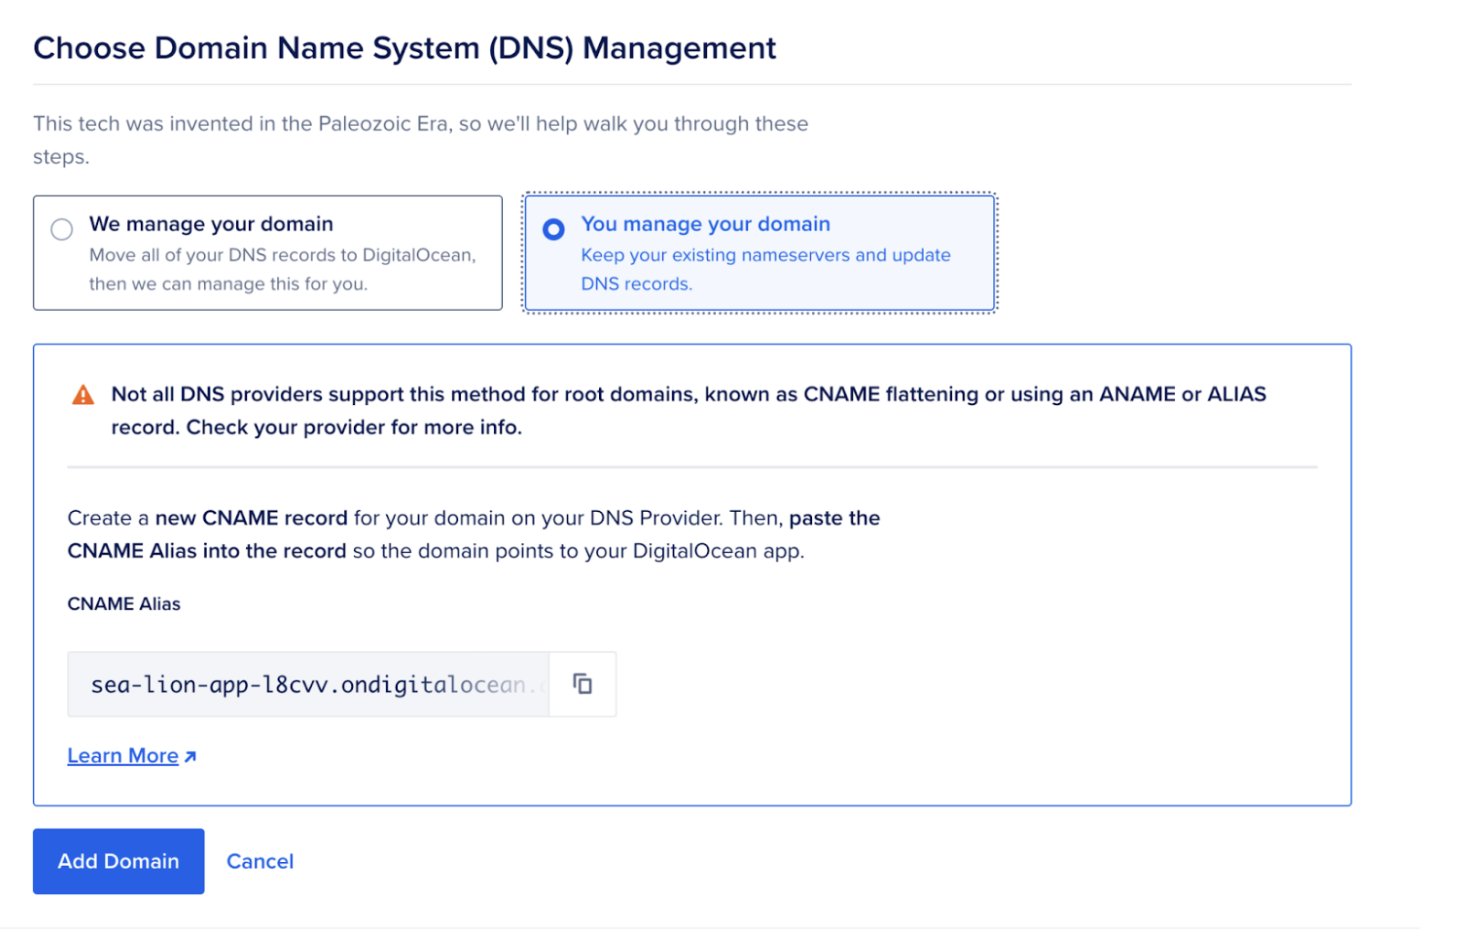
You can also add a CNAME record to your domain. If your DNS provider is not DigitalOcean, check their documentation for instructions. Use the Copy button to copy the ondigitalocean.app alias and paste it into the CNAME record in your DNS provider to point your custom domain to your App Platform app. When finished, click the Add Domain button.
Adding domains purchased on Namecheap
You can follow the steps above to add custom domains purchased on any platform. For this example, let's see how you configure the settings for a domain purchased on Namecheap.
- Log in to your Namecheap account. Click Domain List, select the domain you want to add, and then click Manage.
- Then go to the Advanced DNS tab and click Add New Record.
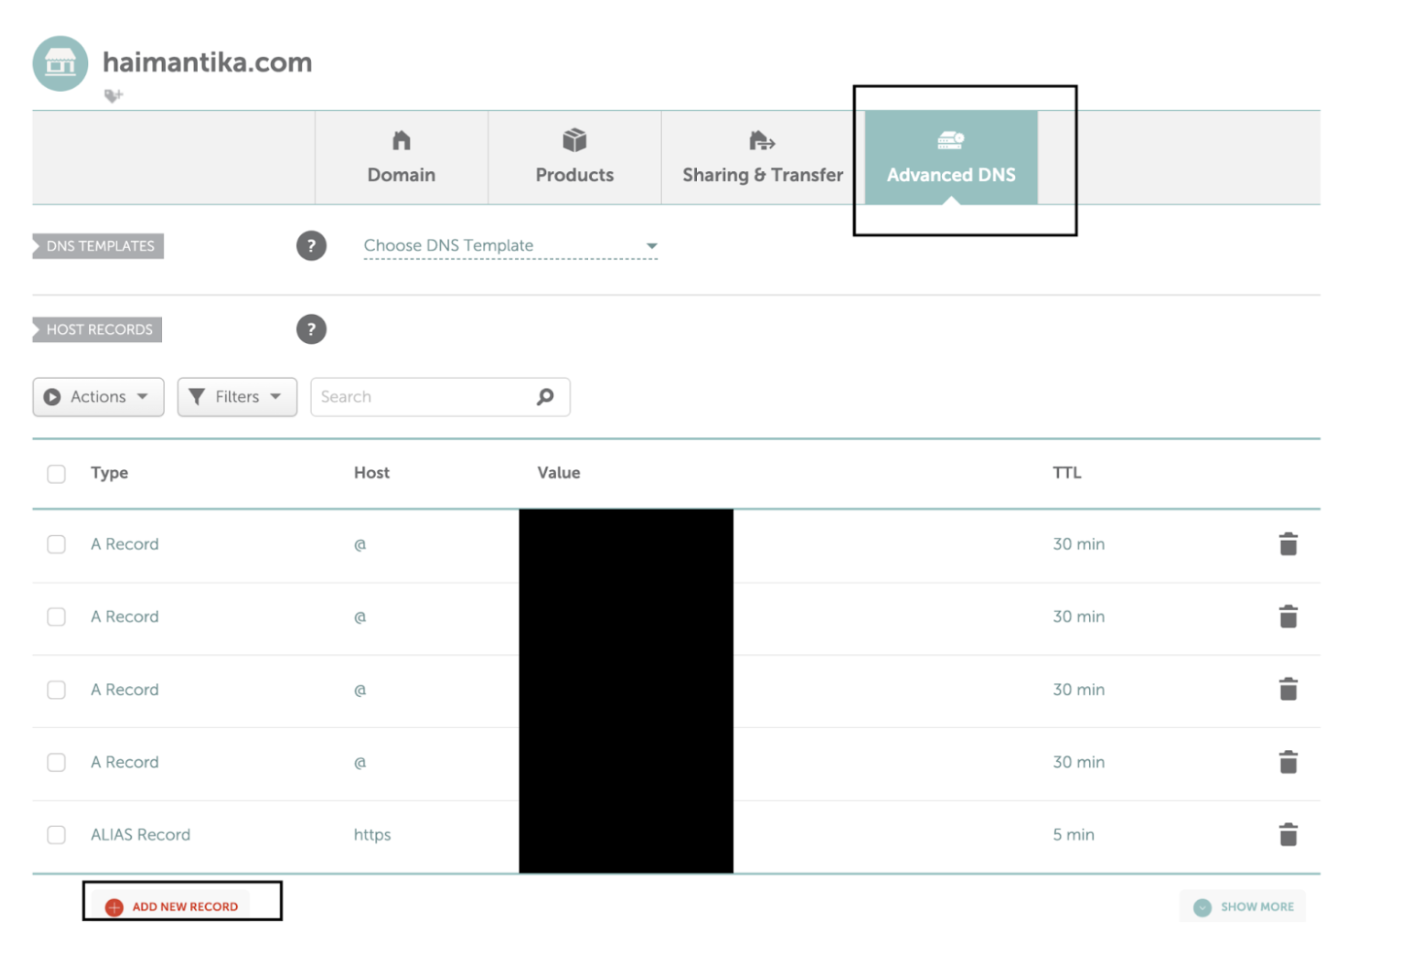 Then, go to the DigitalOcean control panel and copy the link from below.
 Paste it into Namecheap and save your changes.

Result
In this article, you learned how to deploy your applications and manage custom domains using DigitalOcean.