
Introduction
We will install Nginx Proxy Manager, which is an open source software built to make it easy to use the Nginx web server through a user interface. With Nginx Proxy Manager, you can create proxy hosts, redirect hosts, streams, and 404 hosts.
Prerequisites
- A server with a dedicated IPv4 address
- Basic knowledge of Linux and terminal
- Ports 80, 81, 443 are available.
Step 1 – Create a new server
Create a new server, for example with Hotsnr
When creating your server, make sure to choose an operating system that is supported by Docker. This tutorial will use Ubuntu 24.04. Also, a standard plan should be sufficient for a reverse proxy with not much traffic.
It is also recommended to add an SSH key.
For security reasons, using the root user is not recommended. Instead, you should create a new user and add this user to the sudo group.
Step 2 – Install Docker and Nginx Proxy Manager
- Connecting to your server
First, you can start by connecting to your new server via SSH.
ssh holu@<server_ip>
- Installing Docker
To install Docker on Ubuntu, run the following commands. If your server has a different operating system, make sure you look up the correct commands (see Installing Docker - Supported Platforms).
Add the GPG key and Docker repository:
# Uninstall old versions
sudo apt-get purge docker-ce docker-ce-cli containerd.io docker-buildx-plugin docker-compose-plugin docker-ce-rootless-extras
# Install prerequisites
sudo apt-get update
sudo apt-get install ca-certificates curl gnupg
sudo install -m 0755 -d /etc/apt/keyrings
# Add Docker’s official GPG key
sudo curl -fsSL https://download.docker.com/linux/ubuntu/gpg -o /etc/apt/keyrings/docker.asc
sudo chmod a+r /etc/apt/keyrings/docker.asc
# Set up stable repository
echo \
"deb [arch=$(dpkg --print-architecture) signed-by=/etc/apt/keyrings/docker.asc] https://download.docker.com/linux/ubuntu \
$(. /etc/os-release && echo "$VERSION_CODENAME") stable" | \
sudo tee /etc/apt/sources.list.d/docker.list > /dev/null
Install Docker Engine and Docker Compose:
sudo apt-get update
sudo apt-get install docker-ce docker-ce-cli containerd.io docker-compose-plugin
# Test the installation
docker --version
docker compose version
We have successfully installed Docker and Docker Compose.
Add your user to the Docker group:
sudo usermod -aG docker <user>
Log out and log back in to update your user groups.
Now we need to install the Nginx Proxy Manager itself.
- Install Nginx Proxy Manager
Create a new directory for the nginx proxy manager:
mkdir -p npm
cd npm
Run the following commands listed below.
# Create a docker-compose configuration file
touch docker-compose.yml
# Editing the file
nano docker-compose.yml
Place the following contents in the file mentioned below.
version: '3.8'
services:
app:
image: 'jc21/nginx-proxy-manager:latest'
restart: unless-stopped
ports:
- '80:80'
- '81:81'
- '443:443'
volumes:
- ./data:/data
- ./letsencrypt:/etc/letsencrypt
# network_mode: 'host'
Note about network_mode:
- If you plan to proxy to external servers with public IPs, you don't need network_mode.
- If you plan to proxy local Docker containers and want to point to 127.0.0.1: , you need network_mode and you need to remove the hash symbol at the beginning of the line.
Now we need to bring up the stack by running the following command.
docker compose up -d
We should now be able to access the admin interface with the following details.
Replace 203.0.113.1 with your public IPv4 address
Management UI: http://203.0.113.1:81
Default admin user:
Email: [email protected]
Password: changeme
Step 3 – Access the admin interface
Immediately after logging in with the default user, you must edit your profile and change your password.
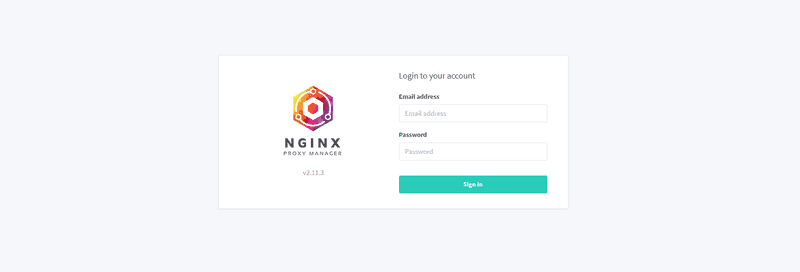
The admin login page should look like the image below.
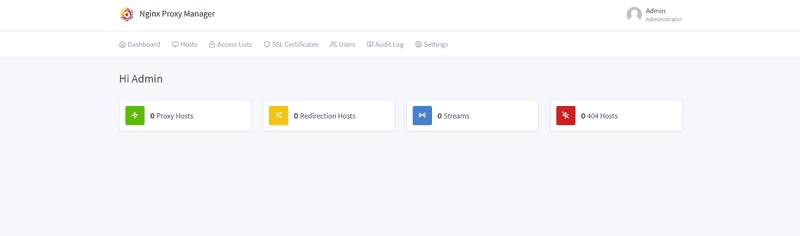
Once you have logged in and changed all the default details, you can view the “Dashboard”.
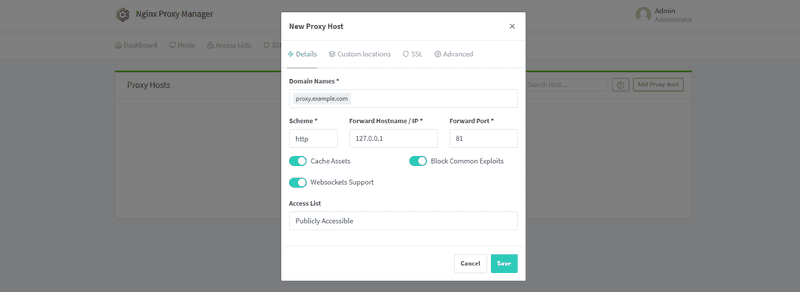
Creating your first proxy host is relatively simple. In the “Dashboard”, click “0 Proxy Host” » “Add Proxy Host”. Below is a screenshot of a basic configuration for accessing the admin interface from a domain (proxy.example.com). Make sure the domain has a DNS record that points the domain to the server’s public IPv4 address.
After that, you will most likely need an SSL certificate to keep everything secure. Below is a screenshot of the initial configuration of how the SSL options could look.
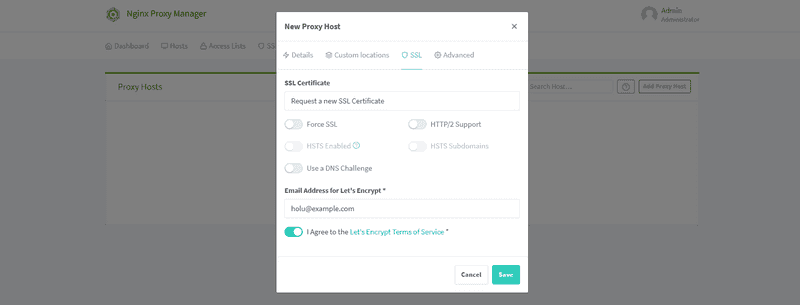
You can check other options like “Force SSL” etc. as you wish. They are not checked in the image just so that readers reading this tutorial don’t get confused and think they need to check them.
After saving the new entry, you can access the admin interface from the domain you set up (in this example, proxy.example.com).
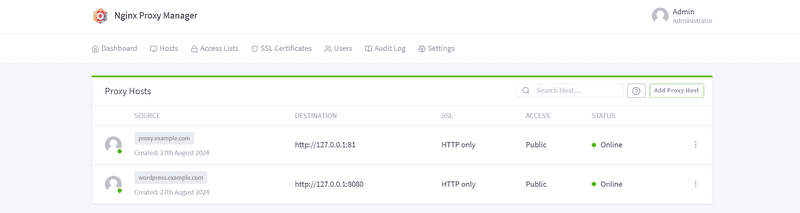
The Nginx proxy manager is now ready and you can add your proxy hosts.
If you added network_mode in the Docker Compose file above, you should be able to set the “Forward Hostname/IP” for all local containers to 127.0.0.1. For example, a local WordPress Docker container:
holu@tutorial:~/npm$ docker run -p 8080:80 -d wordpress
holu@tutorial:~/npm$ docker ps
CONTAINER ID IMAGE COMMAND CREATED STATUS PORTS NAMES
23bcbfe55c53 jc21/nginx-proxy-manager "/init" 31 minutes ago Up 31 minutes npm-app-1
e9853acea394 wordpress "docker-entrypoint.s…" 22 minutes ago Up 22 minutes 0.0.0.0:8080->80/tcp, :::8080->80/tcp thirsty_greider
You can set the destination to http://127.0.0.1:8080:
If you don't have network_mode: 'host' in your Docker Compose file, you need to set the destination to a public IP address, in this example 203.0.113.1:8080.
Result
Now you need to install an Nginx Proxy Manager.