Introduction
TinyCP is a project that manages your Linux system through a web-based control panel. It is a very lightweight and functional project. It allows you to monitor your server and create web pages, virtualization, databases and email, in addition to the facility to create user access to FTP (File Transfer Protocol).
Prerequisites
- A server with Ubuntu Server installed and root access.
- To buy an Ubuntu server Click Do it.
Step 1 – Preparing the Server and Installing TinyCP
First, access the Ubuntu server with a user with root permissions.
Before installing TinyCP, it is recommended to update Ubuntu packages.
sudo apt update && sudo apt upgrade -y
Next, install the stable version of the TinyCP project.
1. First you need to install a few packages, so run the command:
sudo apt install gnupg ca-certificates
2. Add the TinyCP package to your repository, run the commands:
sudo apt-key adv --fetch-keys http://repos.tinycp.com/ubuntu/conf/gpg.key
echo "deb http://repos.tinycp.com/ubuntu all main" | sudo tee /etc/apt/sources.list.d/tinycp.list
3. After completing the previous steps, update your packages, run the command:
sudo apt update
4. With the TinyCP project installed, run the following command:
sudo apt install tinycp
5. During installation, it will ask if you want to continue with the installation.
Do you want to continue? [Y/n] Y
6. After this, the text TinyCP successfully installed will be displayed. Then you can create a password to log in to the panel:
Type TinyCP admin password:
The expected result is:
______________________________________________
| |
| TinyCP successfully installed |
|______________________________________________|
Type TinyCP admin password:
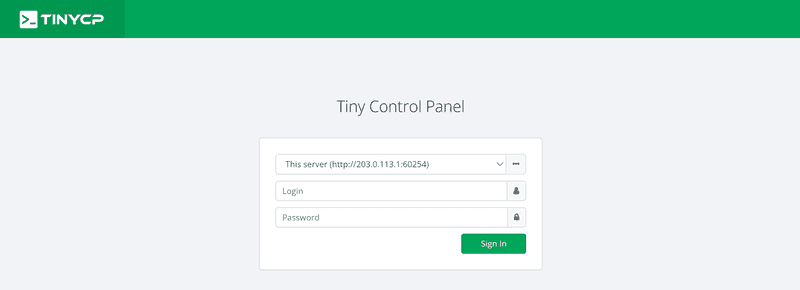
Please save following information!
URL: http://203.0.113.1:60254
LOGIN: admin
PASSWORD: klaie
[...]
holu@tutorial:~$Step 2 – Access the panel
In the last step, the access address to the panel with access details was shown. Access the URL through your browser and enter the login and password and press the “Login” button.
The expected result is:
Result
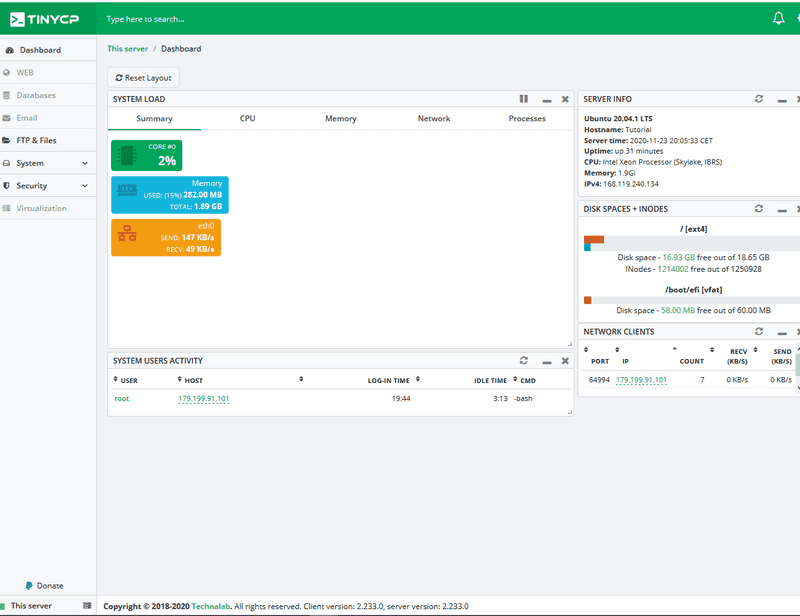
By following steps 1 to 2, TinyCP installation has been successfully completed. Now you can use the simple TinyCP control panel.