Introduction
As your application or website grows, it may reach a point where you outgrow your current server setup. If you host your web server and database on the same machine, it may be a good idea to separate the two functions so that each can run on its own hardware and share the load of responding to your visitors' requests.
In this guide, we'll look at how to configure a remote MySQL database server that your web application can connect to. We'll use WordPress as an example so we can work with it, but the technique is broadly applicable to any application that is supported by MySQL.
Prerequisites
- Two Ubuntu 18.04 servers. As explained in the Initial Server Setup with Ubuntu 18.04 tutorial, each should have a non-root user with sudo privileges and the UFW firewall enabled. One of these servers will host your MySQL backend and we will refer to it as the database server throughout this guide. The other will connect remotely to your database server and act as your web server. Similarly, we will refer to it as the web server throughout this guide.
- Nginx and PHP are installed on your web server. Our tutorial on how to install Linux, Nginx, MySQL, PHP (LEMP stack) on Ubuntu 18.04 will guide you through the process, but note that you should skip Step 2 of this tutorial, which focuses on installing MySQL, as you will be installing MySQL on your database server.
- MySQL is installed on your database server. Follow our guide on how to install MySQL on Ubuntu 18.04 to set it up.
- Optionally (but highly recommended), TLS/SSL certificates from Let's Encrypt are installed on your web server. You'll need to purchase a domain name and set up DNS records for your server, but the certificates themselves are free. Our guide How to Secure Nginx with Let's Encrypt on Ubuntu 18.04 shows you how to get these certificates.
Step 1 – Configure MySQL to listen for remote connections
Once you reach the performance ceiling of a single-machine configuration, storing your data on a separate server is a good way to scale gracefully. It also provides the basic structure needed to load balance and scale your infrastructure later. After installing MySQL by following the prerequisite tutorial, you will need to change some configuration values to allow connections from other computers.
Most MySQL server configuration changes can be made in the mysqld.cnf file, which is stored in the /etc/mysql/mysql.conf.d/ directory by default. Open this file on your database server with root privileges in your favorite editor. We will use nano here:
sudo nano /etc/mysql/mysql.conf.d/mysqld.cnfThis file is divided into sections, which are marked with labels in square brackets ([ and ]). Find the section titled mysqld:
. . .
[mysqld]
. . .
In this section, look for a parameter called bind-address. This tells the database software which network address to listen on for connections.
By default, this is set to 127.0.0.1, which means MySQL is configured to only look for local connections. You will need to change this to point to an external IP address where your server can be accessed.
If both of your servers are in a data center with private network capabilities, use the private network IP of your database server. Otherwise, you can use its public IP address:
[mysqld]
. . .
bind-address = db_server_ip
Since you will be connecting to your database over the internet, it is recommended that you use encrypted connections to keep your data secure. If you do not encrypt your MySQL connection, anyone on the network can intercept sensitive information between your web and database servers. To encrypt MySQL connections, add the following line after the bind-address line you updated:
[mysqld]
. . .
require_secure_transport = on
. . .
When you're done, save and close the file. If you're using nano, do this by pressing CTRL+X, Y, then ENTER.
For SSL connections to work, you need to create some keys and certificates. MySQL comes with a command that automatically sets these up. Run the following command, which creates the necessary files. It also makes them readable by the MySQL server by specifying the mysql user UID:
sudo mysql_ssl_rsa_setup --uid=mysqlTo force MySQL to update the configuration and read the new SSL information, restart the database:
sudo systemctl restart mysqlTo verify that the server is now listening on the external interface, run the following netstat command:
sudo netstat -plunt | grep mysqldOutput
tcp 0 0 db_server_ip:3306 0.0.0.0:* LISTEN 27328/mysqldnetstat prints statistics about your server's network system. This output shows us that a process called mysqld is connected to db_server_ip on port 3306, the standard MySQL port, and confirms that the server is listening on the appropriate interface.
Next, open that port on the firewall to allow traffic through:
sudo ufw allow mysqlThese are all the configuration changes you need to make in MySQL. Next, we'll look at how to set up the database and some user profiles, one of which you'll use to access the server remotely.
Step 2 – Setting up a WordPress database and remote credentials
Even though MySQL is currently listening on an external IP address, there are currently no remotely enabled users or databases configured. Let's create a database for WordPress, and a couple of users that can access it.
Start by connecting to MySQL as the MySQL root user:
sudo mysqlFrom the MySQL prompt, create a database that WordPress will use. It may be helpful to give this database a recognizable name so you can easily identify it later. Here we'll name it WordPress:
Now that you have created your database, the next step is to create a pair of users. We will create a local-only user as well as a remote user associated with the web server's IP address.
First, create your local user, wpuser, and match this account to local connection attempts only, using localhost in the declaration:
CREATE USER 'wpuser'@'localhost' IDENTIFIED BY 'password';Then give this account full access to the WordPress database:
GRANT ALL PRIVILEGES ON wordpress.* TO 'wpuser'@'localhost';This user can now perform any operation on the database for WordPress, but this account cannot be used remotely, as it only matches connections from the local machine. With this in mind, create a companion account that matches connections exclusively from your web server. You will need the IP address of your web server for this.
Please note that you must use an IP address that uses the same network as you configured in the mysqld.cnf file. This means that if you specified a private network IP in the mysqld.cnf file, you must enter the private IP of your web server in the two commands below. If you configured MySQL to use the public internet, you must match it with the public IP address of the web server.
CREATE USER 'remotewpuser'@'web_server_ip' IDENTIFIED BY 'password';After creating your remote account, give it the same privileges as your local user:
GRANT ALL PRIVILEGES ON wordpress.* TO 'remotewpuser'@'web_server_ip';Finally, clear the privileges so that MySQL knows to start using them:
FLUSH PRIVILEGES;Then exit the MySQL command by typing:
exitNow that you have a new database and an active remote user set up, you can test whether you can connect to the database from your web server.
Step 3 – Test remote and local connections
Before proceeding, it's a good idea to check that you can connect to your database from both your local machine – your database server – and your web server.
First, test the local connection from your database server by trying to log in to your new account:
mysql -u wpuser -pWhen prompted, enter the password you set for this account.
If you are prompted for MySQL, the local connection was successful. You can exit again by typing:
exitThen log in to your web server to test remote connections:
ssh sammy@web_server_ipTo access the remote database, you need to install some MySQL client tools on your web server. First, update your local package cache if you haven't done so recently:
sudo apt updateThen install the MySQL client tools:
sudo apt install mysql-clientAfter this, connect to your database server using the following command:
mysql -u remotewpuser -h db_server_ip -pAgain, you need to make sure you are using the correct IP address for your database server. If you have configured MySQL to listen on a private network, enter the private network IP of your database. Otherwise, enter the public IP address of your database server.
You will be asked for the password for the remotewpuser account. After entering it, and if everything works as expected, you will see the MySQL prompt. Verify that the connection is using SSL with the following command:
statusIf the connection is actually using SSL, the SSL: line will indicate this, as shown here:
Output
--------------
mysql Ver 14.14 Distrib 5.7.18, for Linux (x86_64) using EditLine wrapper
Connection id: 52
Current database:
Current user: [email protected]
SSL: Cipher in use is DHE-RSA-AES256-SHA
Current pager: stdout
Using outfile: ''
Using delimiter: ;
Server version: 5.7.18-0ubuntu0.16.04.1 (Ubuntu)
Protocol version: 10
Connection: 203.0.113.111 via TCP/IP
Server characterset: latin1
Db characterset: latin1
Client characterset: utf8
Conn. characterset: utf8
TCP port: 3306
Uptime: 3 hours 43 min 40 sec
Threads: 1 Questions: 1858 Slow queries: 0 Opens: 276 Flush tables: 1 Open tables: 184 Queries per second avg: 0.138
--------------
After confirming that you can connect remotely, go ahead and exit the command:
exitWith that, you have verified local access and access from the web server, but you have not verified that other connections are being denied. To further verify, do the same from a third server that you have not configured a specific user account for to make sure that the other server is not being granted access.
Note that you may have to install the MySQL client applications as you did above before running the following command to attempt to connect:
mysql -u wordpressuser -h db_server_ip -pThis should not complete successfully, and should return an error similar to this:
Output
ERROR 1130 (HY000): Host '203.0.113.12' is not allowed to connect to this MySQL server
This is expected, because you have not created a MySQL user that is allowed to connect from this server, and it is also desired, because you want to be sure that your database server prevents unauthorized users from accessing your MySQL server.
After successfully testing your remote connection, you can proceed to install WordPress on your web server.
Step 4 – Install WordPress
To demonstrate the capabilities of your new MySQL server with remote control, we'll walk you through the steps of installing and configuring WordPress—the popular content management system—on your web server. To do this, you'll need to download and extract the software, configure your connection information, and then run it via the WordPress web-based installer.
On your web server, download the latest version of WordPress to your root directory:
cd ~
curl -O https://wordpress.org/latest.tar.gz
Extract the files, which will create a directory called wordpress in your root directory:
tar xzvf latest.tar.gz
WordPress includes a sample configuration file that we will use as a starting point. Make a copy of this file, removing the sample - from the file name so that it will be loaded by WordPress:
cp ~/wordpress/wp-config-sample.php ~/wordpress/wp-config.phpOnce you open the file, the first thing you will need to do is set up some secret keys to make your installation more secure. WordPress provides a secure generator for these values so you don’t have to come up with good values yourself. These are only used internally, so having complex and secure values here doesn’t hurt usability.
To get secure values from the WordPress secret key generator, type:
curl -s https://api.wordpress.org/secret-key/1.1/salt/This will print a number of keys in your output. You will add these to your wp-config.php file instantly:
Output
define('AUTH_KEY', 'L4|2Yh(giOtMLHg3#] DO NOT COPY THESE VALUES %G00o|te^5YG@)');
define('SECURE_AUTH_KEY', 'DCs-k+MwB90/-E(=!/ DO NOT COPY THESE VALUES +WBzDq:7U[#Wn9');
define('LOGGED_IN_KEY', '*0kP!|VS.K=;#fPMlO DO NOT COPY THESE VALUES +&[%8xF*,18c @');
define('NONCE_KEY', 'fmFPF?UJi&(j-{8=$- DO NOT COPY THESE VALUES CCZ?Q+_~1ZU~;G');
define('AUTH_SALT', '@qA7f}2utTEFNdnbEa DO NOT COPY THESE VALUES t}Vw+8=K%20s=a');
define('SECURE_AUTH_SALT', '%BW6s+d:7K?-`C%zw4 DO NOT COPY THESE VALUES 70U}PO1ejW+7|8');
define('LOGGED_IN_SALT', '-l>F:-dbcWof%4kKmj DO NOT COPY THESE VALUES 8Ypslin3~d|wLD');
define('NONCE_SALT', '4J(<`4&&F (WiK9K#] DO NOT COPY THESE VALUES ^ZikS`es#Fo:V6');
Copy the received output to your clipboard, then open the configuration file in your text editor:
nano ~/wordpress/wp-config.phpFind the section that contains the dummy values for those settings. It will look something like this:
. . .
define('AUTH_KEY', 'put your unique phrase here');
define('SECURE_AUTH_KEY', 'put your unique phrase here');
define('LOGGED_IN_KEY', 'put your unique phrase here');
define('NONCE_KEY', 'put your unique phrase here');
define('AUTH_SALT', 'put your unique phrase here');
define('SECURE_AUTH_SALT', 'put your unique phrase here');
define('LOGGED_IN_SALT', 'put your unique phrase here');
define('NONCE_SALT', 'put your unique phrase here');
. . .
Delete those lines and paste the values you copied from the command line.
Next, enter the connection information for your remote database. These configuration lines are at the top of the file, just above where you pasted your keys. Remember to use the same IP address that you used earlier in your remote database test:
. . .
/** The name of the database for WordPress */
define('DB_NAME', 'wordpress');
/** MySQL database username */
define('DB_USER', 'remotewpuser');
/** MySQL database password */
define('DB_PASSWORD', 'password');
/** MySQL hostname */
define('DB_HOST', 'db_server_ip');
. . .
And finally, anywhere in the file, add the following line that tells WordPress to use an SSL connection to our MySQL database:
define('MYSQL_CLIENT_FLAGS', MYSQLI_CLIENT_SSL);
Save and close the file.
Next, copy the files and directories in your ~/wordpress directory to the Nginx document root. Note that this command includes the -a flag to ensure that all existing permissions are transferred:
sudo cp -a ~/wordpress/* /var/www/html
After this, all you need to do is change the file ownership. Change the ownership of all files in the document root to www-data, the default Ubuntu web server user:
sudo chown -R www-data:www-data /var/www/htmlWith that, WordPress is installed and you are ready to run it through the web-based setup procedure.
Step 5 – Setting Up WordPress via the Web Interface
WordPress has a web-based setup process. As you go through it, it asks a few questions and installs all the tables it needs in your database. Here, we'll walk you through the basic steps of setting up WordPress, which you can use as a starting point for building your own custom website that uses a remote database.
Go to the domain name (or public IP address) associated with your web server:
http://example.comYou will see a language selection page for the WordPress installer. Select the appropriate language and click on the main installation page:
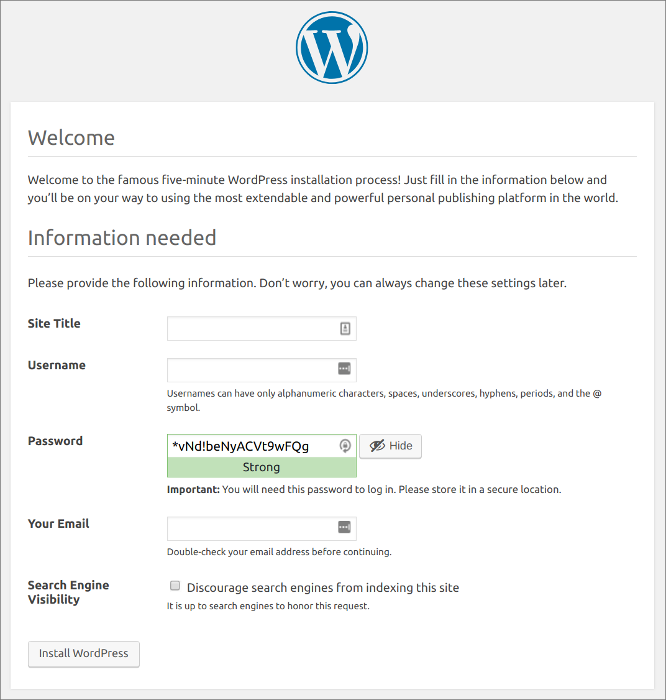
Once you have submitted your information, you will need to log in to the WordPress admin interface using the account you created. You will then be taken to a dashboard where you can customize your new WordPress site.
Result
By following this tutorial, you have set up a MySQL database to accept SSL-secured connections from a remote WordPress installation. The commands and techniques used in this guide are applicable to any web application written in any programming language, but the specific implementation details will vary. Refer to your application's or language's database documentation for more information.