Introduction
In this tutorial, you will deploy a database in Amazon Lightsail that can be used by any Lightsail instance or applications deployed in the same AWS region. This allows you to build applications and systems in Lightsail without having to use additional AWS services. This tutorial also helps you add databases to an instance, add users, create snapshots of your data, and understand how to view database metrics.
What you will do
- Deploy a Lightsail MySQL database instance.
- Deploy a Lightsail Ubuntu instance.
- Connect the Ubuntu instance to the database instance.
- Create additional users and databases in the database instance.
- Enable logging and snapshots of the database instance.
Prerequisites
- An AWS account
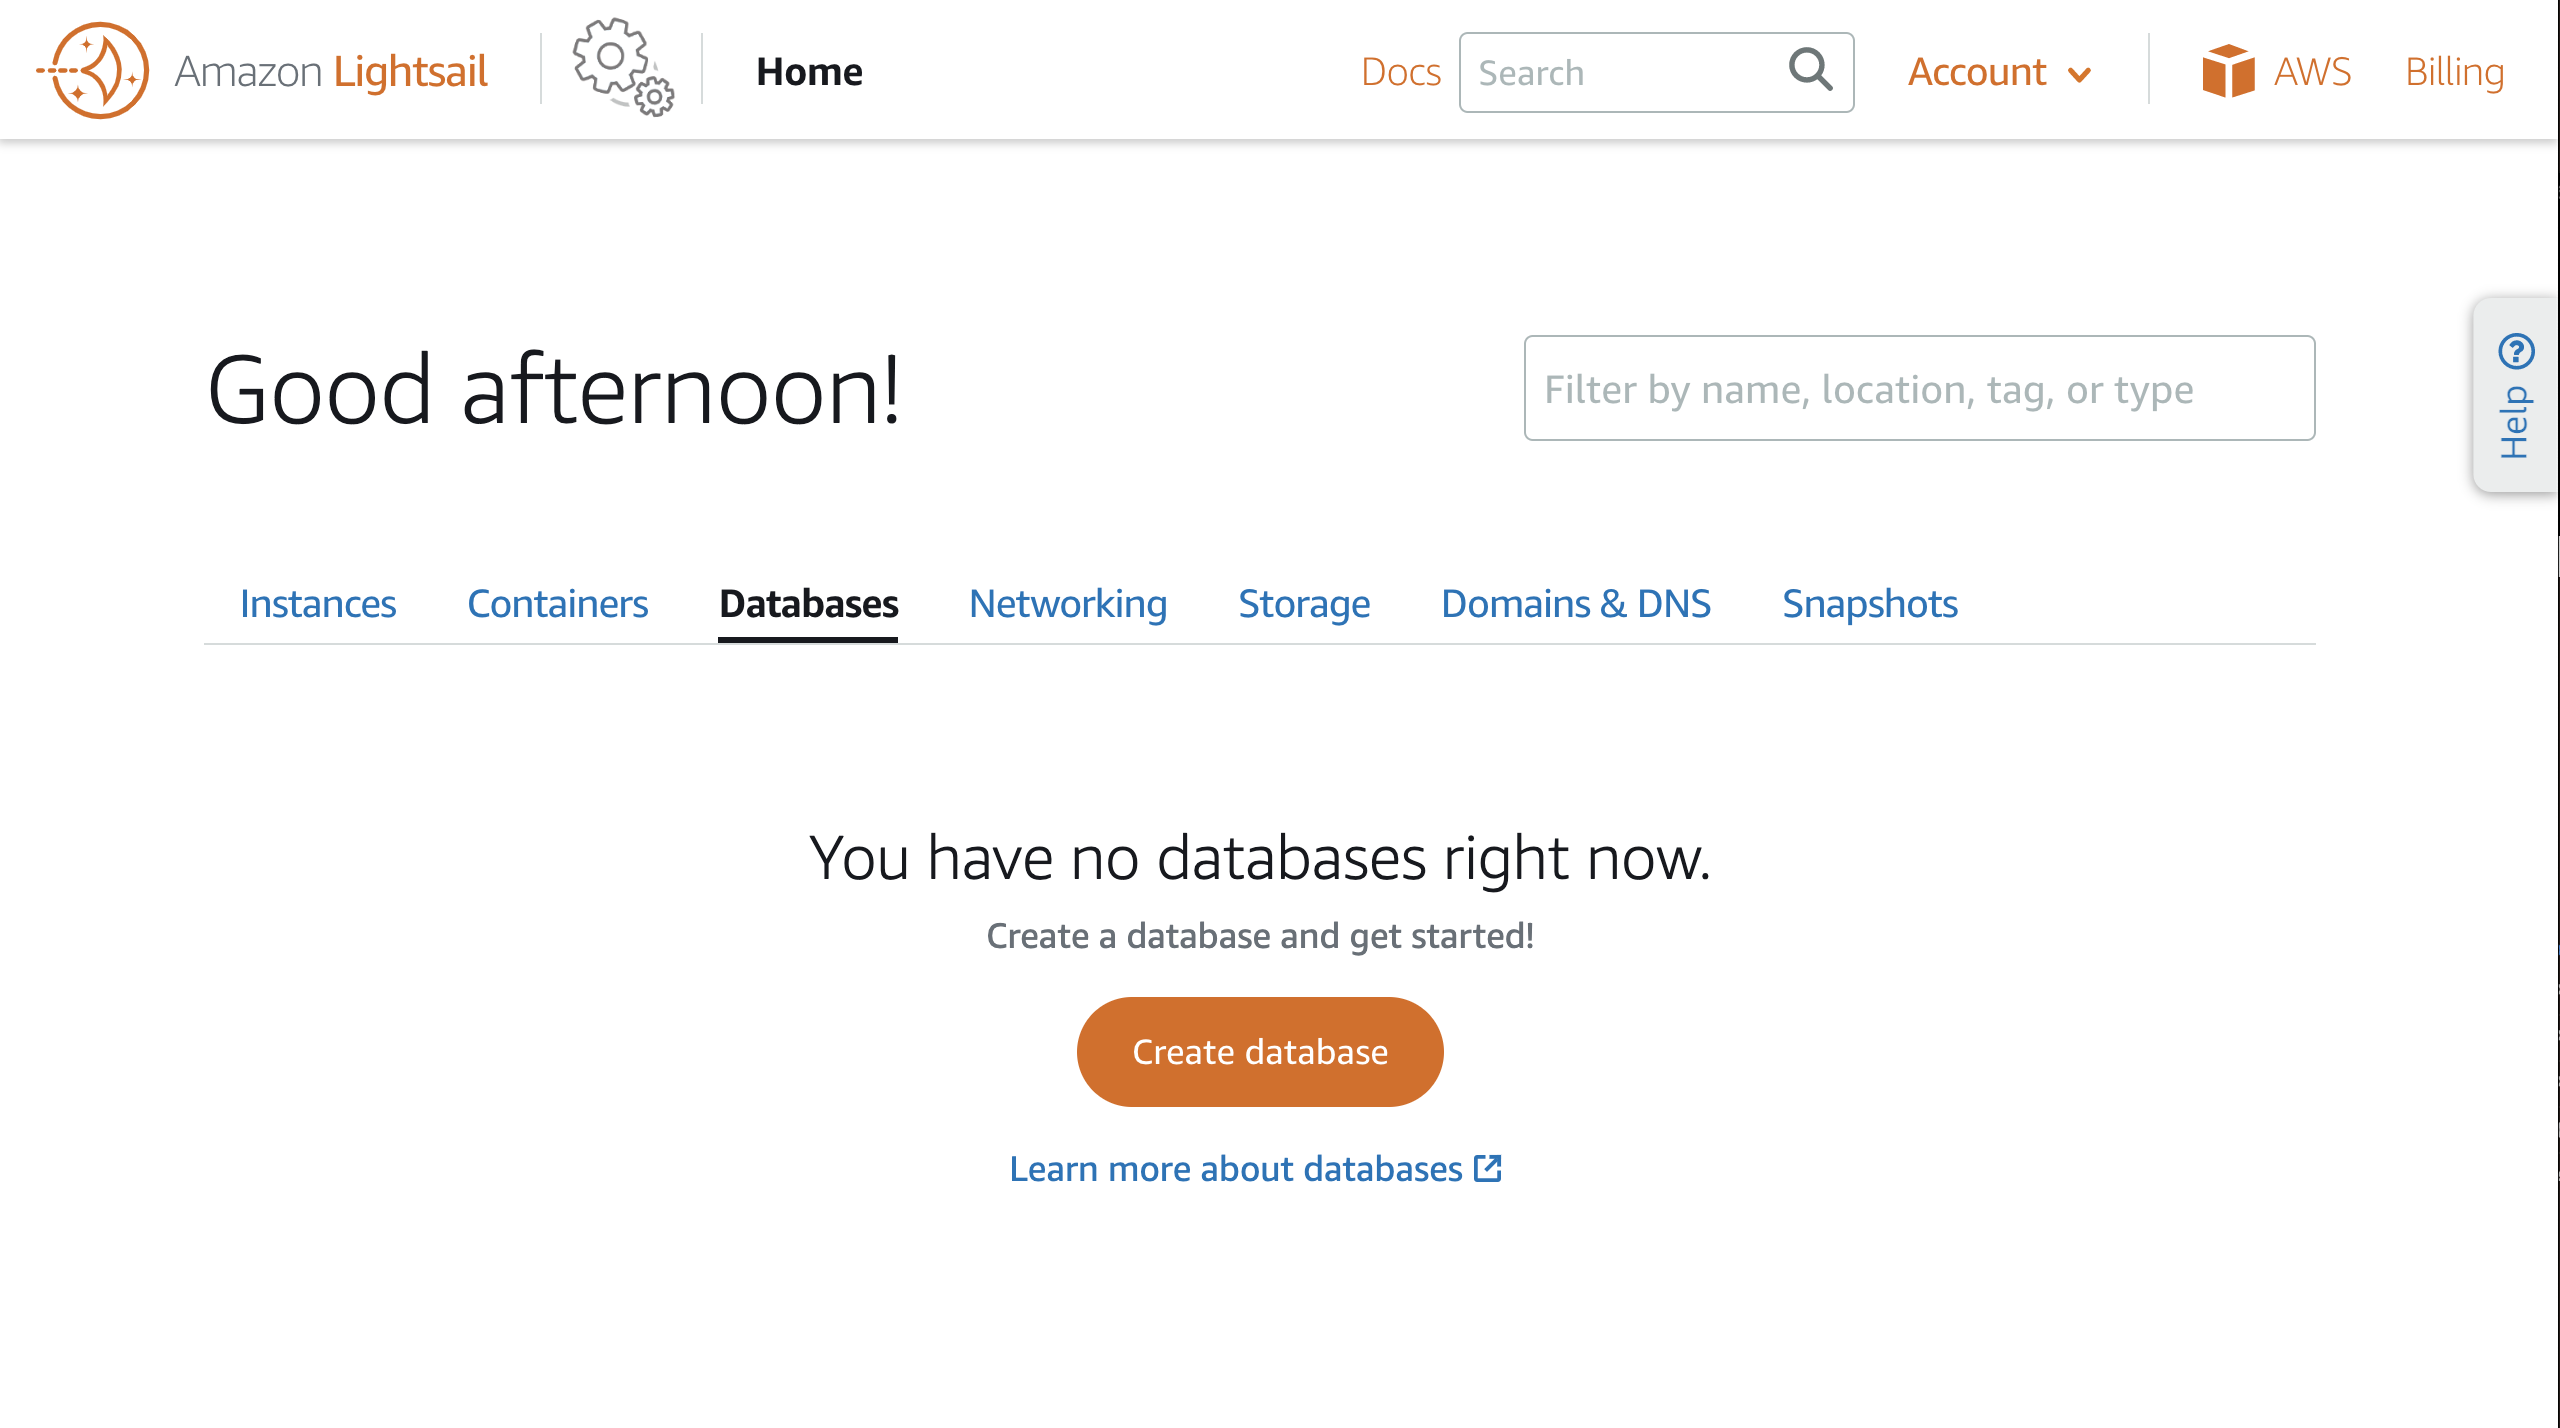
1. To get started, go to the Amazon Lightsail console and select the Databases tab.
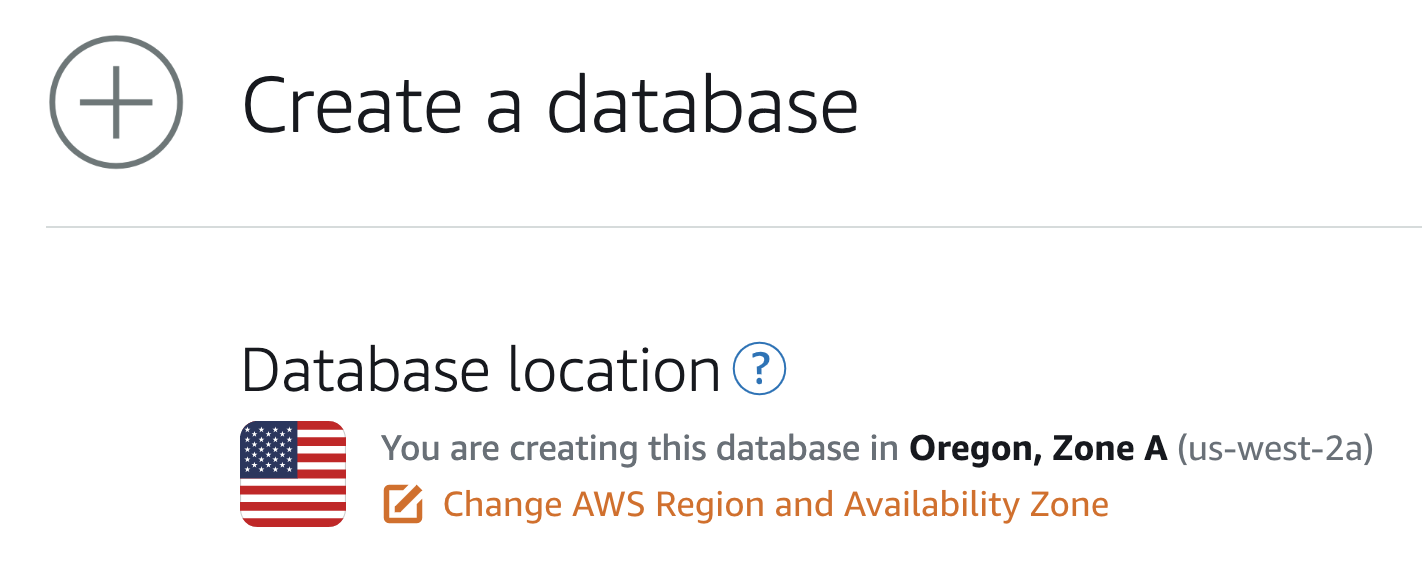
2. Select Create Database and select Change AWS Region and Availability Zone and select the Region and Availability Zone where you want your database to be located.
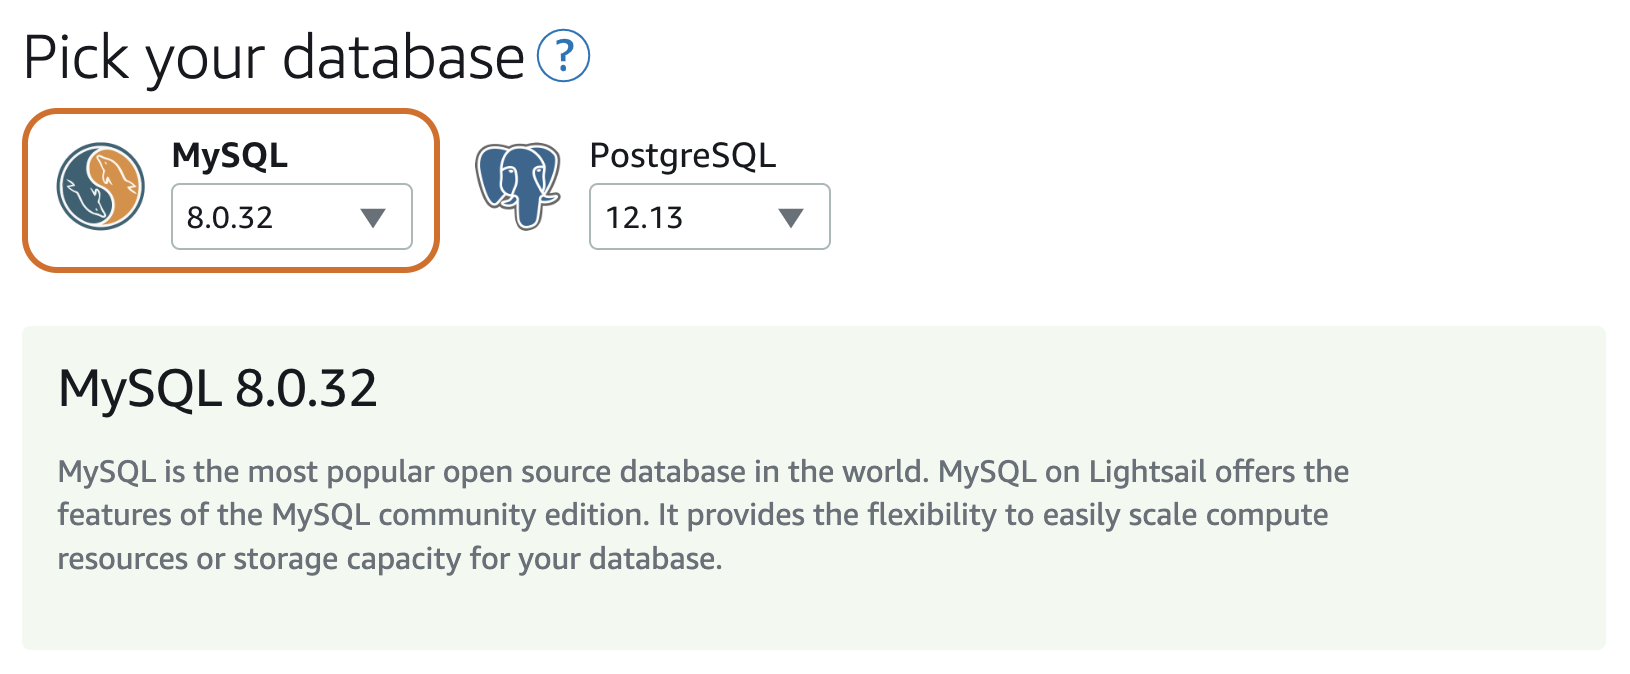
3. Choose your database. Lightsail currently supports MySQL and PostgreSQL. For this tutorial, choose MySQL and use the latest version.
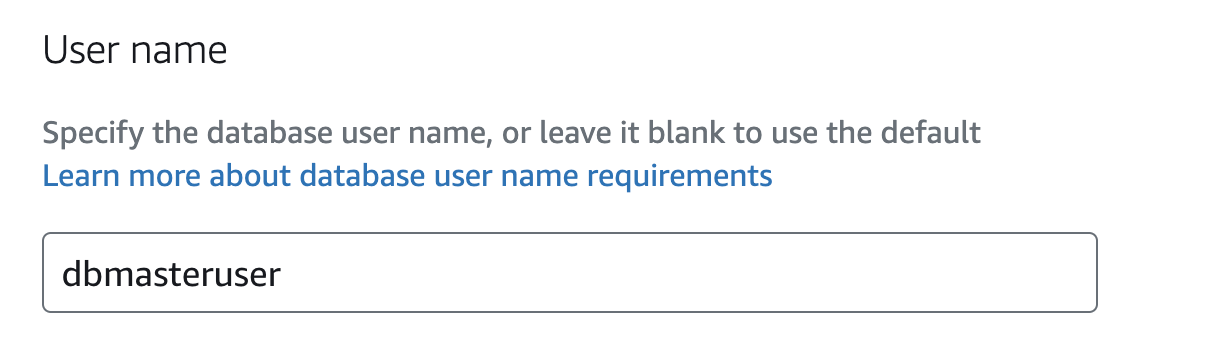
Select Specify login credentials .4. You can create a database username like dbmasteruser or you can leave it blank and you will see the default credentials after the database is deployed.
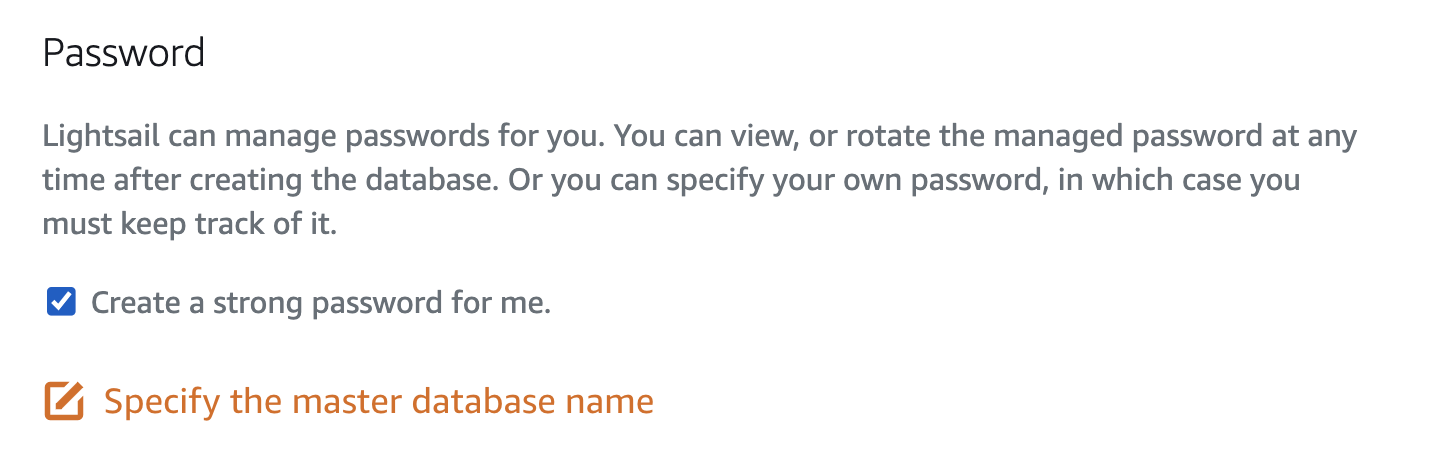
5. By default, Lightsail creates a strong password for your database instance, which is displayed in the console after the database is deployed. Uncheck Create a strong password for me and enter Sunny2DAY! or a password of your choice.
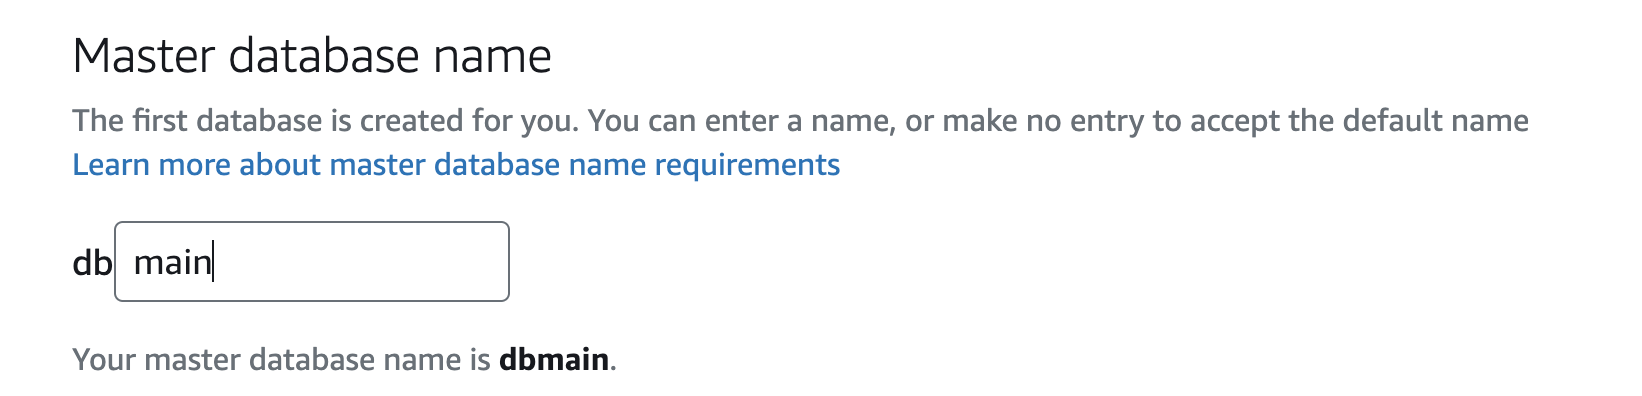
6. Give your database a name. When you deploy a Lightsail database, you are actually deploying both a database instance (a server running MySQL) and a new database on the instance. This step is to name the database running on the instance. Once this is deployed, you can log in to the database instance and create additional databases on a single instance without having to deploy additional compute. You will see this in step 26. Additionally, the name you give your database here will be prefixed with the letters db. Enter main, which will be created as dbmain.
7. With Lightsail databases, you can choose between a Standard plan and a High Availability plan. The High Availability plan offers two database servers and keeps your database running even if something happens to the primary database. High Availability plans are twice the cost because they have twice the number of resources as the Standard plan. Choose the $15 Standard plan.
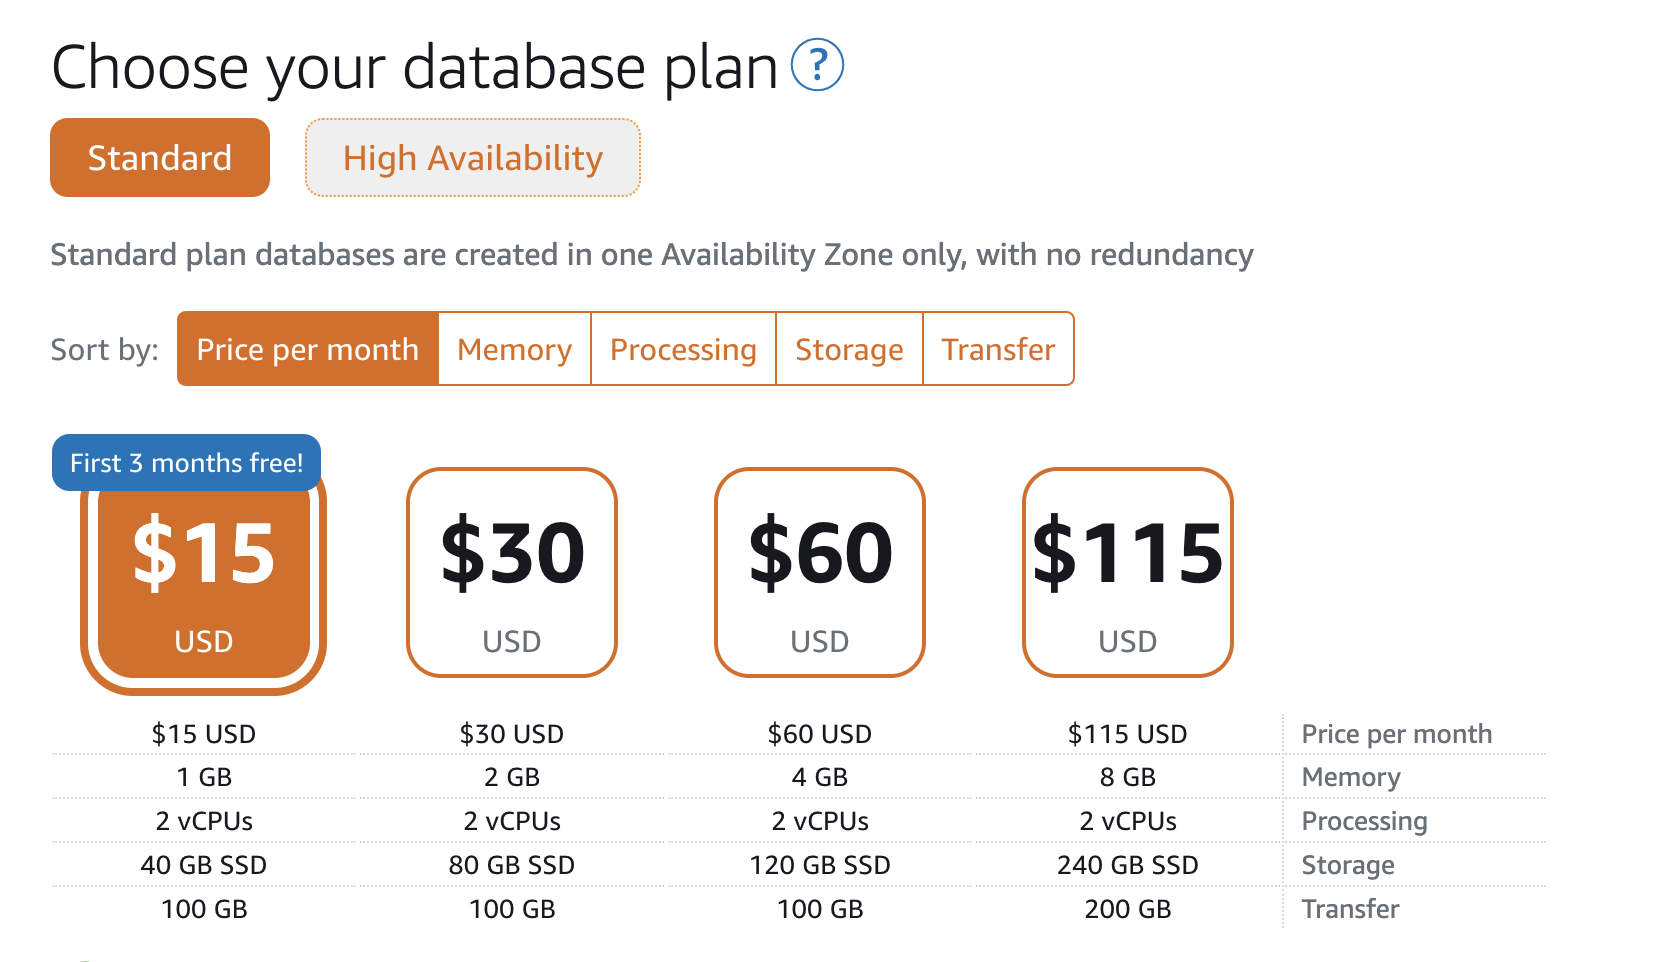
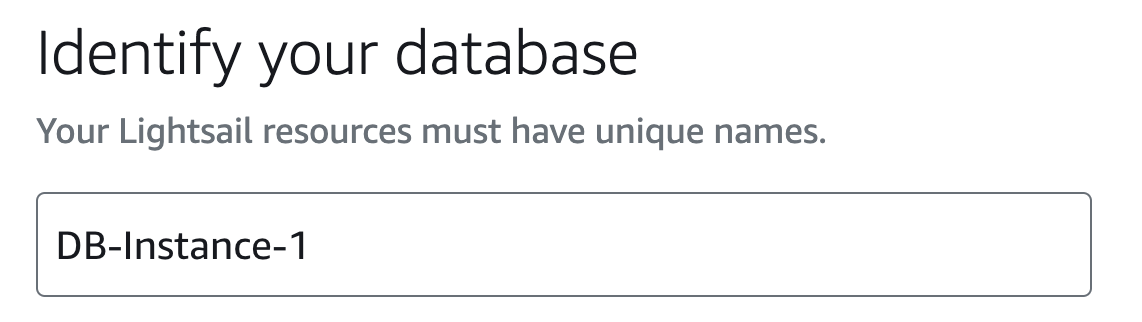
8. Enter DB-Instance-1. This is the name of the database instance (the server running MySQL) that you will see in the Lightsail console under your database resources.
9. Select Create Database. Deploying the database server will take 10-15 minutes. It will be grayed out with a Creating status until the resource is ready.

10. While you wait for your database to be created, we will deploy a Lightsail Ubuntu instance that we can use to remotely access our database instance and perform some administrative tasks. Select the Lightsail icon or the Home button at the top of the Lightsail console, which will take you to the Instances page.
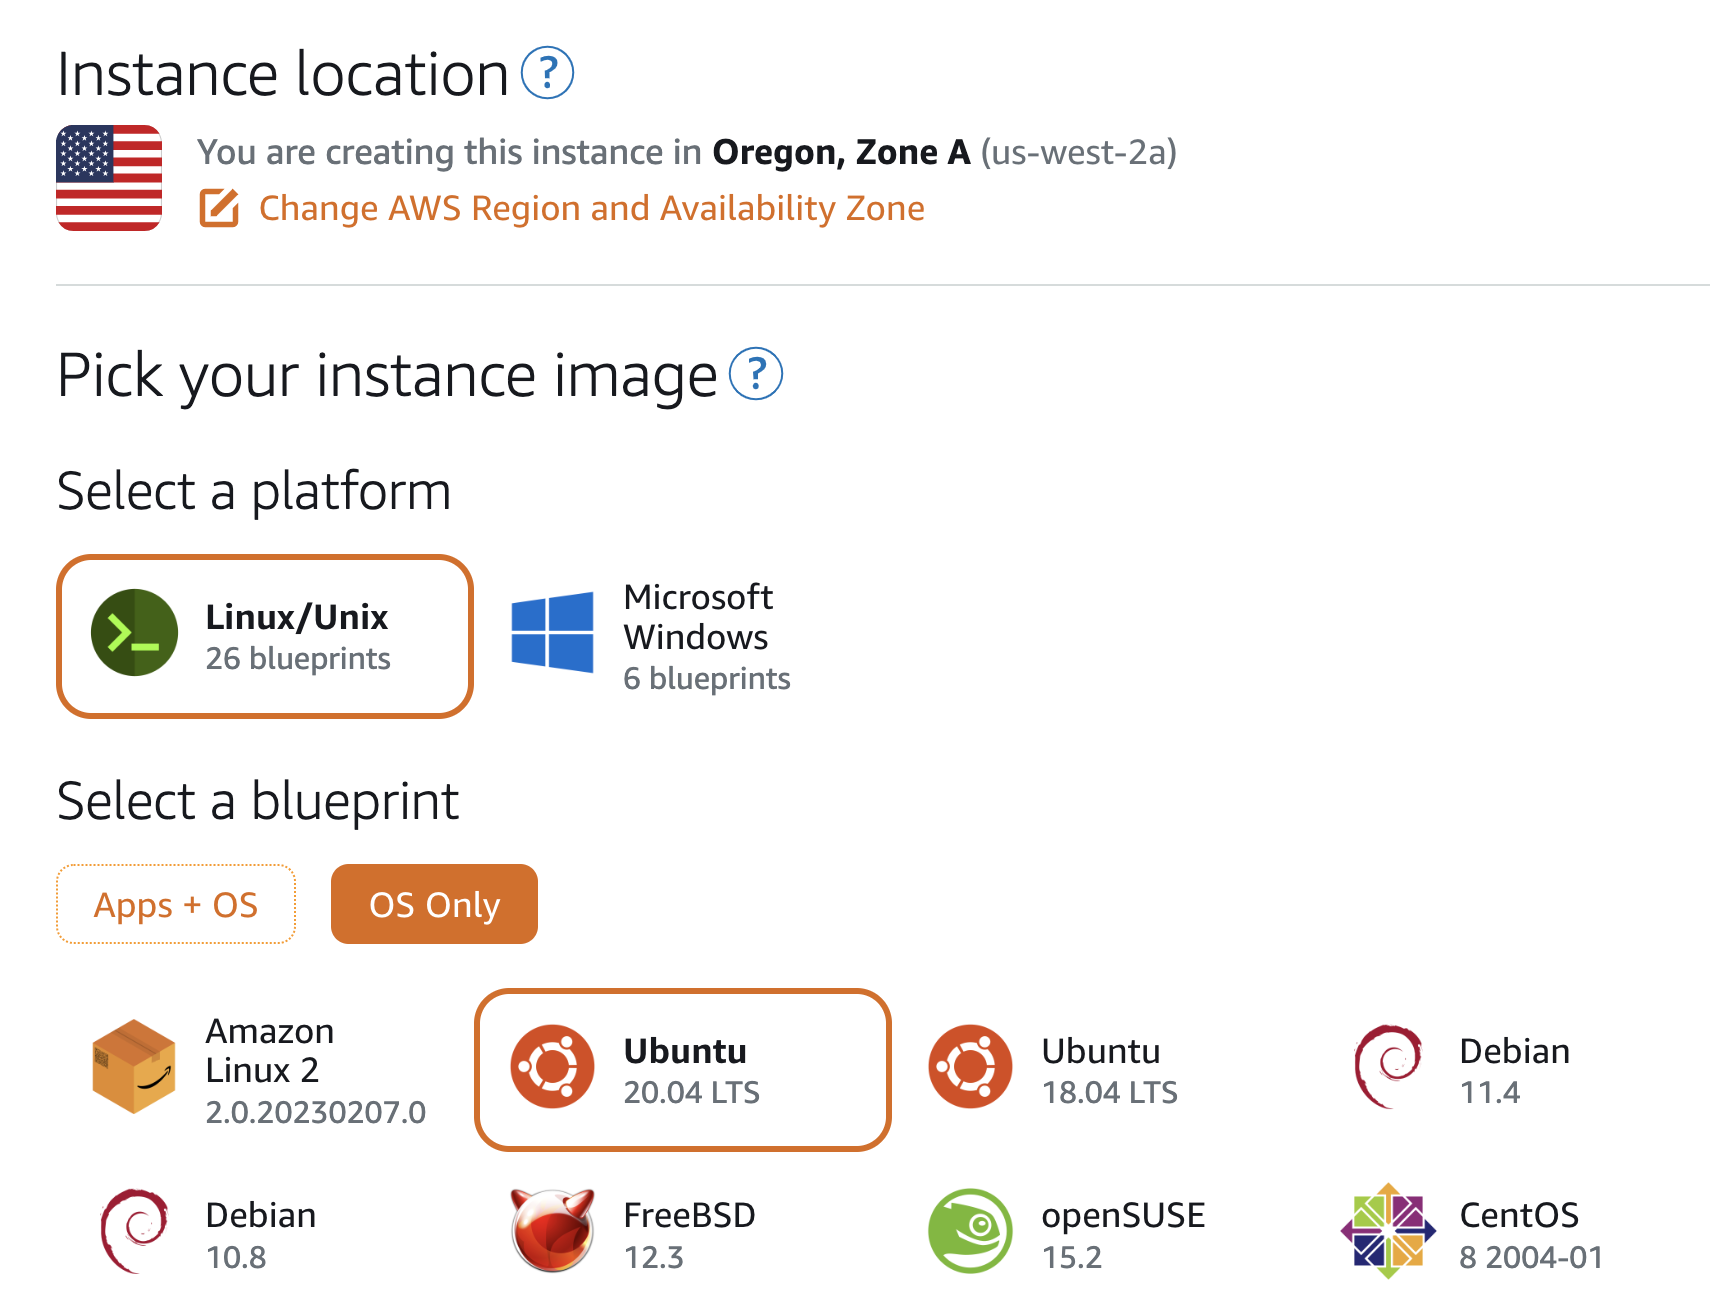
11. Select Create instance. Make sure your instance will be deployed in the same region as your database. If it shows a different region, expand the region selection and select the appropriate region. Otherwise, select OS Only in the Select a blueprint section and select the latest Ubuntu blueprint.
12. Select Add Startup Script. This code will be run at the end of this instance deployment. You will use the startup script to add the MySQL client, which will allow you to remotely connect to your database instance and perform administrative tasks. Paste the following code into the Startup Script text box:
# Update the package index
sudo apt update
# Install mysql client
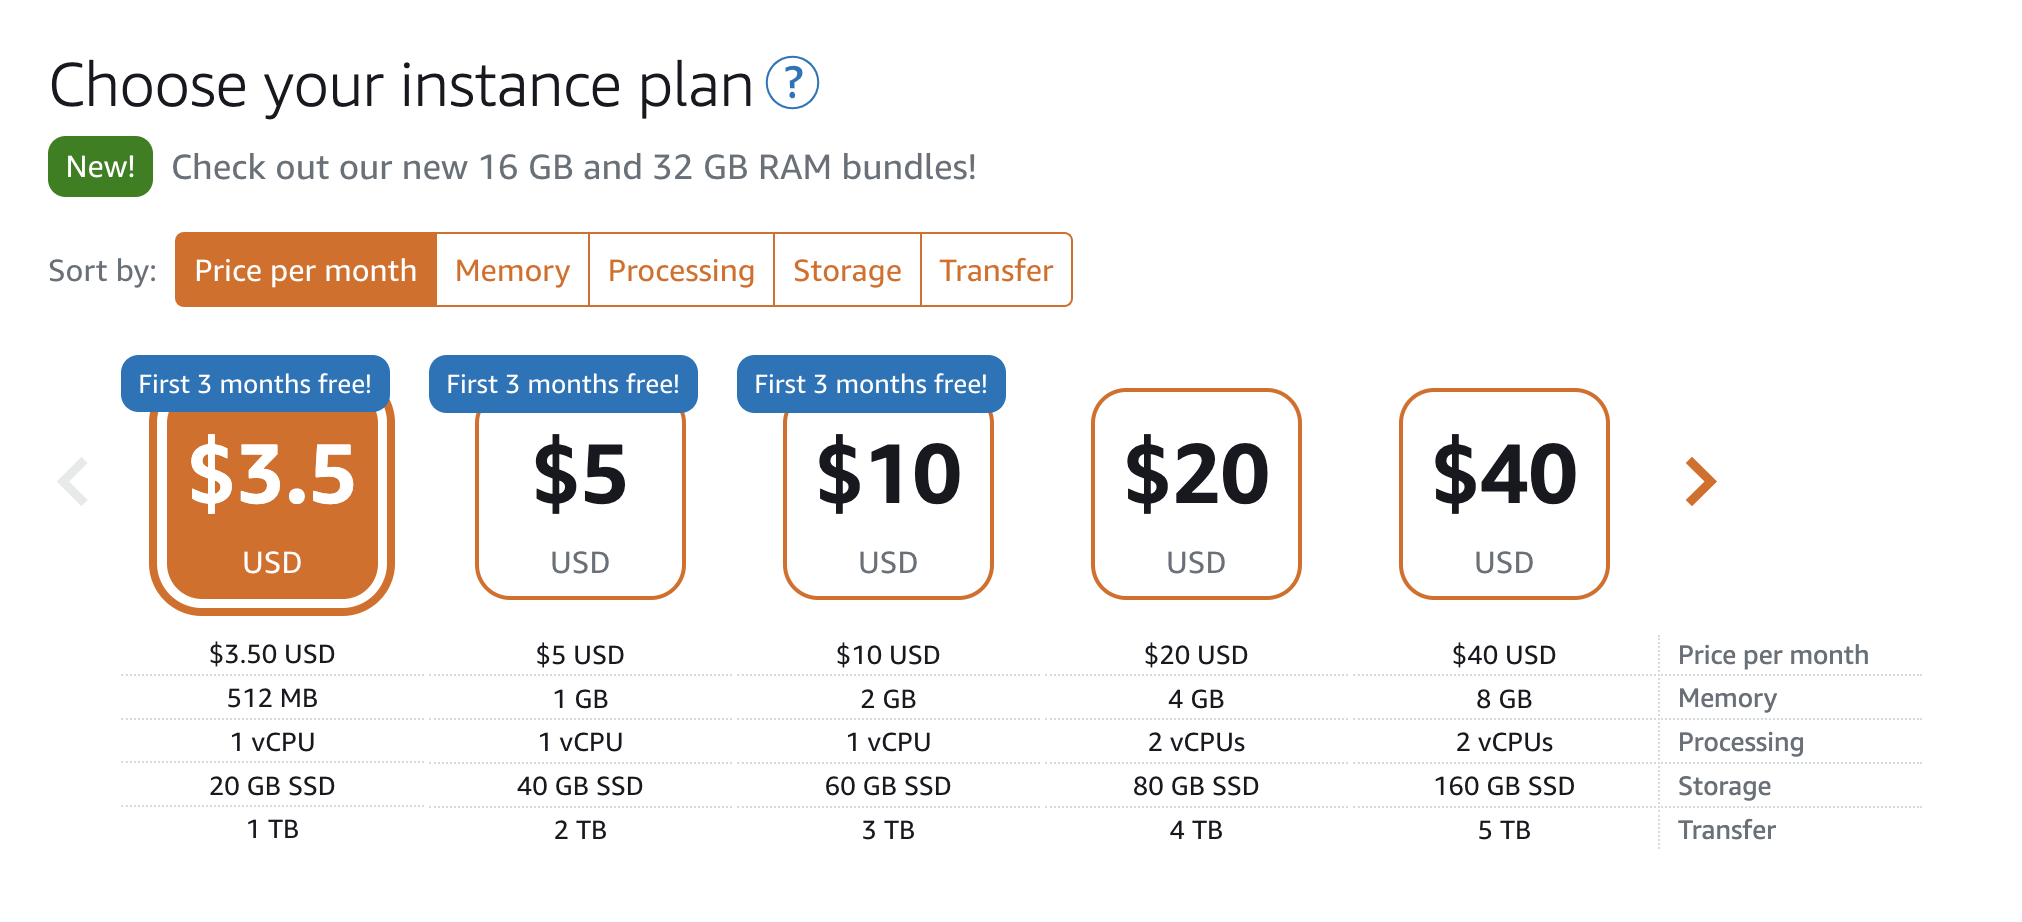
sudo apt-get install mysql-client-core-8.0 -y13. For this example, choose the $3.50/month sample plan. For larger apps or websites, you can choose the sample plan according to your needs.
14. Enter Ubuntu-1 to identify your instance, then select Create instance.

15. Wait for the database instance to become available. You can see the status change by going to the Databases tab by selecting the Lightsail icon or the Home button in the Lightsail console.
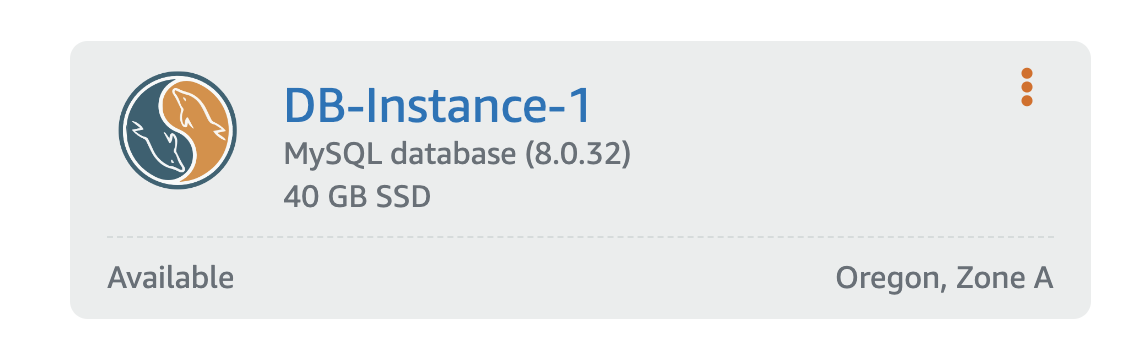
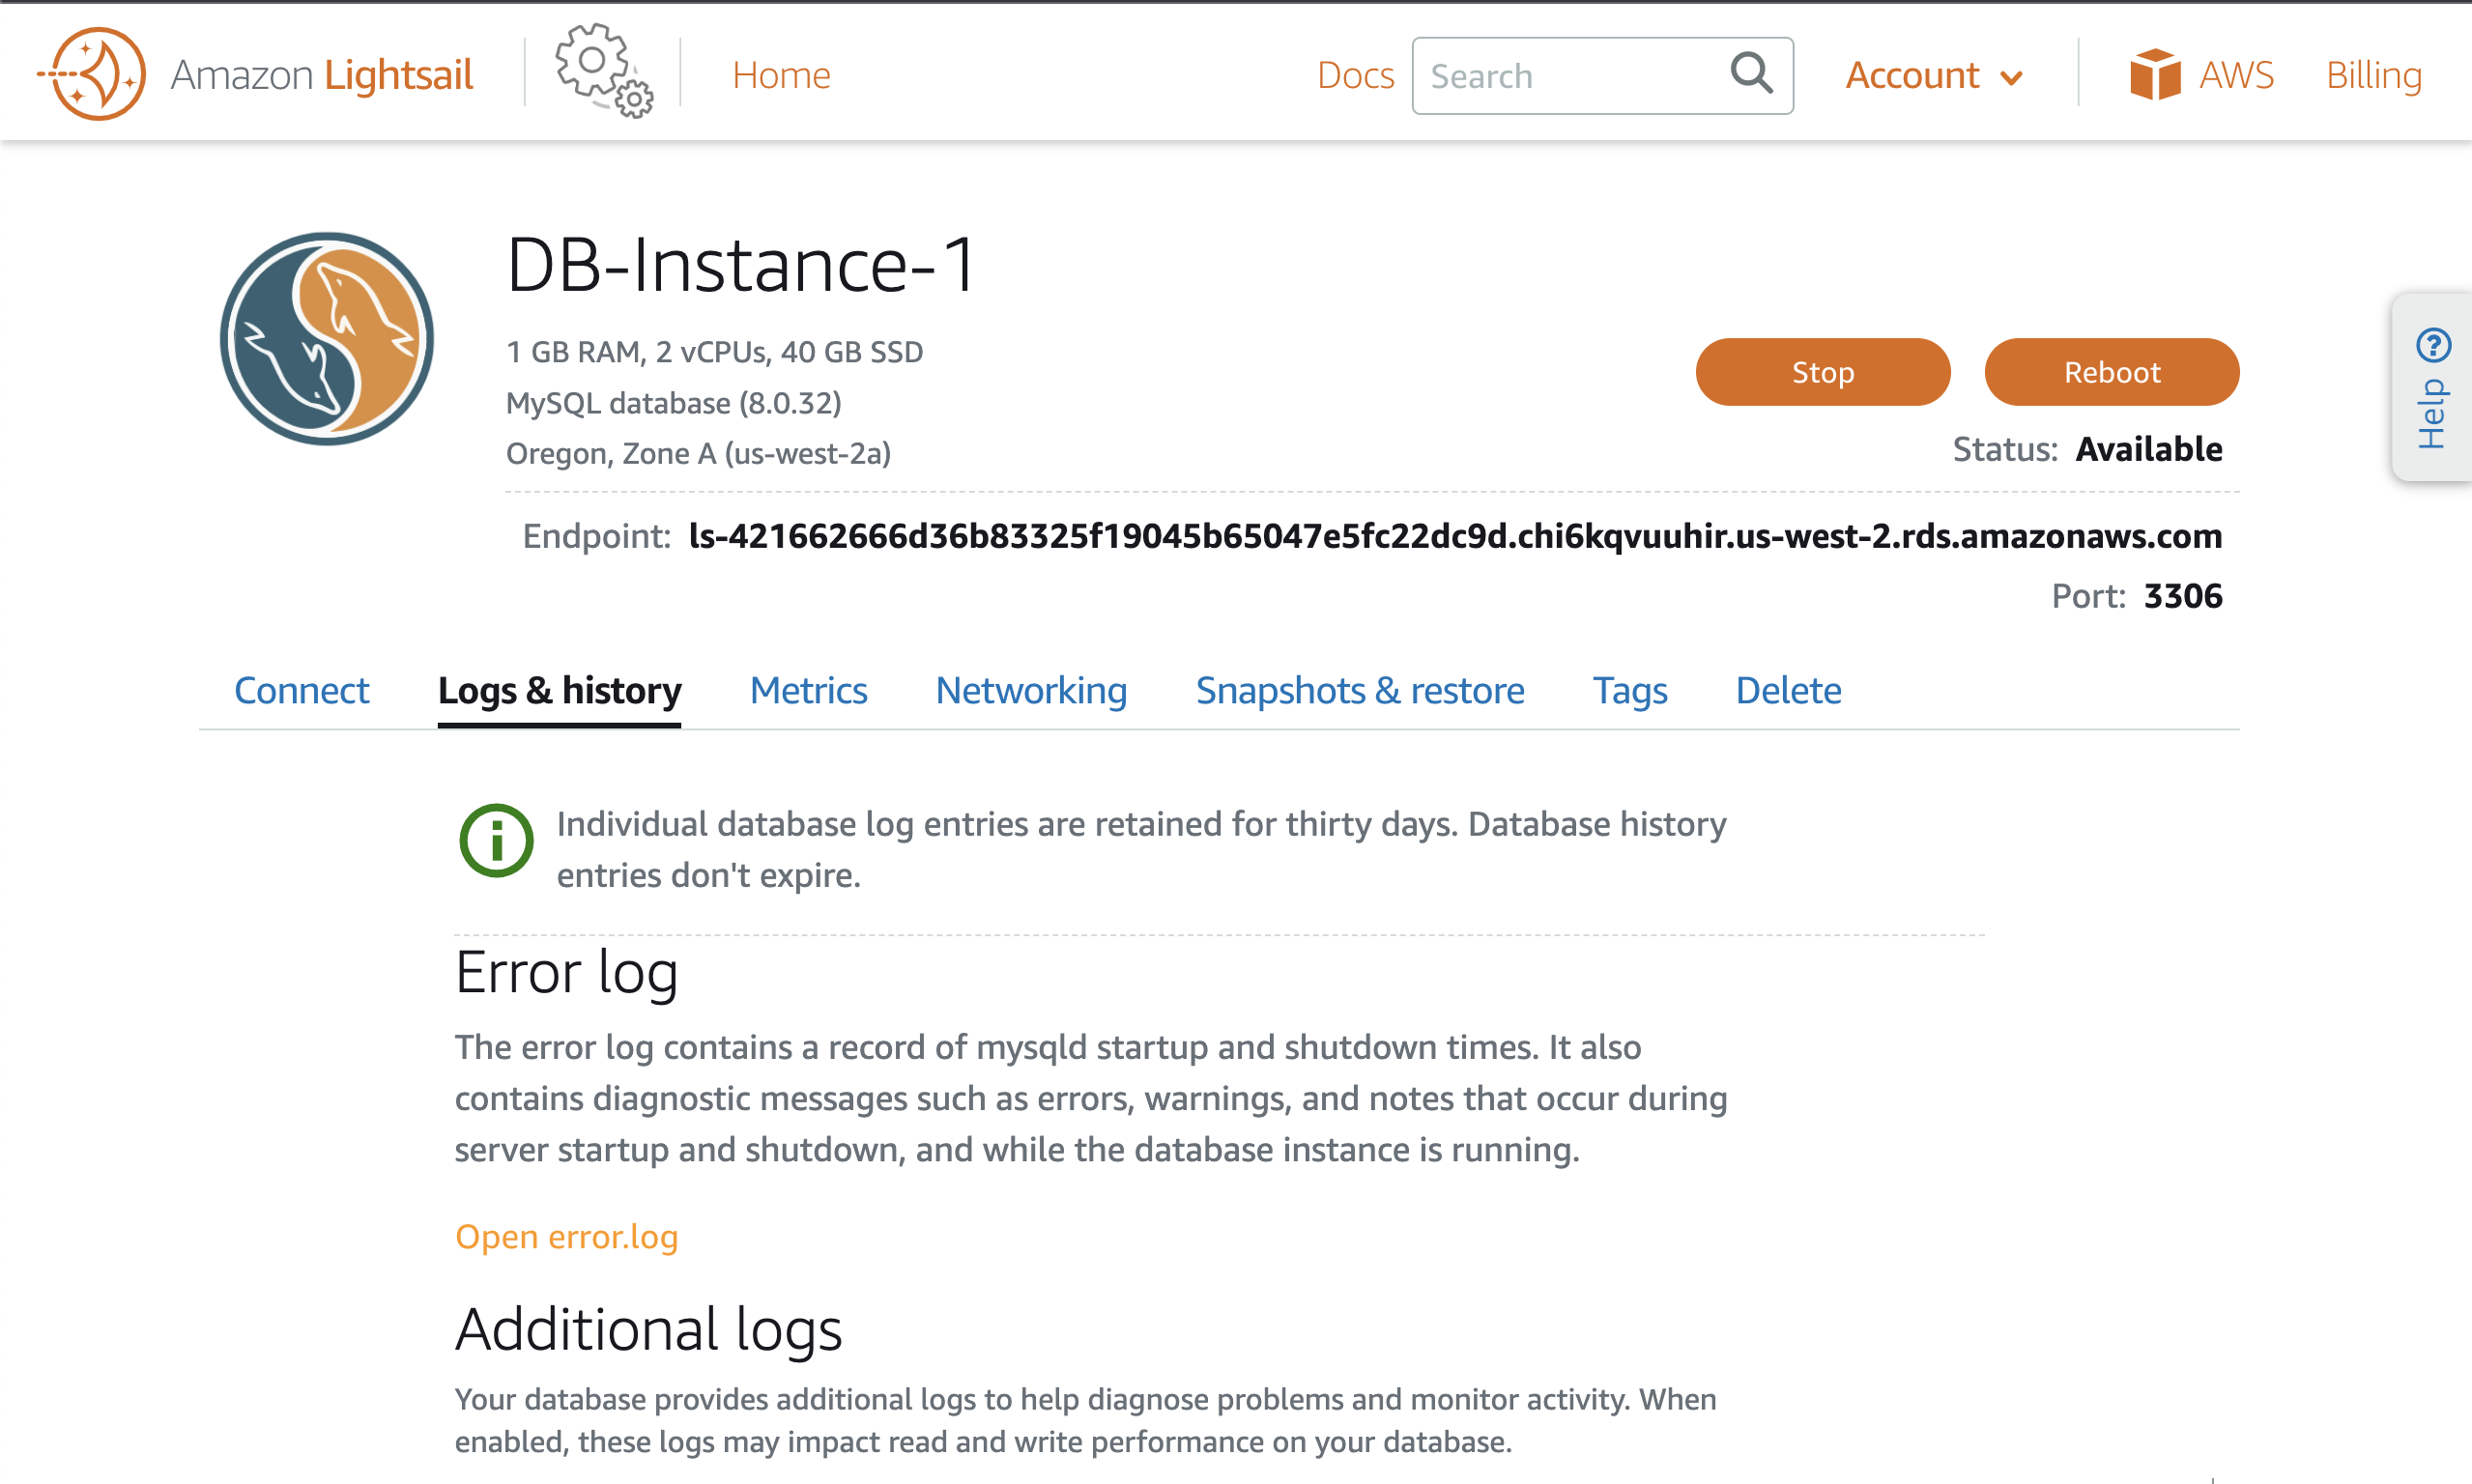
16. Now that your database is available, you can continue. Your instance will only be accessible from other resources in your Lightsail account that are in the same region as this instance. This means that you cannot connect to this database from your home or work or from resources outside the current region. Select the instance name to continue. Your screen will look similar to this screenshot. You will see Resources, MySQL version, and Region, and then you will see Endpoint and Port. The endpoint and port number are what you use to connect an application to the database. Below that, you will see a number of tabs, which we will cover in the next steps. Below the tabs, you will see the username and password to connect to the database instance. You can also add other users that are not covered in this tutorial.

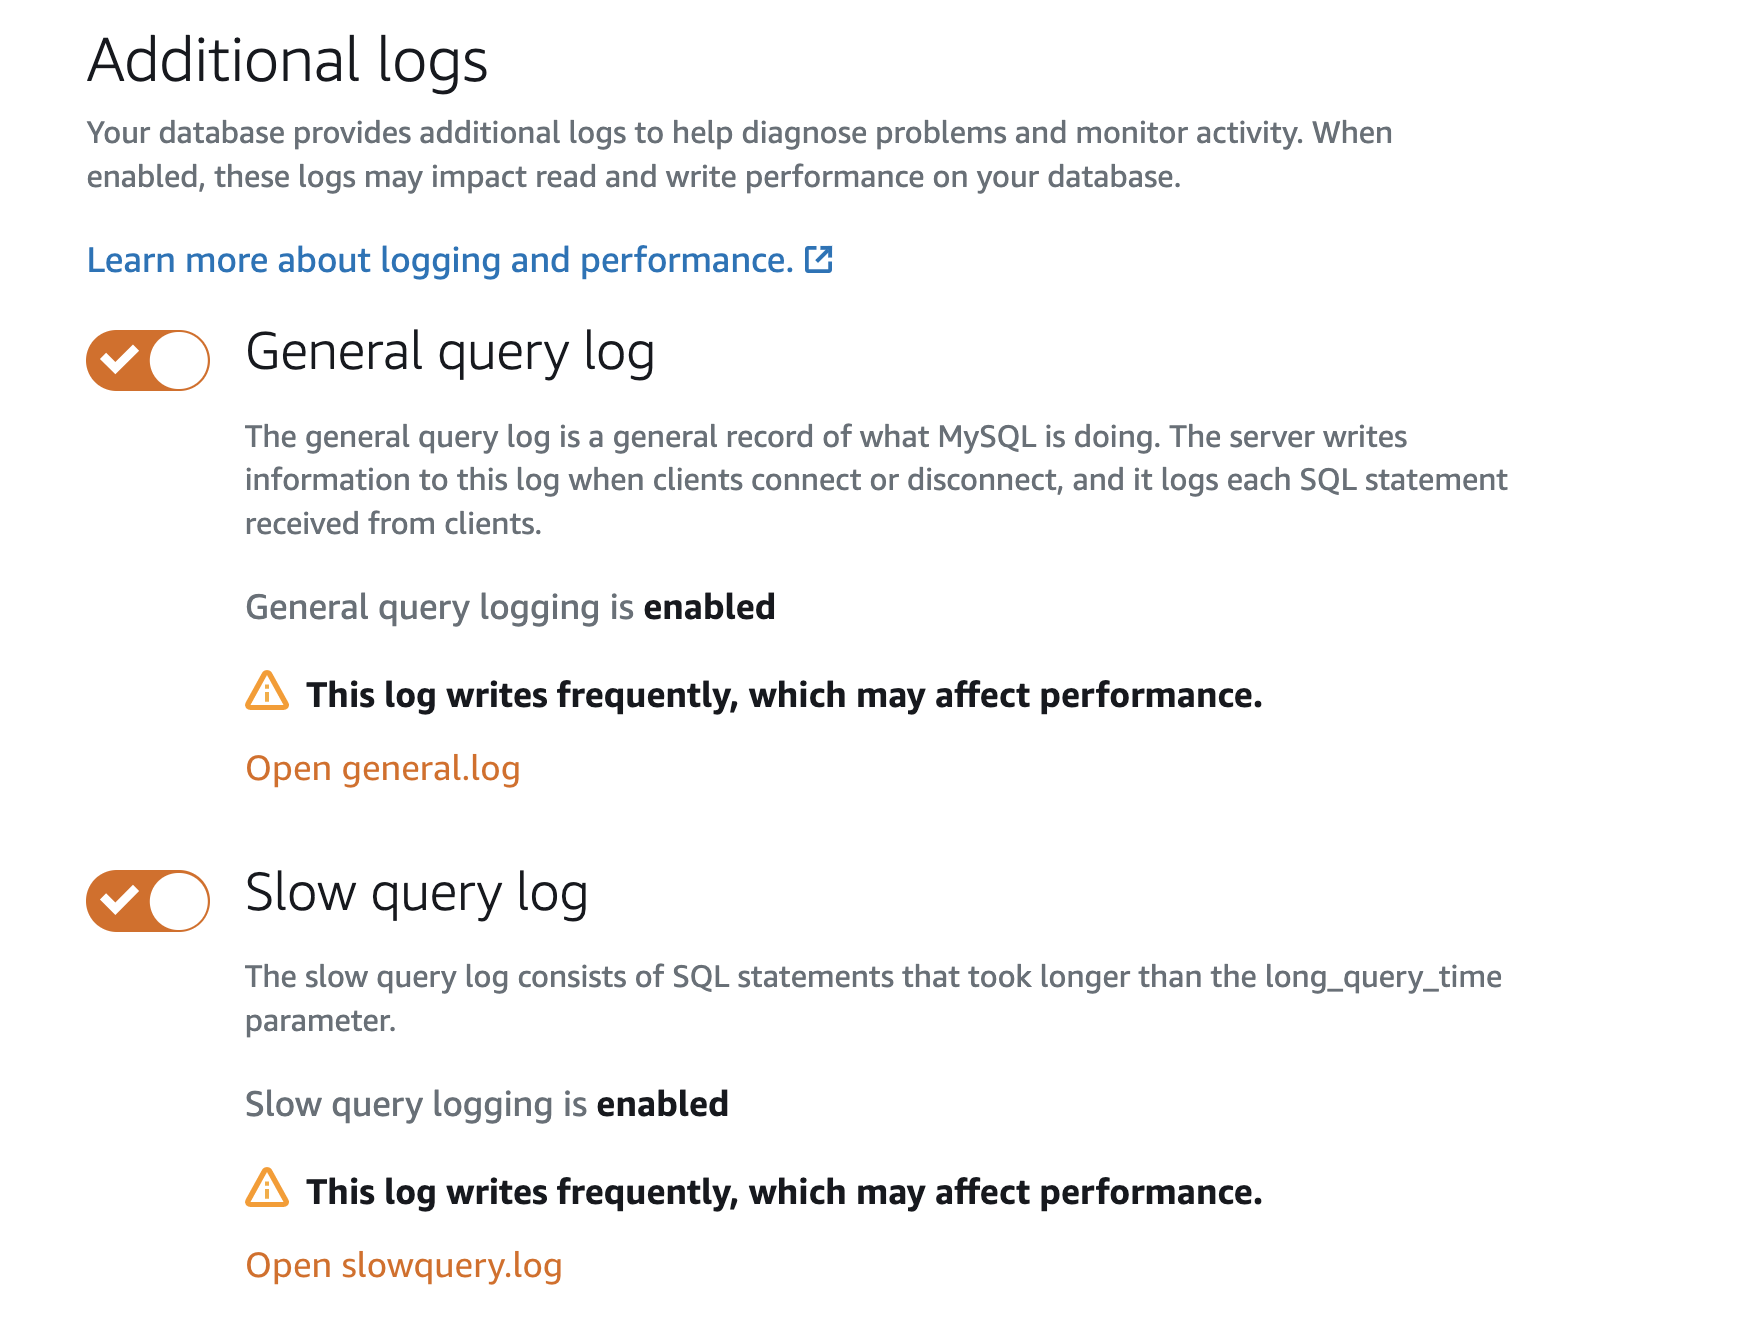
17. Select the Logs & history tab, which provides additional tools for troubleshooting your database instance. By default, these logs are disabled, but they can be enabled by selecting the toggle buttons. Enable all the logs on this page by selecting the toggle buttons.
18. Once these logs are enabled, you can select the Open log buttons to see what is being logged and use it for troubleshooting if needed.
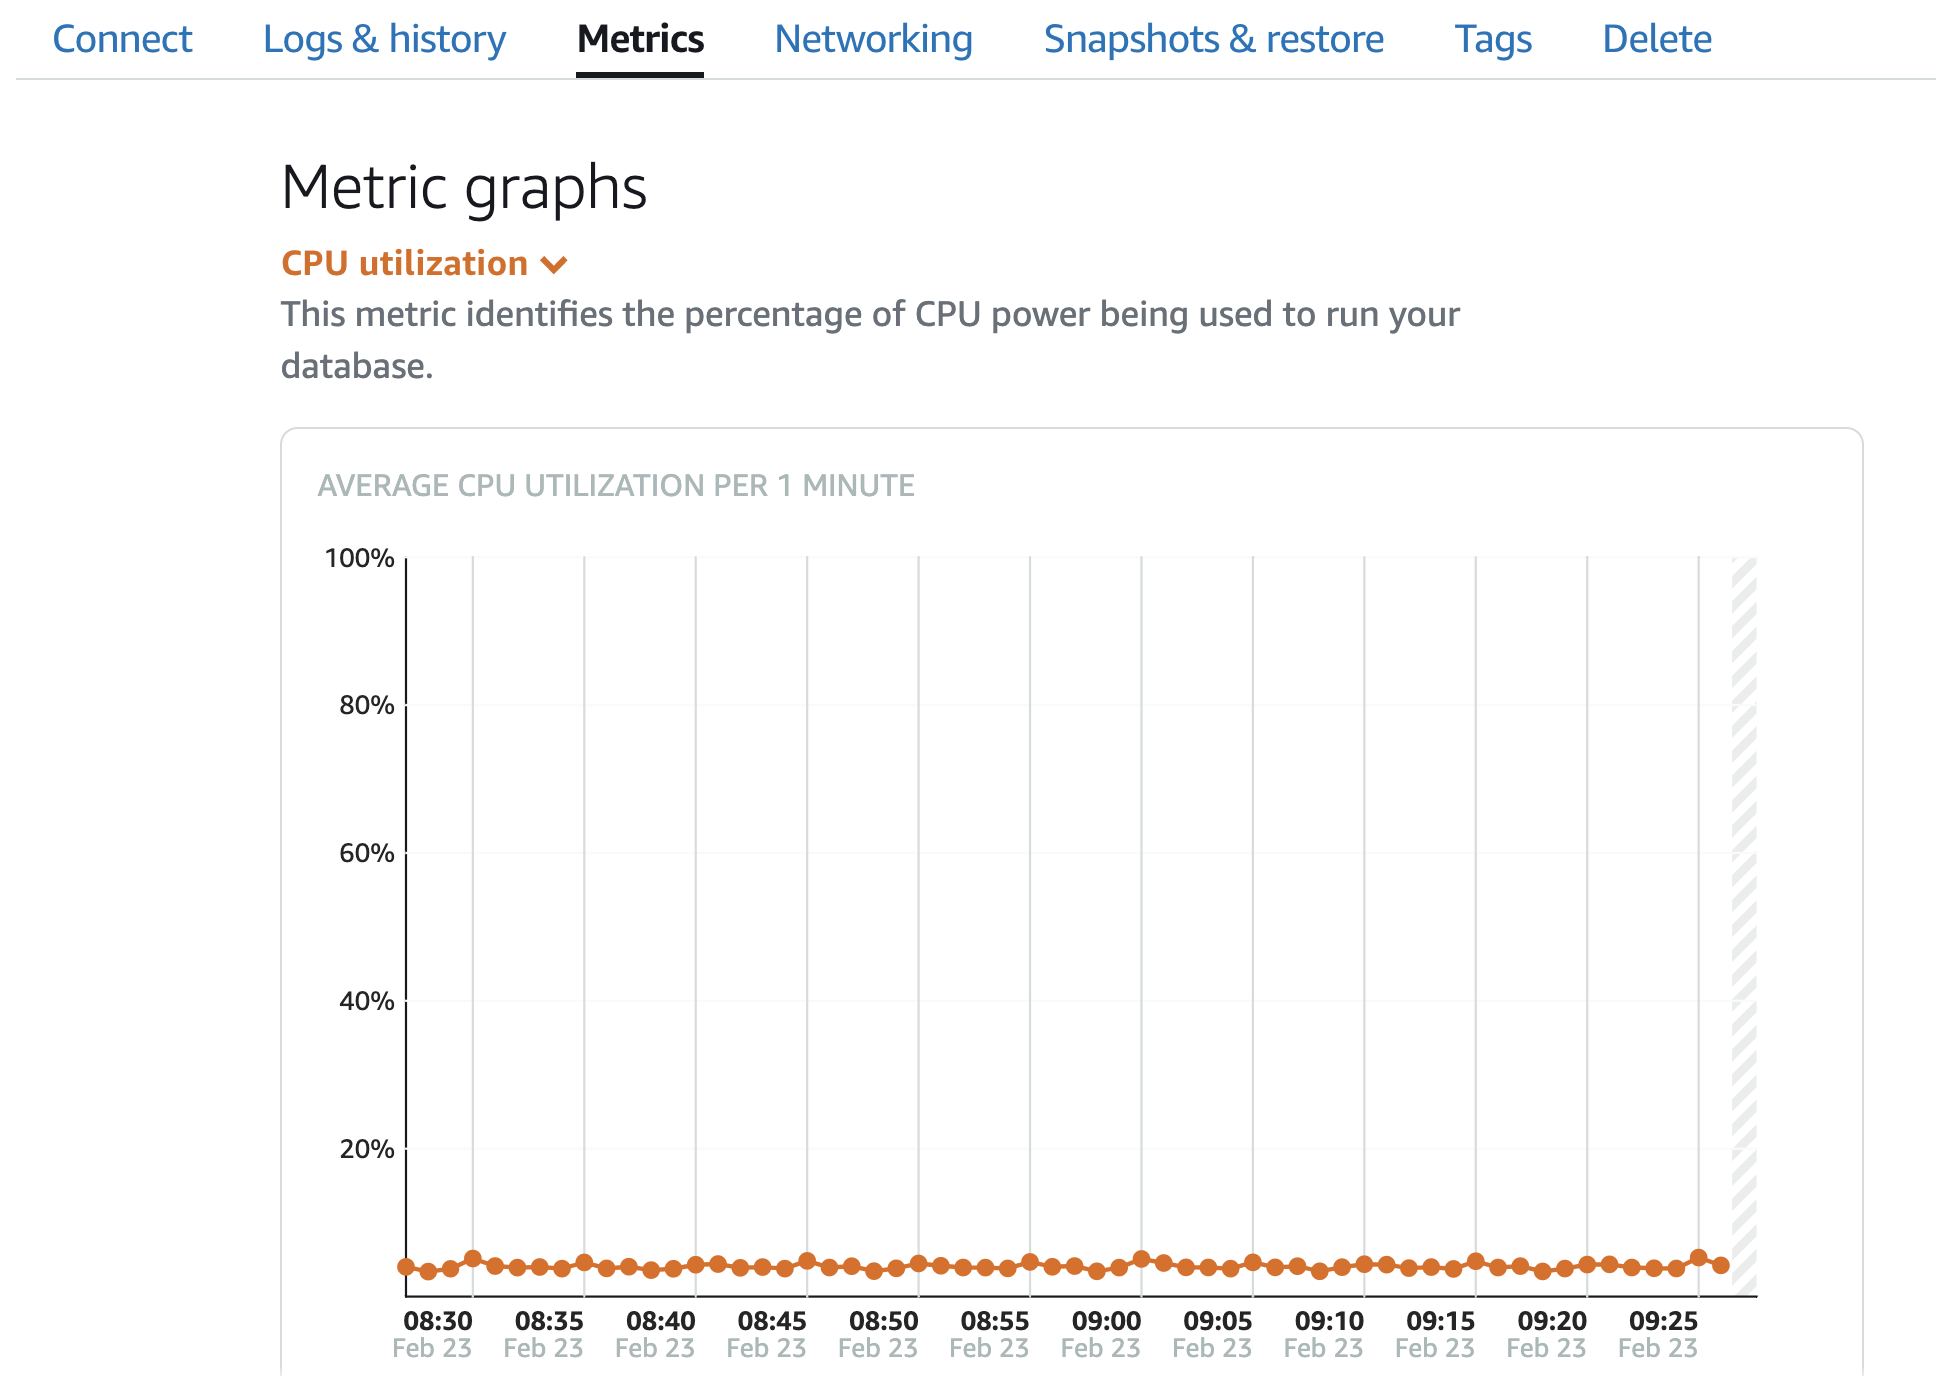
19. Next, select the Metrics tab. Here you can select various metrics and see a graphical representation of resource usage. This is useful when troubleshooting or determining if a larger instance is needed.
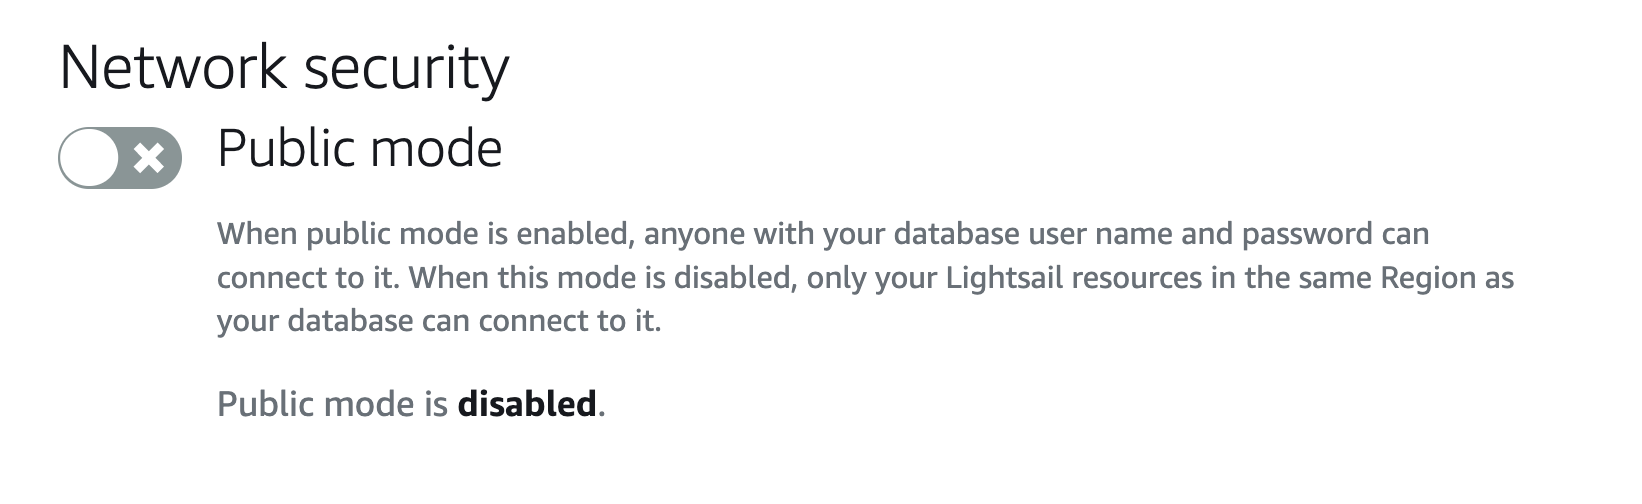
20. Next, select the Networking tab. You have the option to enable public mode. However, this opens your database to connections from anywhere in the world and is highly discouraged except for temporary troubleshooting purposes. If you select the public mode switch, the instance will take 10 to 15 minutes to reconfigure to take effect. Similarly, if you clear the public mode option, it will take a few minutes to reconfigure the instance to the latest settings.
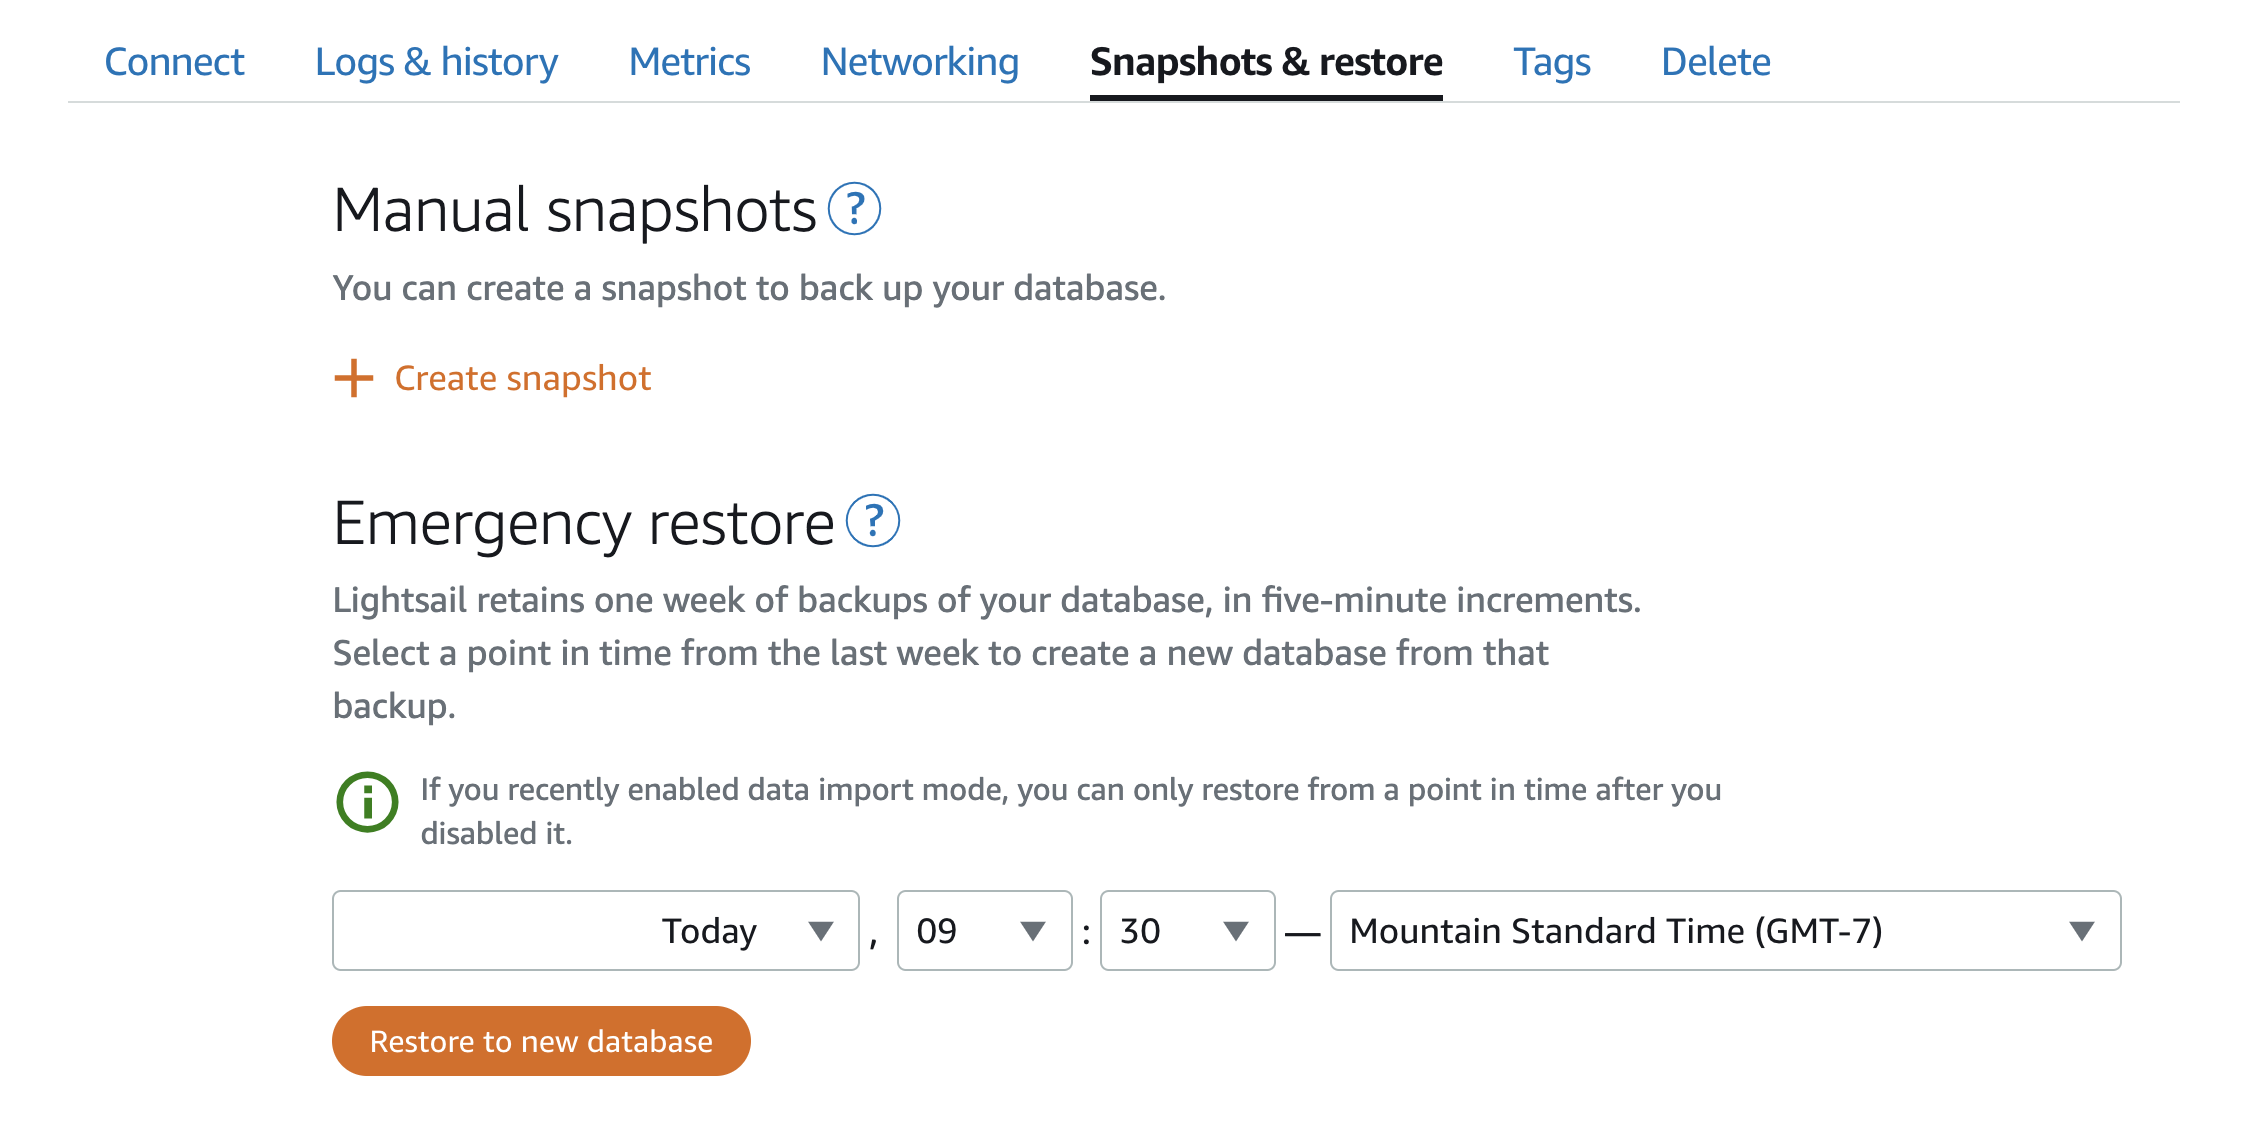
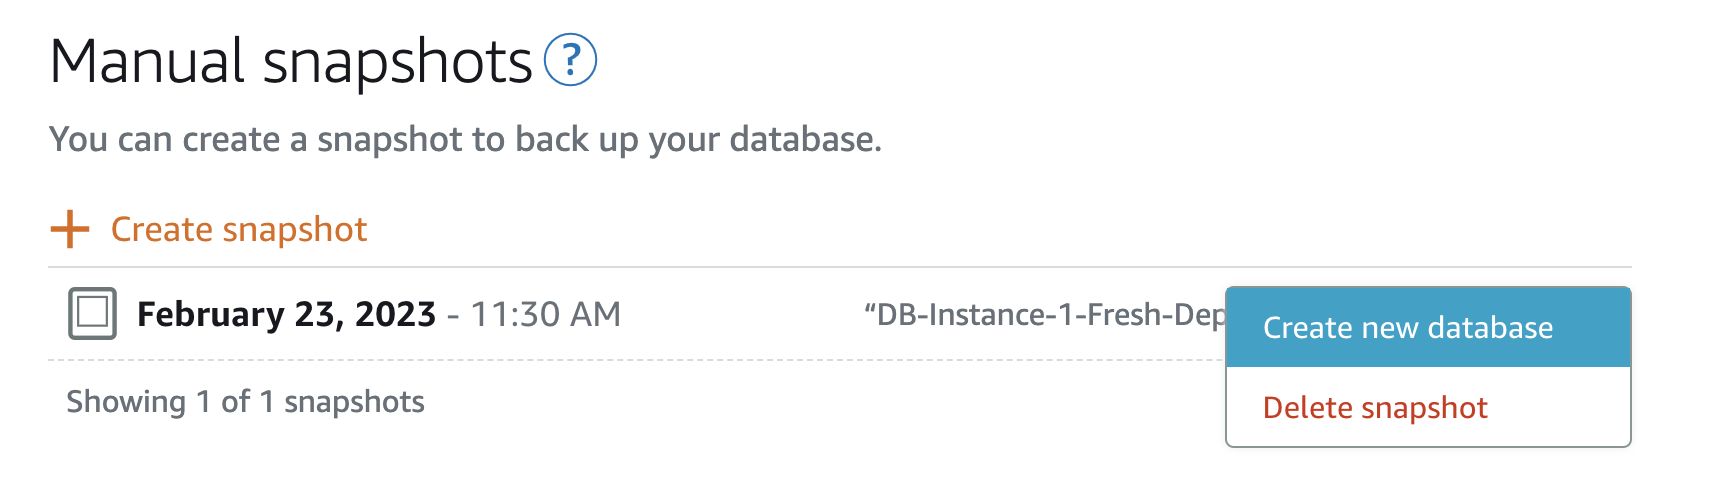
21. Select Snapshots & restore. Here you can create a manual snapshot (point-in-time copy) of your database. Additionally, Lightsail will increment your database backups by 5 minutes. If you need to restore to a previous snapshot, you can select Restore to new database and deploy it as a new database with a different instance name that you can point your applications to again. Select Create snapshot.
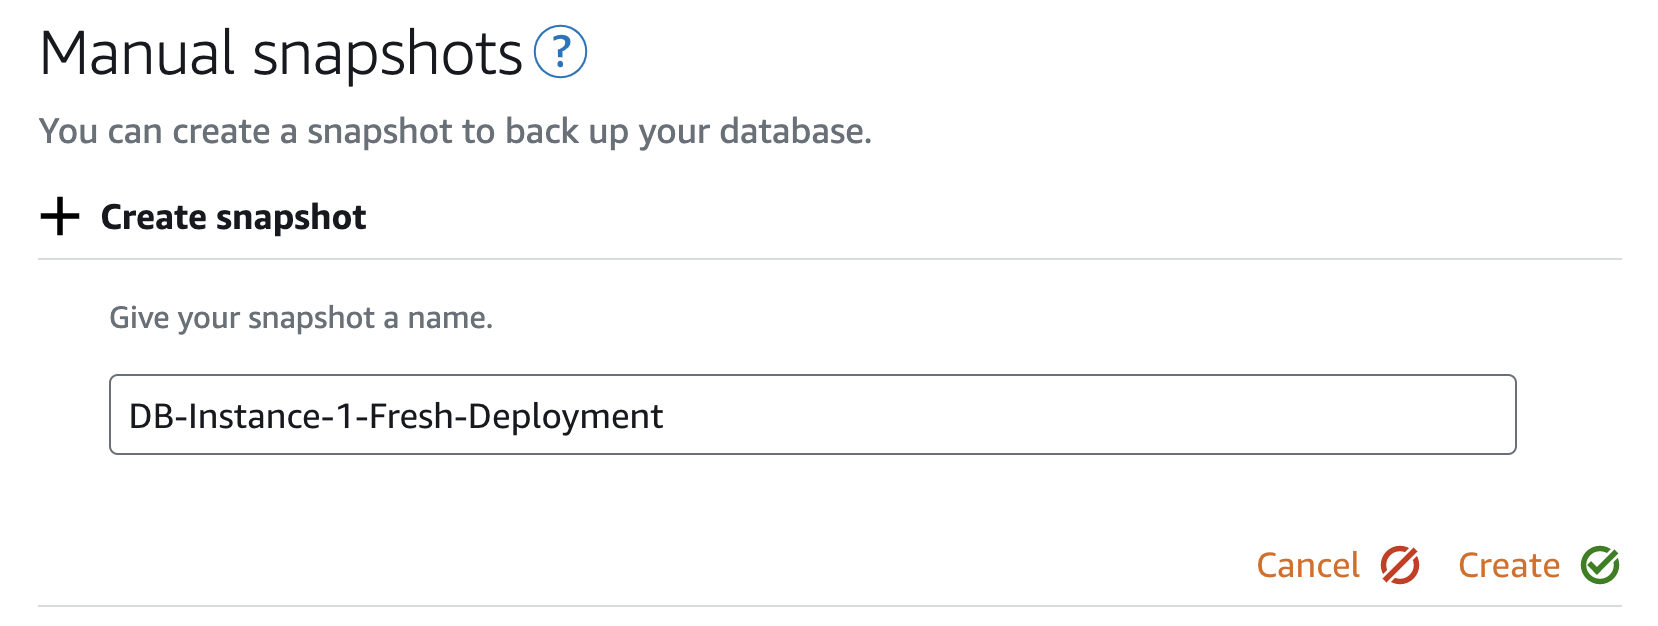
22. Name your snapshot. In this case, enter DB-Instance-1-Fresh-Deployment and select Create. Your snapshot will be created in a few minutes.
23. After creating the snapshot, select the 3-dot button to the right of the snapshot. This option provides the option to create a new database from this snapshot.
24. Copy the database endpoint to your clipboard, then switch back to your Ubuntu-1 instance. Select the remote terminal icon. A new SSH window will appear and you can now connect to your database instance from this instance. Enter the following command, replacing DATABASE_URL with the database endpoint you copied to your clipboard in the previous step. (Note: Make sure there is no space between -p and the password.)
mysql -h DATABASE_URL -u dbmasteruser -pSunny2DAY!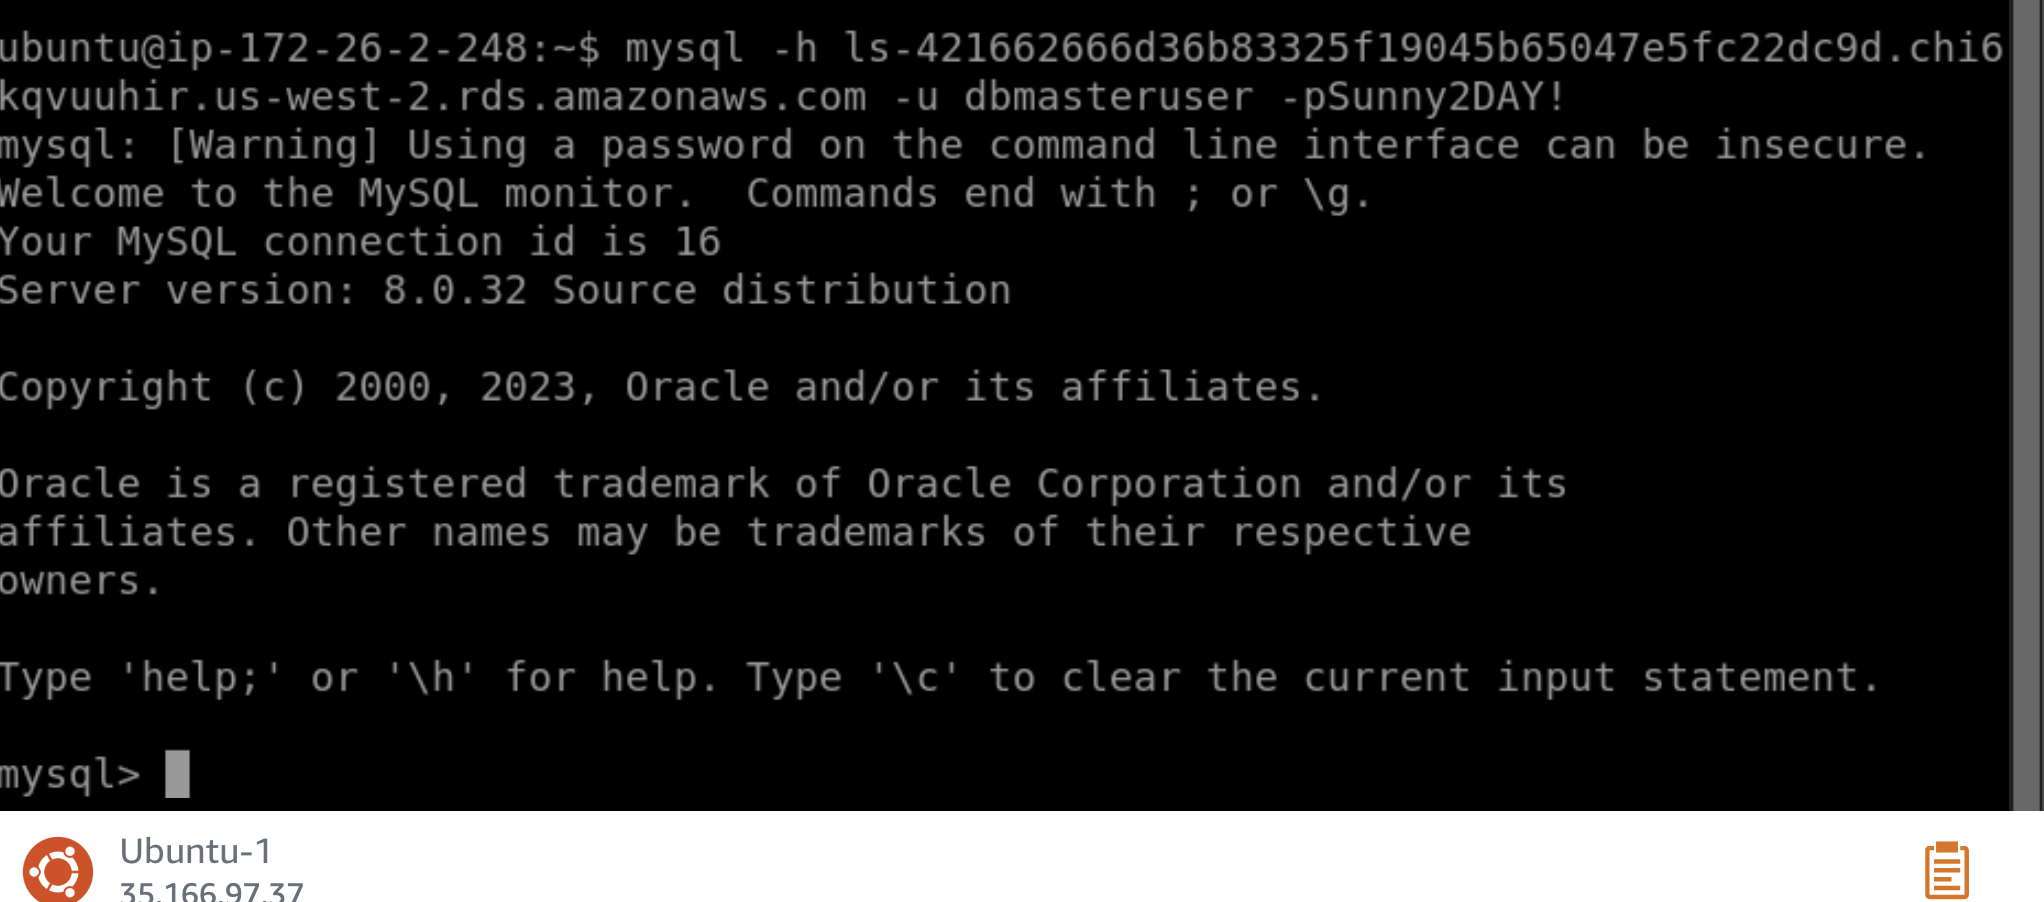
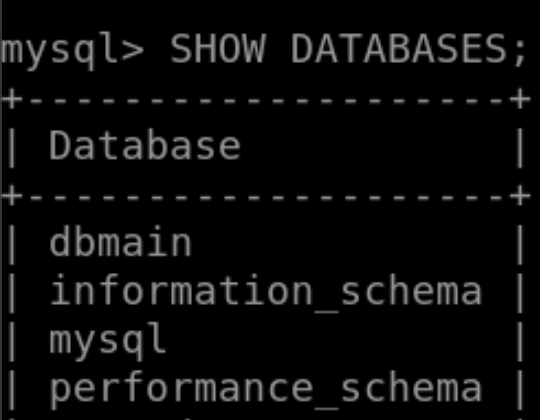
25. You will now see that you are connected to the MySQL instance. Run the command:
SHOW DATABASES;You will see the dbmain that you created during database deployment, along with several others used by the Lightsail database service.
26. Create another database in this instance using the following command:
CREATE DATABASE secondDB;
27. Grant your user dbmasteruser privileges on the new database by running the following command:
GRANT ALL PRIVILEGES ON secondDB.* TO 'dbmasteruser'@'%';The above code will grant your user all privileges on the secondDB database.

28. Finally, we can exit the remote SQL session by entering:
exit;Result
Congratulations on deploying and configuring your Lightsail database instance. You should now feel comfortable using Lightsail databases to power any application you build or deploy in Lightsail.