- Do you want to configure your domain's DNS records on Cloudflare quickly and securely?
- General steps
- Prerequisites
- Basic DNS concepts and common records
- Step-by-step: Setting up DNS records in Cloudflare
- Cloudflare API and Commands Samples
- Service-specific configuration
- Testing and troubleshooting
- Security tips and best practices
- Practical examples (common scenarios)
- Conclusion
- Frequently Asked Questions
Do you want to configure your domain's DNS records on Cloudflare quickly and securely?
In this step-by-step guide, you will learn how to add DNS records to your account. Cloudflare Set up, whether for a website, email, gaming services, or AI. This article contains practical examples, command-line commands, security tips, and troubleshooting methods so you can quickly and confidently configure your domain.
General steps
Summary of the main steps before going into details:
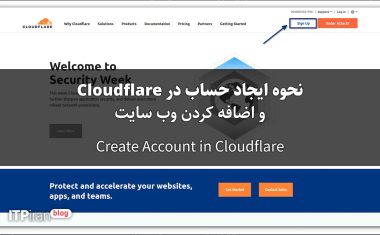
- Create or log in to an account Cloudflare
- Add a site and scan current DNS records
- Checking and modifying records (A, AAAA, CNAME, MX, TXT, SRV, etc.)
- Change nameservers in the registry to Cloudflare nameservers
- Testing and verifying the publication of security records and configurations (DNSSEC, HTTPS, WAF)
Prerequisites
Things you need before you start:
- Account access Cloudflare Dashboard (or create an account)
- Access to the domain registry panel (where you change nameservers)
- Access the server or host control panel to know the server IP (for A/AAAA records)
- Install command line tools for testing:
dig,nslookup
sudo apt update && sudo apt install dnsutils -yBasic DNS concepts and common records
A summary of important records and when you should use each.
A and AAAA
A: Mapping a domain name to an IPv4 address (example: example.com -> 203.0.113.10).
AAAA: Mapping to IPv6 address (example: example.com -> 2001:db8::1).
CNAME
CNAME is a reference of one name to another (example: www -> example.com). Shouldn't Place the CNAME at the root of the domain (apex); use A/AAAA instead.
MX
Mail Exchange records for the mail server. Example: MX 10 mail.example.com.
TXT
Used for SPF/DKIM/DMARC and ownership verification. SPF example: v=spf1 ip4:203.0.113.0/24 -all.
SRV
For specific services like VoIP or Minecraft. Example: _minecraft._tcp.example.com SRV 10 5 25565 mc-server.example.com.
NS
The nameservers responsible for the domain. When using Cloudflare, the registry's NS must be changed to the NSs provided by Cloudflare.
Proxied vs DNS-only (record obfuscation)
Cloudflare provides HTTP/HTTPS proxying with "orange cloud". If the record proxy The original IP is hidden and traffic passes through the Cloudflare network. For email or some games that require a direct connection to the IP, the record should be DNS-only Be.
Step-by-step: Setting up DNS records in Cloudflare
1. Add the site to Cloudflare
Log in to your Cloudflare dashboard and click “Add site.” Enter the domain without http/https; Cloudflare will automatically scan for existing records.
2. Review and modify scanned records
Review scanned records and remove or correct incomplete or outdated items.
Example of adding an A record:
- Type: A
- Name: @
- IPv4 address: 203.0.113.10
- TTL: Auto
- Proxy status: Proxy (for web) or DNS only (For email, SSH, games)
3. Adding important records (practical example)
Common examples:
- Web (proxy enabled): Type: A, Name: www, Content: 203.0.113.10, Proxy: Proxied
- Root: Type: A, Name: @, Content: 203.0.113.10, Proxy: Proxied
- Email: Type: MX, Name: @, Content: mail.example.com, Priority: 10 — Also A record for mail.example.com to the mail server IP and Proxy=DNS only
- SPF: Type: TXT, Name: @, Content: “v=spf1 ip4:203.0.113.0/24 include:spf.protection.example -all”
- DKIM/DMARC: Values provided by your email service (Gmail/Office365/ProtonMail)
4. Change nameservers in the domain registry
After verifying the records, Cloudflare will give you two NS (e.g. ado.ns.cloudflare.com and beti.ns.cloudflare.com). Replace these NSs in the domain registrar panel. If you registered the domain from your company, select Change Nameservers from the Domains section in the client panel and enter the Cloudflare NSs.
5. Waiting for propagation and review
Changing NS usually takes a few minutes to 48 hours (often under a few hours).
Sample check commands with dig:
dig example.com NS +short
dig @1.1.1.1 example.com A +short
You can also use online tools like WhatsMyDNS Use to examine global propagation.
Cloudflare API and Commands Samples
Installing testing tools
On Ubuntu:
sudo apt update && sudo apt install dnsutils -yTest with dig:
dig @1.1.1.1 example.com A +shortAdding a record with the Cloudflare API (curl example)
First, create an API Token with permission levels for Zone.Zone and Zone.DNS. Example of adding an A record with curl:
curl -X POST "https://api.cloudflare.com/client/v4/zones/<ZONE_ID>/dns_records" \
  -H "Authorization: Bearer <API_TOKEN>" \
  -H "Content-Type: application/json" \
  --data '{"type":"A","name":"test","content":"203.0.113.15","ttl":1,"proxied":false}'
The JSON response will contain the ID of the created record. This method is suitable for CI/CD automation and bulk record management.
Service-specific configuration
Website and SSL
In the Cloudflare SSL/TLS section, select the appropriate mode:
- Flexible: Communication between the user and Cloudflare HTTPS and between Cloudflare and origin HTTP — for quick but risky testing.
- Full: HTTPS between Cloudflare and origin with a self-signed or trusted certificate.
- Full (strict): Full HTTPS and certificate validation by Cloudflare (recommended).
To use Let's Encrypt with DNS challenge when using a proxy you can use certbot + dns-cloudflare plugin:
sudo apt install certbot python3-certbot-dns-cloudflare
certbot certonly --dns-cloudflare --dns-cloudflare-credentials ~/.secrets/cloudflare.ini -d example.com -d *.example.com
Email and records
Email records should not be proxied. Cloudflare recommends that you use the MX record and A records for mail. DNS-only Hold on.
Also add SPF, DKIM, and DMARC as TXT.
Gaming and Trading (Low Ping)
For gaming and trading, ping and stability are crucial:
- Game service UDP/TCP records should usually be DNS-only Unless you use services like Cloudflare Spectrum.
- Choosing a server location close to your target users helps reduce RTT.
- Using BGP Anycast and CDN is useful for reducing packet loss and improving routing.
Testing and troubleshooting
Useful tools: dig, nslookup, host.
dig @1.1.1.1 example.com ANY +noall +answer
dig MX example.com +short
Common errors and solutions:
- Wrong A record → 404 or cannot connect
- Proxied record but requires direct connection (e.g. SSH) → should be DNS-only
- MX is registered but there is no A record for the mail → Email is not delivered
Clear local cache:
sudo systemd-resolve --flush-cachesUse logs to check for server errors (e.g. for web: /var/log/nginx/error.log Or /var/log/apache2/error.log).
Security tips and best practices
Suggestions for increasing security and stability:
- Activation DNSSEC In Cloudflare and in the registry panel (preventing DNS spoofing)
- Use of API Token With the lowest level of access required and secure storage of tokens
- Activation 2FA For Cloudflare account and domain registry
- Hide IP origin by enabling Cloudflare proxy (for web) and enabling WAF and Rate Limiting
- Setting up Firewall Rules, Access Rules, and Cloudflare Access (Zero Trust) for critical services
- Set PTR for email servers if you have a dedicated IP to avoid being marked as spam
Practical examples (common scenarios)
Scenario 1 — Web hosting + separate email
Recommended settings:
- web server: A record proxied → example.com → 203.0.113.10 (Proxied)
- www → CNAME → example.com (Proxied)
- mail → A → 203.0.113.20 (DNS-only)
- MX → mail.example.com (priority 10)
- TXT SPF: “v=spf1 ip4:203.0.113.20 -all”
Scenario 2 — Game Server (Minecraft)
Recommended settings:
- mc.example.com → A → 203.0.113.30 (DNS-only)
- SRV for direct connection: _minecraft._tcp.example.com SRV 10 5 25565 mc.example.com
Conclusion
Setting up your DNS records correctly in Cloudflare will increase the security, stability, and speed of your services. By following the tips for proxies, email records, and SSL/TLS, you can enjoy the benefits of the global network.
If you need help changing your nameservers or choosing the right configuration for trading, gaming, or AI, you can use the relevant technical services to implement DNS and network settings for you.