
Introduction
Typically, a command-line tool in a terminal or terminal emulator software that includes an SSH client is used to connect to an SSH server. Some tools, such as WebSSH in Python, allow you to connect via SSH and run a terminal directly in a web browser.
This feature is useful in a variety of situations. This is especially helpful in live presentations or demos where it is difficult to share a regular terminal window in a way that is easily understood. It is also useful in educational environments when providing access to people who are not familiar with the command line, as it does not require installing software on their machines (especially on Windows, where the default options are problematic). Finally, Python WebSSH is particularly portable and requires no other dependencies to set up, other than Python. Other web-based terminal stacks can be more complex and Linux-specific.
In this tutorial, you will set up WebSSH and connect to it via SSH in your browser. Then, optionally secure it with an SSL certificate and place it behind an Nginx reverse proxy for deployment in production.
Prerequisites
- A Windows, Mac, or Linux environment with an SSH service running. It's useful to run WebSSH locally, but if you don't have an SSH service on your local machine, you can use a remote Linux server.
- The Python programming language is installed with pip, its package manager. To install Python and pip on Ubuntu, you can refer to the first part of this tutorial.
- Optionally, to enable HTTPS in the browser, you will need SSL certificates and your domain name. You can obtain them using Certbot in standalone mode.
Step 1 – Install WebSSH
If you have Python and pip installed, you should be able to install Python packages from PyPI (the Python software repository). WebSSH is designed to be installed and run directly from the command line, so there is no need to set up another virtual environment like the one in Python 3 installation tutorial As discussed, no. Virtual environments are more useful when you're working on your own projects, not when you're installing system tools.
To install the WebSSH package, use the following command:
sudo pip3 install websshThe output should be as follows:
Output
…
Successfully built webssh
Installing collected packages: tornado, pycparser, cffi, pynacl, paramiko, webssh
Successfully installed cffi-1.15.1 paramiko-2.11.0 pycparser-2.21 pynacl-1.5.0 tornado-6.2 webssh-1.6.0
Using sudo will install the wssh command globally. You can check where wssh is installed using the which command:
which wsshThe output should look something like this:
/usr/local/bin/wsshYou now have WebSSH installed. Next, you will run and connect to it. However, you need to add a firewall rule first. WebSSH runs on port 8888 by default. If you are using ufw as your firewall, allow that port through ufw:
sudo ufw allow 8888
Step 2 – Run WebSSH and connect to it
If you are running WebSSH on a local machine, you can run the wssh command without any additional arguments. If you are running WebSSH on a remote server, you must use the -s option. --fbidhttp=False Use to allow remote connections over HTTP. This connection is not secure if you are using an unsecured network, but it is useful for a demo and you will secure WebSSH in the next steps.
wssh --fbidhttp=FalseNow you can connect to WebSSH and log in. At the address your_domain:8888 In your web browser, go to (if you are running locally, from) localhost:8888 The WebSSH login page should be displayed.
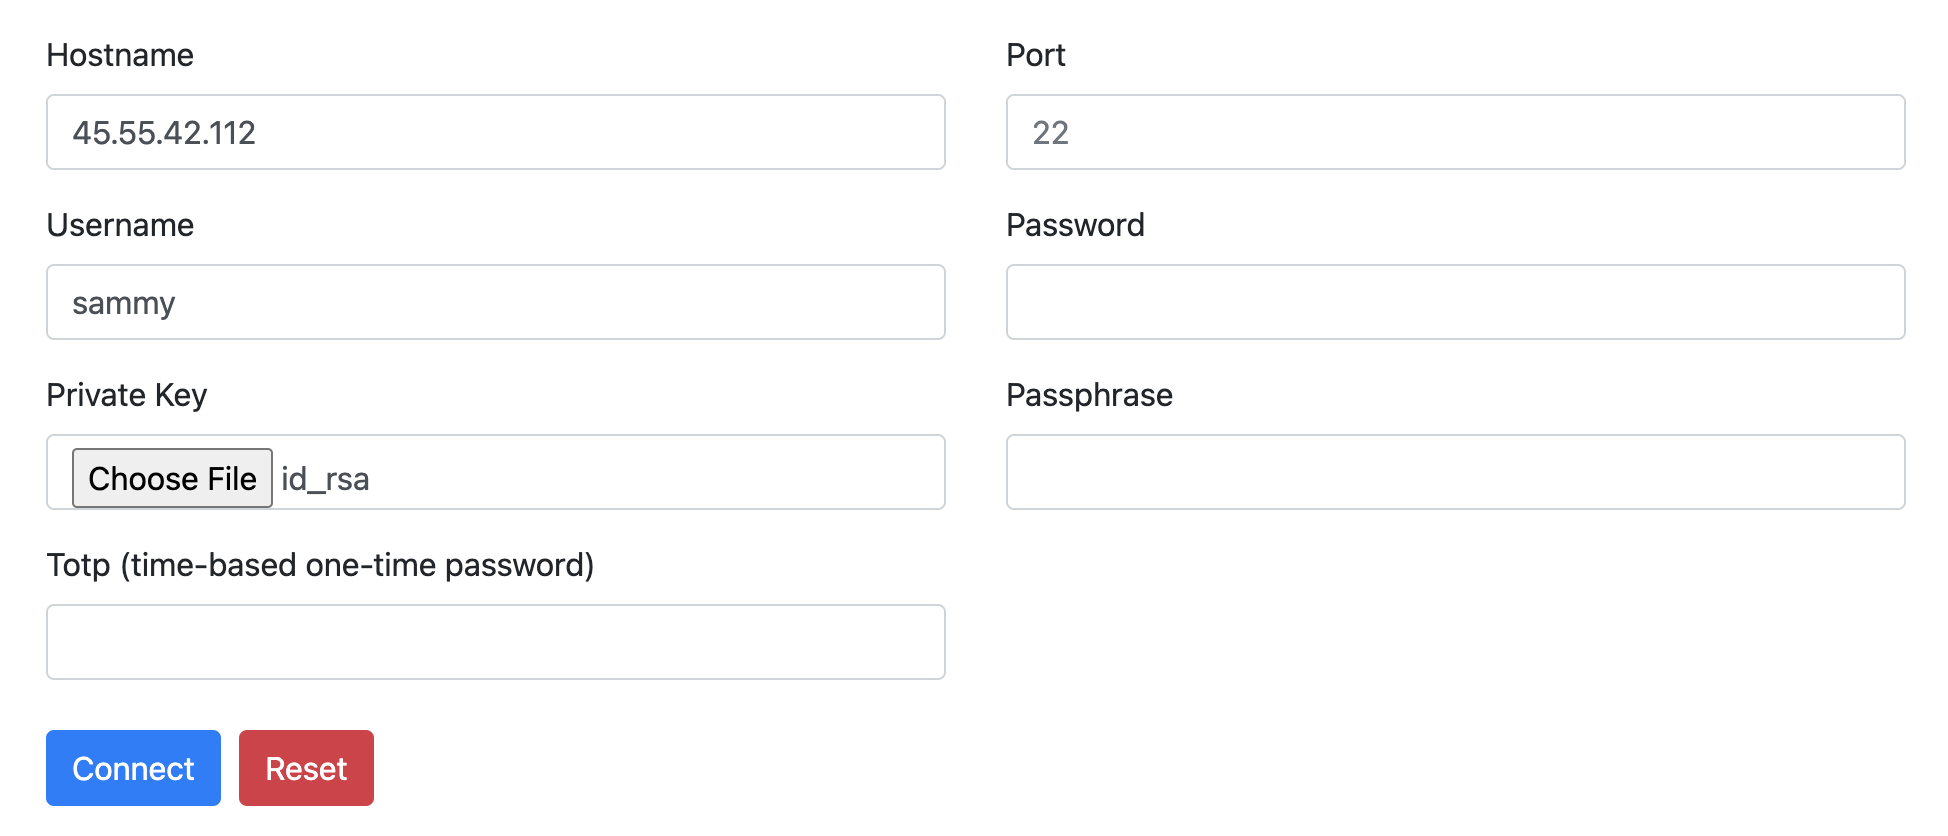
Enter your usual SSH credentials. If you followed the DigitalOcean server setup guide, you should be using key-based authentication, not passwords. So, you only need to specify the server hostname, your username, and the SSH key, which should be in the folder .ssh/ located in your home directory (usually named id_rsa is).
Note: As you might guess from manually specifying the hostname, WebSSH can also be used to connect to servers other than the one it is running on. For this tutorial, it will be running on the same server you are connecting to.
To connect, click the button. Connect Click and you should see your default terminal welcome screen.
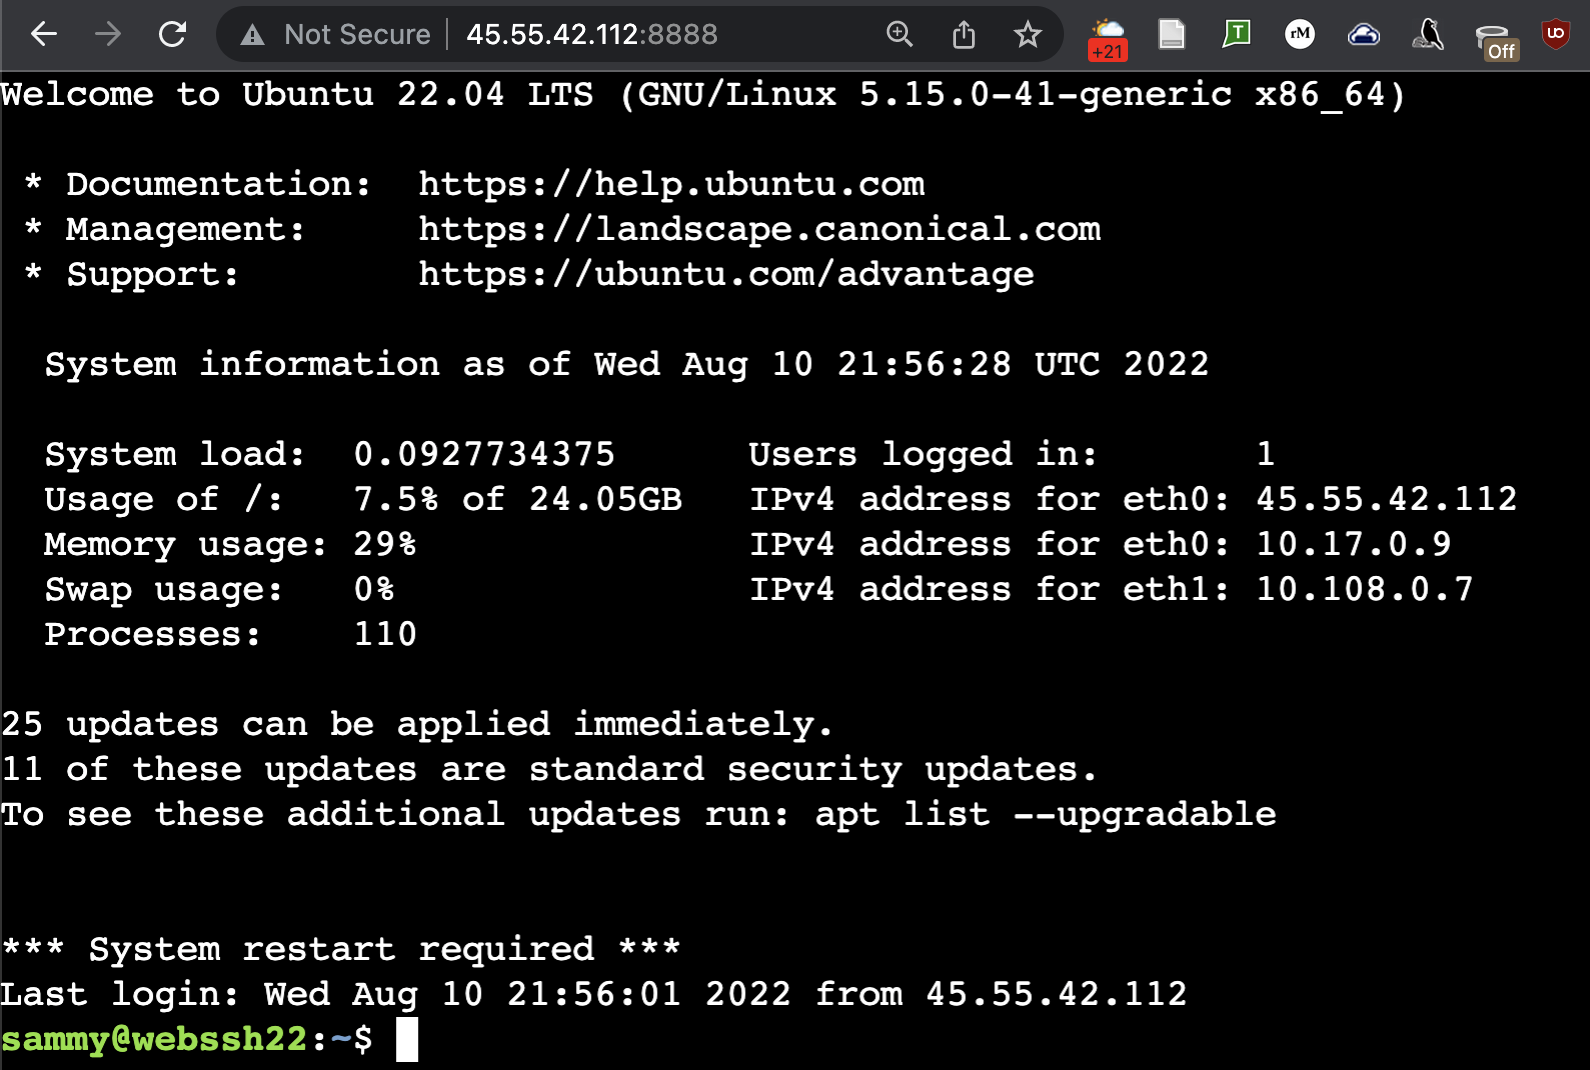
At this point, you can use your terminal as usual, as if you were connected via SSH. Multiple users can also connect via a WebSSH instance simultaneously. You may need this if you have WebSSH on a local machine just for streaming or recording video. You can type Ctrl+C in the terminal where you launched WebSSH (not the WebSSH terminal) to stop the WebSSH server when it is finished.
If you are running on a remote server, you do not want to use WebSSH in production behind an insecure HTTP connection. Although you are still protected by the SSH service's authentication mechanism, using an SSH connection over HTTP carries a significant security risk and could potentially allow others to steal your SSH credentials. In the next steps, you will secure your WebSSH instance so that it is no less secure than a regular SSH connection.
Step 3 – (Optional) Secure WebSSH with an SSL Certificate
To complete this step, you must have already obtained your domain and SSL certificates. One way is to use Certbot in standalone mode.
After receiving the certificates, verify that they are located in the following path:
sudo ls /etc/letsencrypt/live/your_domainTo run WebSSH with HTTPS support, you need to provide it with the path to the certificate and key:
sudo wssh --certfile='/etc/letsencrypt/live/your_domain/fullchain.pem' --keyfile='/etc/letsencrypt/live/your_domain/privkey.pem''In your web browser, go to https://your_domain:4433 Go ahead and you should see the same interface you saw in the previous step, now with HTTPS support.
Step 4 – (Optional) Run WebSSH behind Nginx reverse proxy
By putting a web server like Nginx in front of your web applications, you can improve performance and simplify site security. You will install Nginx and configure it to reverse proxy requests to WebSSH.
First, update your package list, then install Nginx:
sudo apt update nginx
sudo apt install nginx
If you are using the ufw firewall, you need to change its configuration to allow access to the default HTTP/HTTPS ports (ports 80 and 443):
sudo ufw allow “Nginx Full”Then copy the Nginx configuration file to the path /etc/nginx/sites-available/webssh Create:
sudo nano /etc/nginx/sites-available/websshEnter the configuration similar to the following:
server {
listen 80 default_server;
listen [::]:80 default_server;
server_name your_domain www.your_domain
root /var/www/html;
access_log /var/log/nginx/webssh.access.log;
error_log /var/log/nginx/webssh.error.log;
location / {
proxy_pass http://127.0.0.1:8888;
proxy_http_version 1.1;
proxy_read_timeout 300;
proxy_set_header Upgrade $http_upgrade;
proxy_set_header Connection "upgrade";
proxy_set_header Host $http_host;
proxy_set_header X-Real-IP $remote_addr;
proxy_set_header X-Real-PORT $remote_port;
}
listen 443 ssl;
# RSA certificate
ssl_certificate /etc/letsencrypt/live/your_domain/fullchain.pem;
ssl_certificate_key /etc/letsencrypt/live/your_domain/privkey.pem;
# Redirect non-https traffic to https
if ($scheme != "https") {
return 301 https://$host$request_uri;
}
}
You can read this configuration as having three main “blocks” to it. The first block, before the location/ line, contains an Nginx configuration to serve a website on the default HTTP port, 80. The location/ block contains the configuration to proxy incoming connections to WebSSH, which runs internally on port 8888, while maintaining SSL. The configuration at the end of the file, after the location/ block, loads your LetsEncrypt SSL key pairs and redirects HTTP connections to HTTPS.
Save and close the file. If you're using nano, press Ctrl+X, then press Y and then Enter when prompted.
Next, you need to enable this new configuration. Nginx's convention is to create symbolic links (like shortcuts) from files in sites/ to another folder called sites-enabled/ when you decide to enable or disable them. Create this link, using full paths for clarity:
sudo ln -s /etc/nginx/sites-available/webssh /etc/nginx/sites-enabled/websshBy default, Nginx includes another configuration file in /etc/nginx/sites-available/default that is linked to /etc/nginx/sites-enabled/default , which also provides its default index page. You want to disable that rule by removing it from /sites-enabled , as it conflicts with your new WebSSH configuration:
sudo rm /etc/nginx/sites-enabled/default
Note: The Nginx configuration in this tutorial is designed to serve a single application, WebSSH. You can extend this Nginx configuration to serve multiple applications on a single server by following the Nginx documentation.
Then, test the Nginx configuration:
sudo nginx -tOutput
nginx: the configuration file /etc/nginx/nginx.conf syntax is ok
nginx: configuration file /etc/nginx/nginx.conf test is successfulAnd restart the Nginx service:
sudo systemctl restart nginxFinally, you can remove the firewall rules you previously created for direct WebSSH access, as all traffic will now be handled by Nginx over standard HTTP/HTTPS ports:
sudo ufw delete allow 8888
sudo ufw delete allow 4433
This time you don't need to provide the certificate and key paths, as Nginx will handle that. Then, navigate to your_domain in a web browser.
Note that WebSSH is now served over HTTPS via Nginx without the need to specify a port. At this point, you have automated everything except the wssh setup itself. You will do that in the last step.
Step 5 – (Optional) Create a Systemd Service for WebSSH
Deploying server-side applications that don't automatically run in the background can be impractical at first, as you have to start them directly from the command line each time. The solution is to start your own background service.
To do this, you create a single file that can be used by your server's init system. In almost all modern Linux distributions, the init system is called Systemd, and you can interact with it using the systemctl command.
If WebSSH is still running in your terminal, press Ctrl+C to stop it. Then, using nano or your favorite text editor, open a new file called /etc/systemd/system/webssh.service:
sudo nano /etc/systemd/system/webssh.service
Your unit file needs at least one [Unit] section, one [Service] section, and one [Install] section:
[Unit]
Description=WebSSH terminal interface
After=network.target
[Service]
User=www-data
Group=www-data
ExecStart=wssh
[Install]
WantedBy=multi-user.target
This file can be divided as follows:
- The [Unit] section contains a plain text description of your new service as well as an After hook that specifies when it should run at system startup, in this case after your server's network interfaces have come up.
- The [Service] section specifies which command should be run and which user should run it. In this case, www-data is the default Nginx user on the Ubuntu server, and wssh is the command itself.
- The [install] section only contains the line WantedBy=multi-user.target, which works in conjunction with the After line in the [unit] section to ensure that the service starts when the server is ready to accept user logins.
After saving the file, start the service and enable it to run at system startup:
sudo systemctl start webssh
sudo systemctl enable webssh
Use systemctl status webssh to verify that it started successfully. You should get the same output as when you first ran the command in the terminal.
sudo systemctl status webssh
Output
● webssh.service - WebSSH terminal interface
Loaded: loaded (/etc/systemd/system/webssh.service; enabled; vendor preset: enabled)
Active: active (running) since Thu 2022-08-11 22:08:25 UTC; 2s ago
Main PID: 15678 (wssh)
Tasks: 1 (limit: 1119)
Memory: 20.2M
CPU: 300ms
CGroup: /system.slice/webssh.service
└─15678 /usr/bin/python3 /usr/local/bin/wssh
Aug 11 22:08:25 webssh22 systemd[1]: Started WebSSH terminal interface.
Aug 11 22:08:26 webssh22 wssh[15678]: [I 220811 22:08:26 settings:125] WarningPolicy
Aug 11 22:08:26 webssh22 wssh[15678]: [I 220811 22:08:26 main:38] Listening on :8888 (http)
You can now reload https://your_domain in your browser and you should get the WebSSH interface once again. From now on, WebSSH and Nginx will automatically restart with your server and run in the background.
Result
In this tutorial, you installed WebSSH and provided a portable solution for providing a command-line interface in a web browser. You then enhanced its deployment by adding SSL, an Nginx reverse proxy, and creating a systemd service. This model is very useful for deploying small server-side applications, especially in the context of SSH security that uses key pairs for authentication.