
مقدمة
أشرطة التمرير هي سلسلة من الإطارات، يمكن تمرير كل إطار منها بالتسلسل. يمكن أن تكون الإطارات في شريط التمرير صورًا أو مقاطع فيديو أو حتى عناصر HTML (مثل الأوصاف أو التعليقات). أشرطة التمرير موجودة في العديد من مواقع الويب الحديثة. يستخدمها المطورون لعرض معلومات حول موقع الويب دون الحاجة إلى مساحة كبيرة.
على سبيل المثال، لنفترض أن مطورًا يطور موقعًا إلكترونيًا لمنتج، فقد يرغب في عرض شهادات أو تقييمات المستخدمين ليثق بها ويشتري منتجه. يمكن للمطور إنشاء شريط تمرير يُمكّن المستخدمين من تصفح كل تقييم وقراءته بسهولة. ويمكن تطبيق الأمر نفسه على صور المنتجات، حيث يمكن للمطور إنشاء شريط تمرير لصور المنتجات ليتمكن المستخدم من رؤية المنتج بزاوية 360 درجة.
المتطلبات الأساسية
سنتعلم كيفية إنشاء شريط تمرير صور CSS أساسي باستخدام HTML وCSS وJavaScript. لفهم ما يجري وما نفعله بشكل كامل، هناك بعض المفاهيم التي يجب معرفتها مسبقًا. دعونا نلقي نظرة عليها.
- HTML: يجب أن تكون لديك معرفة أساسية بلغة HTML، مثل العناصر والوسوم. سنستخدم مجموعة متنوعة من الوسوم والعناصر لإنشاء شريط تمرير، لذا يجب أن تعرف دور كل وسم أو عنصر فيه.
- CSS: سنستخدم CSS بكثافة لإنشاء شريط التمرير. يجب أن تكون على دراية ببعض مفاهيم CSS الوسيطة، مثل التكديس، ومؤشر Z، والموضع، والرسوم المتحركة. ستكون جميع هذه المفاهيم ضرورية عند إنشاء شريط التمرير.
- جافا سكريبت: يجب أن تكون على دراية بأساسيات جافا سكريبت، مثل إعلان المتغيرات، واستخدام حلقة for، ومعالجة DOM. تُستخدم هذه الأدوات للتحكم في شريط التمرير وإنشاء التأثيرات.
بعد أن تتعرف على جميع هذه المفاهيم، لنبدأ بإنشاء شريط تمرير. سنتناول كل مفهوم خطوة بخطوة، ونشرح سبب قيامنا بذلك.
الخطوة 1: إنشاء تخطيط شريط تمرير الصورة الأساسي باستخدام كود HTML
لنُنشئ الهيكل الأساسي لشريط التمرير. كما ذكرنا سابقًا، أشرطة التمرير عبارة عن مجموعة من الإطارات. سنُنشئ شريط تمرير صورة CSS.
أولاً، ننشئ عنصر div الرئيسي الذي يحتوي على صور ووظائف شريط التمرير. كما نضيف بعض التصميمات، مثل تغيير لون الخلفية وضبط ارتفاع وعرض عنصر div الرئيسي.
<!DOCTYPE html>
<html>
<head>
<title>Slider in CSS</title>
<style>
</style>
</head>
<body>
<div id="parent-container">
<!-- This div will contain all images and buttons we will be using for Slider
-->
</div>
</body>
</html>
وبمجرد الانتهاء من ذلك، فلننتقل إلى الجزء التالي.
الخطوة 2: إضافة أزرار السابق والتالي
تحتوي أشرطة التمرير على زرين: السابق والتالي. يُستخدمان للتنقل عبر إطارات أشرطة التمرير. سنضيف أزرارًا أساسية إلى قسمنا الرئيسي. ستساعد هذه الأزرار المستخدم على التنقل عبر الصور في دائرة العرض. للتبسيط، سنستخدم < و > كنص للزر، اللذين يمثلان السابق والتالي على التوالي.
بالإضافة إلى إضافة أزرار HTML الأساسية، سنقوم أيضًا بتعديلها قليلًا لتكون محاذية رأسيًا بالنسبة لعنصر div المركزي. هذا لتسهيل التمرير عبر شريط التمرير. سنستخدم الوضع النسبي لمحاذاة الأزرار رأسيًا.
<!DOCTYPE html>
<html>
<head>
<title>Slider in CSS</title>
<style>

body{
background-color: rgb(58, 58, 58);
margin-top: 100px;
}
.carousel-container {
width: 600px;
height: 400px;
position: relative;
margin: 0 auto;

}

.navigation-buttons .previous {
position: absolute;
z-index: 10;
font-size: 25px;
top: 40%;
left: 10px;
font-weight: 700;
}

.navigation-buttons .next {
right: 10px;
position: absolute;
font-size: 25px;
z-index: 10;
top: 40%;
}

.navigation-buttons .nav-btn {
background: rgba(255, 255, 255, 0.55);
cursor: pointer;
border-radius: 50%;
width: 30px;
height: 30px;
display: flex;
justify-content: center;
align-items: center;
padding: 5px;
box-shadow: 2px 2px 10px rgba(0, 0, 0, 0.4);
}

.navigation .nav-btn:hover {
background: white;
}

</style>
</head>
<body>

<div id="parent-container">

<div class="navigation-buttons">
<div class="previous nav-btn"><</div>
<div class="next nav-btn">></div>
</div>

</div>

</body>
</html>
الناتج
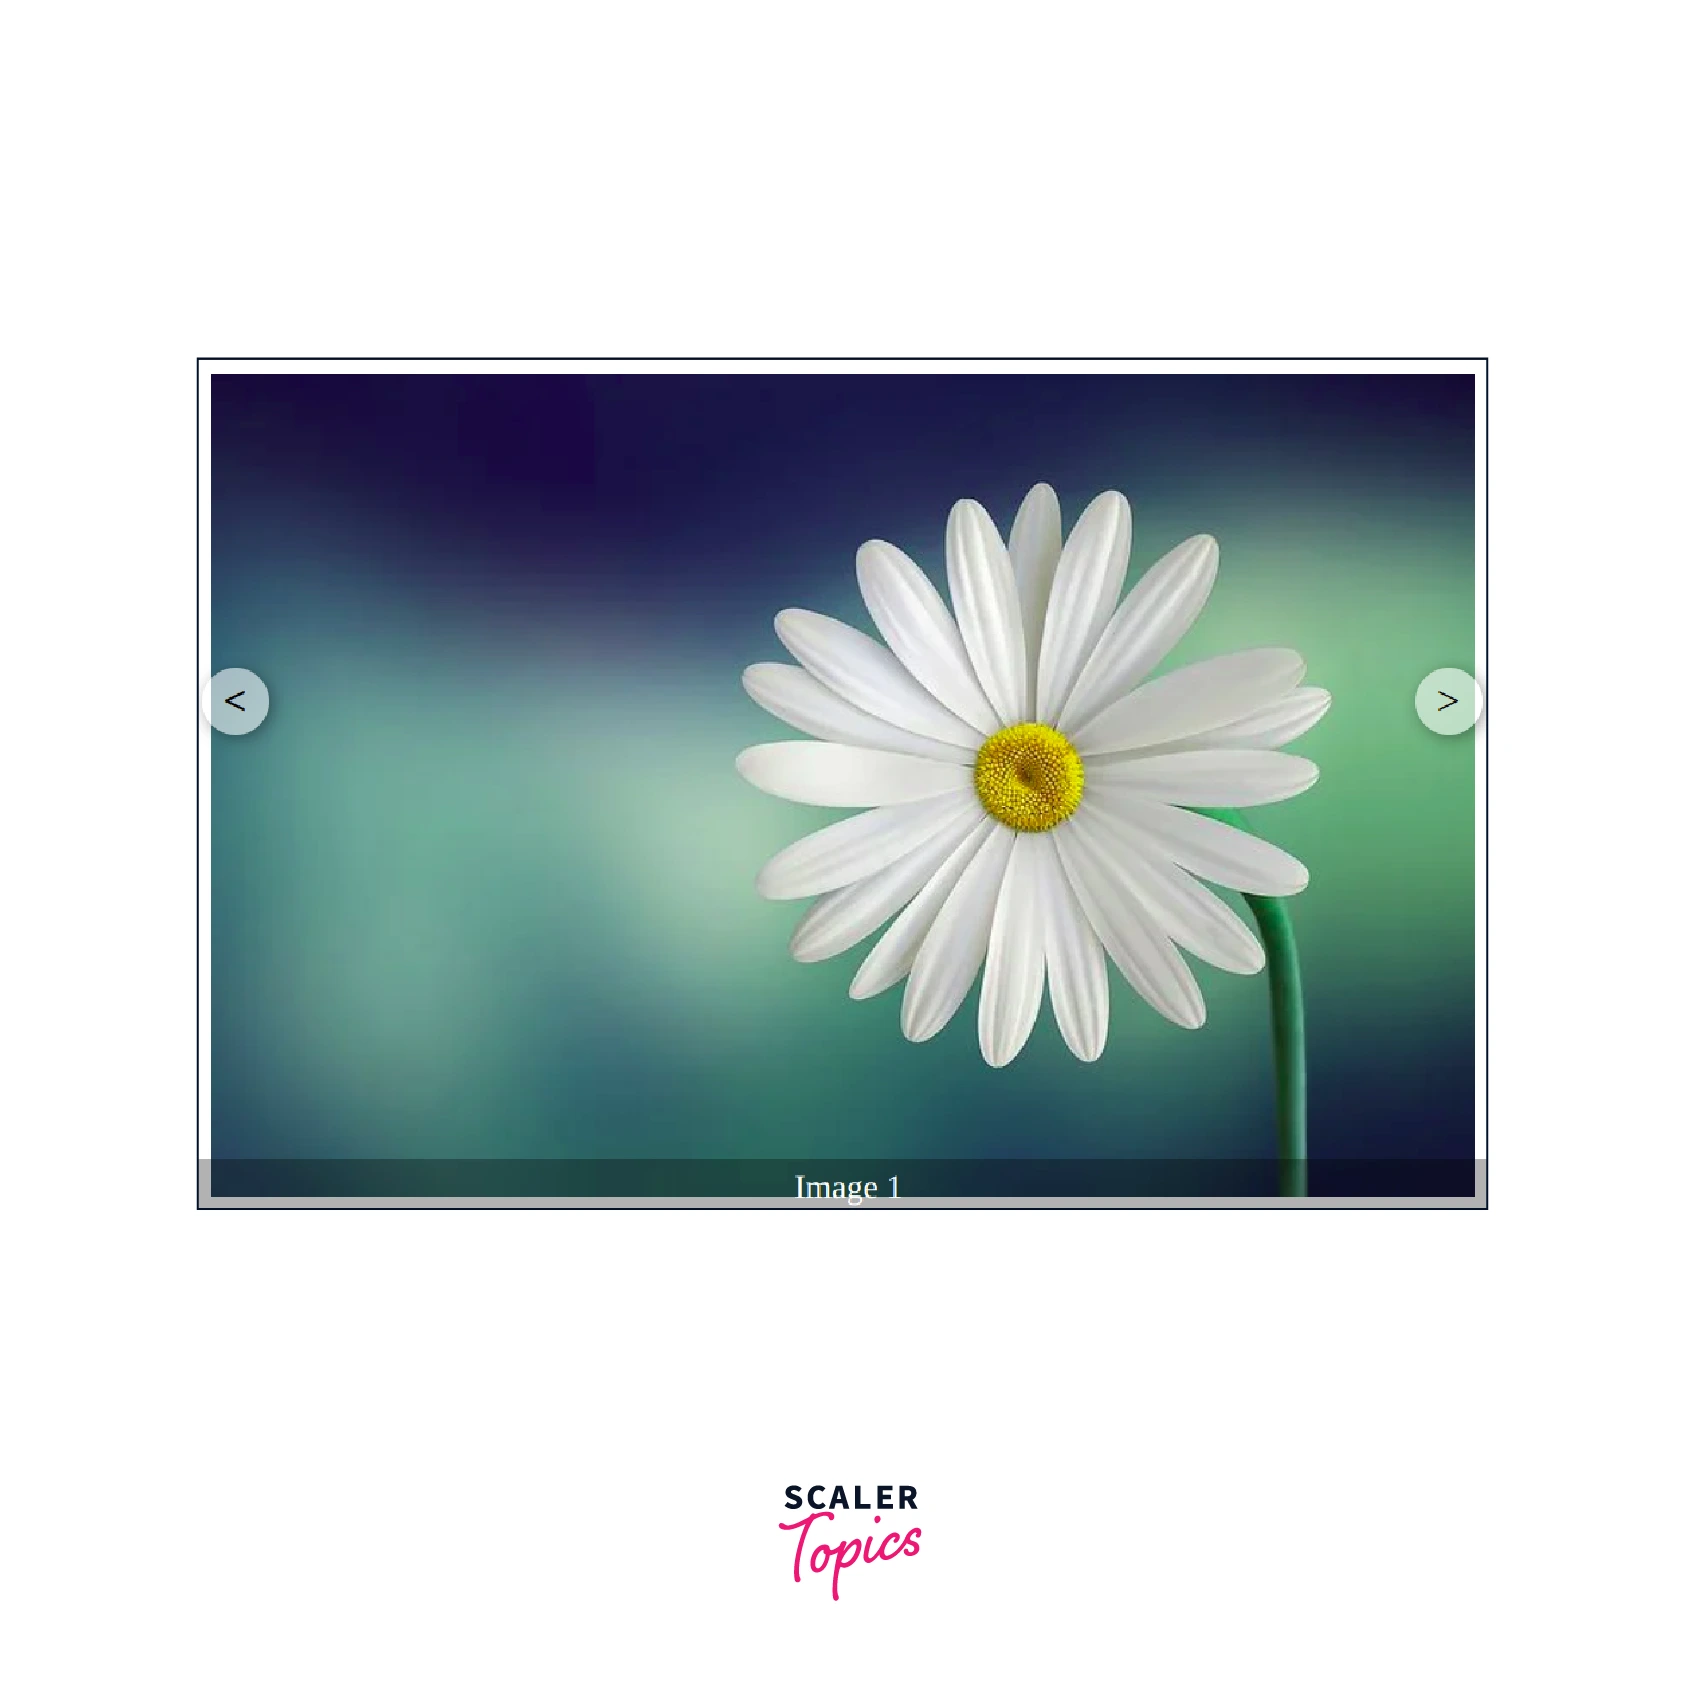
الخطوة 3: أضف الصور والنصوص المطلوبة إلى شريط التمرير
بعد إضافة الأزرار، حان وقت إضافة الصور. سنستخدم صور الزهور لإنشاء شريط تمرير صور CSS. سيتم تكديس الصور فوق بعضها البعض باستخدام دالتي الموضع ومؤشر Z. ولأننا نحتاج صورة واحدة فقط لتكون مرئية، سنستخدم فئة أساسية ونضبط خاصية رؤيتها على "مرئية". سيتم إخفاء باقي الصور لمنع ظهورها للمستخدم.
يحتوي شريط التمرير أيضًا على نص يوضح الصورة التي يشاهدها المستخدم حاليًا. يساعد هذا المستخدم على معرفة عدد الصور في دائرة الصور وترتيبها.
<!DOCTYPE html>
<html>
<head>
<title>Slider in CSS</title>
<style>

body{
background-color: rgb(58, 58, 58);
margin-top: 100px;
}
.carousel-container {
width: 600px;
height: 400px;
position: relative;
margin: 0 auto;

}

.navigation-buttons .previous {
position: absolute;
z-index: 10;
font-size: 25px;
top: 40%;
left: 10px;
font-weight: 700;
}

.navigation-buttons .next {
right: 10px;
position: absolute;
font-size: 25px;
z-index: 10;
top: 40%;
}

.navigation-buttons .nav-btn {
background: rgba(255, 255, 255, 0.55);
cursor: pointer;
border-radius: 50%;
width: 30px;
height: 30px;
display: flex;
justify-content: center;
align-items: center;
padding: 5px;
box-shadow: 2px 2px 10px rgba(0, 0, 0, 0.4);
}

.navigation .nav-btn:hover {
background: white;
}

.slider-carousel {
margin-top: 20px;
transition: all 0.3s ease;

}
.slider-carousel img {
width: 100%;
transition: all 0.3s ease;
border:8px solid white;
}

.images {
position: absolute;
display: none;
}

.main {
display: block;
}

.image-text {
position: absolute;
bottom: 0;
width: 103%;
display: flex;
font-size: 20px;
justify-content: center;
align-items: center;
color: rgb(255, 255, 255);
background: rgba(0, 0, 0, 0.3);
height: 35px;
}

</style>
</head>
<body>

<div id="parent-container">
<div class="navigation-buttons">
<div class="previous nav-btn"><</div>
<div class="next nav-btn">></div>
</div>

<div class="slider-carousel">
<div class="images main">
<img src="https://cdn.pixabay.com/photo/2015/04/19/08/32/marguerite-729510__480.jpg" alt="flower 1" />
<div class="image-text">Image 1</div>
</div>
<div class="images">
<img src="https://cdn.pixabay.com/photo/2014/02/27/16/10/tree-276014_960_720.jpg" alt="flower 2" />
<div class="image-text">Image 2</div>
</div>
<div class="images">
<img src="https://cdn.pixabay.com/photo/2015/04/23/22/00/tree-736885_960_720.jpg" alt="flower 3" />
<div class="image-text">Image 3</div>
</div>
</div>
</div>
</body>
</html>
الناتج
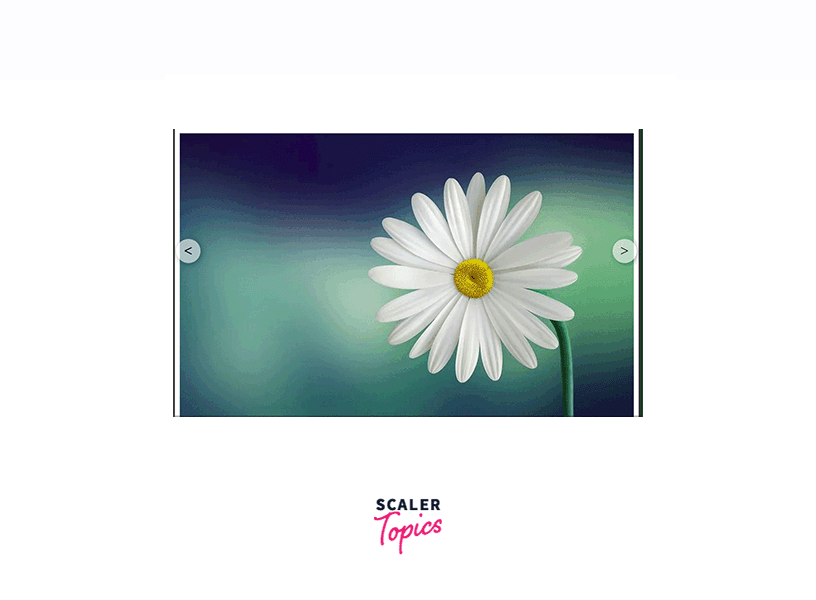
الخطوة 4: تمكين الزرين باستخدام كود JavaScript
لقد أنشأنا فئة شريط التمرير وأضفنا إليها جميع الصور. الآن، نحتاج إلى تفعيل زري "السابق" و"التالي". سنستخدم جافا سكريبت.
أولاً، نحتاج إلى إضافة مُستمع أحداث إلى هذه الأزرار. في كل مرة ينقر فيها المستخدم على الزر السابق أو التالي، يُنفَّذ إجراء مرتبط بذلك الزر. فكيف سنفعل ذلك؟
لقد استخدمنا الصنف الرئيسي لتحديد الصورة التي يجب أن تكون مرئية للمستخدم. علينا التحكم بالصورة التي تحمل هذا الصنف. سيتم إخفاء أي صورة أخرى، وستكون الصورة التي تحمل الصنف الرئيسي فقط هي المرئية للمستخدم. لتحقيق ذلك، سنستخدم معالجة DOM. تساعدنا معالجة DOM على إزالة الصنف الرئيسي من صورة موجودة وإضافته إلى صورة جديدة.
الآن لتحديد أي صورة يجب أن تحتوي على الفئة الرئيسية، نستخدم مستمعي الأحداث للأزرار السابقة واللاحقة. نحتاج أولاً إلى الحصول على جميع الصور في شريط التمرير. يمكننا أن نرى أن دائري شريط التمرير الرئيسي يحتوي على تقسيم للصور. يمكننا الحصول على هذا باستخدام محدد الاستعلام في DOM. الآن عندما يكون لدينا جميع عناصر div للصور، نحتاج إلى تحديد العنصر المناسب وإضافة الفئة الرئيسية إليه. لن تحتوي البقية على فئة رئيسية وبالتالي ستكون غير مرئية للمستخدم. يمكننا تهيئة متغير يشير في البداية إلى 0. يخبرنا هذا المتغير أي صورة مرئية حاليًا للمستخدم. في كل مرة ينقر فيها المستخدم على التالي أو السابق، نقوم بزيادة أو تقليل قيمة المتغير وفقًا لذلك. إذا كانت القيمة 0 ونقر المستخدم على القيمة السابقة، فإننا نغير القيمة إلى (عدد الصور في div - 1). وبالمثل، إذا كان المتغير موجودًا في الصورة الأخيرة ونقر المستخدم على التالي، فإننا نغير القيمة إلى 0.
<!DOCTYPE html>
<html>
<head>
<title>Slider in CSS</title>
<style>

body{
background-color: rgb(58, 58, 58);
margin-top: 100px;
}
.carousel-container {
width: 600px;
height: 400px;
position: relative;
margin: 0 auto;

}

.navigation-buttons .previous {
position: absolute;
z-index: 10;
font-size: 25px;
top: 40%;
left: 10px;
font-weight: 700;
}

.navigation-buttons .next {
right: 10px;
position: absolute;
font-size: 25px;
z-index: 10;
top: 40%;
}

.navigation-buttons .nav-btn {
background: rgba(255, 255, 255, 0.55);
cursor: pointer;
border-radius: 50%;
width: 30px;
height: 30px;
display: flex;
justify-content: center;
align-items: center;
padding: 5px;
box-shadow: 2px 2px 10px rgba(0, 0, 0, 0.4);
}

.navigation .nav-btn:hover {
background: white;
}

.slider-carousel {
margin-top: 20px;
transition: all 0.3s ease;

}
.slider-carousel img {
width: 100%;
transition: all 0.3s ease;
border:8px solid white;
}

.images {
position: absolute;
display: none;
}

.main {
display: block;
}

.image-text {
position: absolute;
bottom: 0;
width: 103%;
display: flex;
font-size: 20px;
justify-content: center;
align-items: center;
color: rgb(255, 255, 255);
background: rgba(0, 0, 0, 0.3);
height: 35px;
}

</style>
</head>
<body>

<div id="parent-container">

<div class="navigation-buttons">
<div class="previous nav-btn"><</div>
<div class="next nav-btn">></div>
</div>

<div class="slider-carousel">
<div class="images main">
<img src="https://cdn.pixabay.com/photo/2015/04/19/08/32/marguerite-729510__480.jpg" alt="flower 1" />
<div class="image-text">Image 1</div>
</div>
<div class="images">
<img src="https://cdn.pixabay.com/photo/2014/02/27/16/10/tree-276014_960_720.jpg" alt="flower 2" />
<div class="image-text">Image 2</div>
</div>
<div class="images">
<img src="https://cdn.pixabay.com/photo/2015/04/23/22/00/tree-736885_960_720.jpg" alt="flower 3" />
<div class="image-text">Image 3</div>
</div>
</div>

</div>

<script>

const previous = document.querySelector('.previous');
const next = document.querySelector('.next');
const images = document.querySelector('.slider-carousel').children;
const totalImages = images.length;
let currentIndex = 0;


// Event Listeners to previous and next buttons
previous.addEventListener('click', () => {
previousImage()
})

next.addEventListener('click', () => {
nextImage();
})


// Function to go to next Image
function nextImage(){

images[currentIndex].classList.remove('main');
if(currentIndex == totalImages-1){
currentIndex = 0;
}
else{
currentIndex++;
}

images[currentIndex].classList.add('main');

}

// Function to go to previous Image
function previousImage(){

images[currentIndex].classList.remove('main');
if(currentIndex == 0){
currentIndex = totalImages-1;
}
else{
currentIndex--;
}

images[currentIndex].classList.add('main');

}

</script>

</body>
</html>
الناتج
مبروك، لقد قمت بإنشاء شريط تمرير CSS باستخدام HTML وCSS وJavaScript.
وظيفة عرض الشرائح
يعمل شريط التمرير لدينا حاليًا بالتحكم اليدوي. أي أن الصورة لن تتغير إلا بنقر المستخدم على زر "السابق" أو "التالي". مع ذلك، لا تعمل معظم أشرطة التمرير المتوفرة على الإنترنت بهذه الطريقة. فهي مزودة بتأثير عرض شرائح يسمح لها بتغيير الإطارات تلقائيًا بعد فترة زمنية محددة.
يمكننا أيضًا القيام بذلك في شريط التمرير. باستخدام جافا سكريبت، يمكننا استخدام دالة setInterval التي تستدعي الدالة التالية تلقائيًا بعد وقت محدد. هذا يساعد شريط التمرير على العمل تلقائيًا وتغييره بعد الوقت المحدد.
<!DOCTYPE html>
<html>
<head>
<title>Slider in CSS</title>
<style>

body{
background-color: rgb(58, 58, 58);
margin-top: 100px;
}
.carousel-container {
width: 600px;
height: 400px;
position: relative;
margin: 0 auto;

}

.navigation-buttons .previous {
position: absolute;
z-index: 10;
font-size: 25px;
top: 40%;
left: 10px;
font-weight: 700;
}

.navigation-buttons .next {
right: 10px;
position: absolute;
font-size: 25px;
z-index: 10;
top: 40%;
}

.navigation-buttons .nav-btn {
background: rgba(255, 255, 255, 0.55);
cursor: pointer;
border-radius: 50%;
width: 30px;
height: 30px;
display: flex;
justify-content: center;
align-items: center;
padding: 5px;
box-shadow: 2px 2px 10px rgba(0, 0, 0, 0.4);
}

.navigation .nav-btn:hover {
background: white;
}

.slider-carousel {
margin-top: 20px;
transition: all 0.3s ease;

}
.slider-carousel img {
width: 100%;
transition: all 0.3s ease;
border:8px solid white;
}

.images {
position: absolute;
display: none;
}

.main {
display: block;
}

.image-text {
position: absolute;
bottom: 0;
width: 103%;
display: flex;
font-size: 20px;
justify-content: center;
align-items: center;
color: rgb(255, 255, 255);
background: rgba(0, 0, 0, 0.3);
height: 35px;
}

</style>
</head>
<body>

<div id="parent-container">

<div class="navigation-buttons">
<div class="previous nav-btn"><</div>
<div class="next nav-btn">></div>
</div>

<div class="slider-carousel">
<div class="images main">
<img src="https://cdn.pixabay.com/photo/2015/04/19/08/32/marguerite-729510__480.jpg" alt="flower 1" />
<div class="image-text">Image 1</div>
</div>
<div class="images">
<img src="https://cdn.pixabay.com/photo/2014/02/27/16/10/tree-276014_960_720.jpg" alt="flower 2" />
<div class="image-text">Image 2</div>
</div>
<div class="images">
<img src="https://cdn.pixabay.com/photo/2015/04/23/22/00/tree-736885_960_720.jpg" alt="flower 3" />
<div class="image-text">Image 3</div>
</div>
</div>

</div>

<script>

const previous = document.querySelector('.previous');
const next = document.querySelector('.next');
const images = document.querySelector('.slider-carousel').children;
const totalImages = images.length;
let currentIndex = 0;


// Event Listeners to previous and next buttons
previous.addEventListener('click', () => {
previousImage()
})

next.addEventListener('click', () => {
nextImage();
})

setInterval(()=>{
nextImage();
},1000);

// Function to go to next Image
function nextImage(){

images[currentIndex].classList.remove('main');
if(currentIndex == totalImages-1){
currentIndex = 0;
}
else{
currentIndex++;
}

images[currentIndex].classList.add('main');

}

// Function to go to previous Image
function previousImage(){

images[currentIndex].classList.remove('main');
if(currentIndex == 0){
currentIndex = totalImages-1;
}
else{
currentIndex--;
}

images[currentIndex].classList.add('main');

}

</script>

</body>
</html>
الناتج
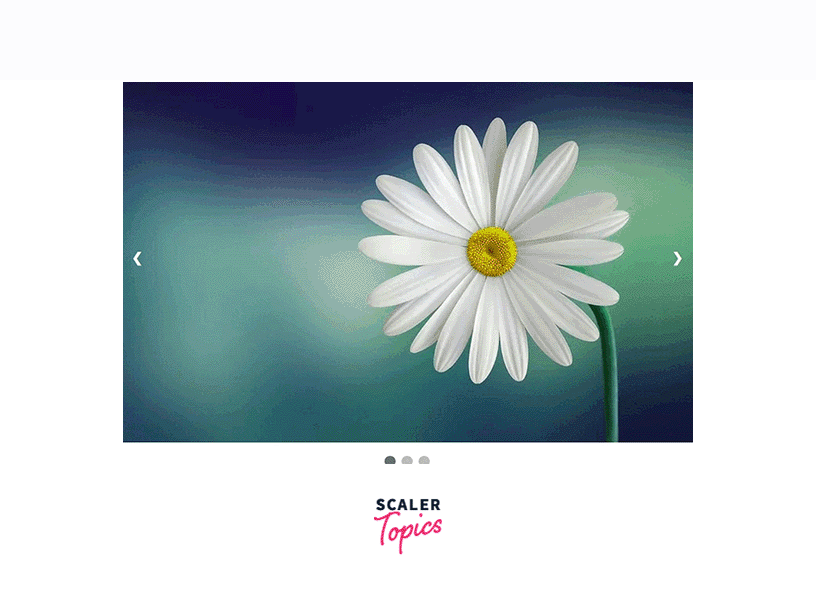
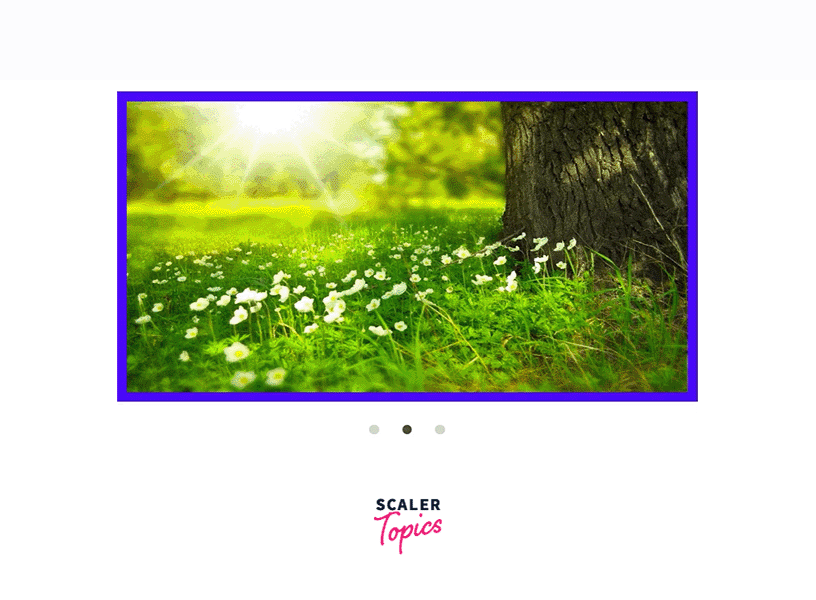
نقاط الملاحة
إلى جانب استخدام عنوان أو نص صورة في شريط التمرير، يمكنك أيضًا استخدام نقاط التنقل. تعمل نقاط التنقل بشكل مشابه للنص أو العنوان، حيث تُعلم المستخدم بالإطار الذي يستخدمه حاليًا. تُستخدم نقاط التنقل في العديد من أشرطة التمرير الحديثة لسهولة إنشائها. غالبًا ما تكون نقاط التنقل عبارة عن أزرار اختيار.
ميزة استخدام نقاط التنقل هي أنها تتيح للمستخدم الوصول إلى كل إطار من إطارات شريط التمرير دون أي عناء. بخلاف شريط التمرير التقليدي الذي يتطلب من المستخدم الوصول إلى كل صورة على حدة، تتيح نقاط التنقل للمستخدم الوصول إلى كل إطار أو صورة بالنقر على نقطة التنقل المقابلة لها.
المبدأ الأساسي لنقاط التنقل مشابه للصور المنزلقة. ستحتوي الصورة الحالية على زر تنقل مطابق له فئة نشطة. بعد تغيير الصورة، تُنقل الفئة النشطة أو تُضاف إلى الصورة الحالية ونقطة التنقل الحالية.
<!DOCTYPE html>
<html>
<head>
<meta name="viewport" content="width=device-width, initial-scale=1">
<style>
* {box-sizing: border-box}

body {font-family: Verdana, sans-serif; margin:0}

.images {display: none}

img {
vertical-align: middle;
width:100%;
}

/* Slideshow container */
.carousel-container {
max-width: 1000px;
position: relative;
margin: auto;
}

/* Next & previous buttons */
.previous, .next {
cursor: pointer;
position: absolute;
top: 50%;
width: auto;
padding: 16px;
margin-top: -22px;
color: white;
font-weight: bold;
font-size: 18px;
transition: 0.6s ease;
border-radius: 0 3px 3px 0;
user-select: none;
}

/* Position the "next button" to the right */
.next {
right: 0;
border-radius: 3px 0 0 3px;
}


/* On hover, add a black background color with a little bit seethrough */
.prev:hover, .next:hover {
background-color: rgba(0,0,0,0.8);
}


/* The dots/bullets/indicators */
.navigation-dot {
cursor: pointer;
height: 15px;
width: 15px;
margin: 0 2px;
background-color: #bbb;
border-radius: 50%;
display: inline-block;
transition: background-color 0.6s ease;
}
.active, .navigation-dot:hover {
background-color: #717171;
}
</style>
</head>
<body>
<div class="carousel-container">
<div class="images fade">
<img src="https://cdn.pixabay.com/photo/2015/04/19/08/32/marguerite-729510__480.jpg">
</div>
<div class="images fade">
<img src="https://cdn.pixabay.com/photo/2014/02/27/16/10/tree-276014_960_720.jpg">
</div>
<div class="images fade">
<img src="https://cdn.pixabay.com/photo/2015/04/23/22/00/tree-736885_960_720.jpg">
</div>

<!-- Previous and Next Buttons -->
<a class="previous" onclick="plusSlides(-1)">❮</a>
<a class="next" onclick="plusSlides(1)">❯</a>
</div>
<br>

<!-- Navigation Dots-->
<div style="text-align:center">
<span class="navigation-dot" onclick="currentSlide(1)"></span>
<span class="navigation-dot" onclick="currentSlide(2)"></span>
<span class="navigation-dot" onclick="currentSlide(3)"></span>
</div>
<script>
var currentIndex = 1;

//Show current image
showSlides(currentIndex);

//Function to move Next
function plusSlides(n) {
showSlides(currentIndex += n);
}

//Function to move back
function currentSlide(n) {
showSlides(currentIndex = n);
}


//Initiate moving of slides
function showSlides(n) {
var i;
var slides = document.getElementsByClassName("images");
var dots = document.getElementsByClassName("navigation-dot");
if (n > slides.length) {currentIndex = 1}
if (n < 1) {currentIndex = slides.length}
for (i = 0; i < slides.length; i++) {
slides[i].style.display = "none";
}
for (i = 0; i < dots.length; i++) {
dots[i].className = dots[i].className.replace(" active", "");
}
slides[currentIndex-1].style.display = "block";
dots[currentIndex-1].className += " active";
}
</script>
</body>
</html>
الناتج

مثال بديل
أشرطة التمرير المُنشأة باستخدام جافا سكريبت تعمل بشكل جيد طالما أن جافا سكريبت مُفعّل في المتصفح. بمجرد إيقاف المستخدم لجافا سكريبت، لن تعمل أشرطة التمرير لأنها تستخدم جافا سكريبت لتحقيق وظائفها.
لا تحتاج إلى استخدام جافا سكريبت لإنشاء شريط تمرير. يمكنك حتى إنشاء شريط تمرير باستخدام HTML وCSS فقط. كل ما عليك فهمه هو كيفية عمله عند نقر المستخدم على زر "السابق" أو "التالي". يستهلك شريط التمرير المُنشأ باستخدام HTML وCSS ذاكرة أقل في المتصفح، وسيعمل حتى مع تعطيل جافا سكريبت فيه.
يمكنك استخدام سماتها وخصائصها لإنشاء فئة نشطة. بالنسبة لزر التنقل، يمكنك إنشاء فئة نشطة تعمل عند النقر على الزر أو تمرير مؤشر الماوس فوقه. يعمل هذا بشكل مشابه لجافا سكريبت، ولكن بدلاً من استخدام معالجة DOM، سنستخدم دوال CSS مثل target وغيرها لتحقيق ذلك.
لقد أنشأنا لك شريط تمرير نموذجيًا باستخدام HTML وCSS. استخدمنا فئات شبه نشطة مثل check لتحديد نقطة التنقل التي نقر عليها المستخدم مؤخرًا. ثم نعرض الصورة للمستخدم وفقًا لذلك. لكل صورة، حددنا الهامش والحشو، لأننا لا نخفي الصور.
<!DOCTYPE html>
<html>

<head>
<title> Slider using HTML and CSS </title>
<style>

img{
height:100%;
width:100%;
}

#frame {
margin: 0 auto;
height:400px;
width: 600px;
max-width: 100%;
}

#frame input[type=radio] {

display: none;
}

#frame label {
cursor: pointer;
text-decoration: none;
}

#slides {
padding: 10px;
background: #00F;
position: relative;
z-index: 1;
}

#overflow {
width: 100%;
overflow: hidden;
}

#frame1:checked~#slides .inner {
margin-left: 0;
}

#frame2:checked~#slides .inner {
margin-left: -100%;
}

#frame3:checked~#slides .inner {
margin-left: -200%;
}

#slides .inner {
transition: margin-left 800ms
cubic-bezier(0.770, 0.000, 0.175, 1.000);
width: 400%;
line-height: 0;
height: 300px;
}

#slides .frame {
width: 25%;
float: left;
display: flex;
justify-content: center;
align-items: center;
height: 100%;
color: black;
}

#controls {
margin: -180px 0 0 0;
width: 100%;
height: 50px;
z-index: 3;
position: relative;
}

#controls label {
transition: opacity 0.2s ease-out;
display: none;
width: 50px;
height: 50px;
opacity: .4;
}

#controls label:hover {
opacity: 1;
}

/* active class for images*/
#frame1:checked~#controls label:nth-child(2),
#frame2:checked~#controls label:nth-child(3),
#frame3:checked~#controls label:nth-child(1){
float: right;
margin: 0 -50px 0 0;
display: block;
}

/* active class for navigation button*/
#frame1:checked~#controls label:nth-last-child(2),
#frame2:checked~#controls label:nth-last-child(3),
#frame3:checked~#controls label:nth-last-child(1){
float: left;
margin: 0 0 0 -50px;
display: block;
}

#bullets {
margin: 150px 0 0;
text-align: center;
}

#bullets label {
display: inline-block;
width: 10px;
height: 10px;
border-radius: 100%;
background: #ccc;
margin: 0 10px;
}

#frame1:checked~#bullets label:nth-child(1),
#frame2:checked~#bullets label:nth-child(2),
#frame3:checked~#bullets label:nth-child(3){
background: #444;
}

</style>
</head>

<body>
<div id="frame">
<input type="radio" name="frame" id="frame1" checked />
<input type="radio" name="frame" id="frame2" />
<input type="radio" name="frame" id="frame3" />
<div id="slides">
<div id="overflow">
<div class="inner">
<div class="frame">
<img src="https://cdn.pixabay.com/photo/2015/04/19/08/32/marguerite-729510__480.jpg">
</div>
<div class="frame">
<img src="https://cdn.pixabay.com/photo/2014/02/27/16/10/tree-276014_960_720.jpg">
</div>
<div class="frame">
<img src="https://cdn.pixabay.com/photo/2015/04/23/22/00/tree-736885_960_720.jpg">
</div>
</div>
</div>
</div>
<div id="controls">
<label for="frame1"></label>
<label for="frame2"></label>
<label for="frame3"></label>
</div>
<div id="bullets">
<label for="frame1"></label>
<label for="frame2"></label>
<label for="frame3"></label>
</div>
</div>
</body>

</html>
الناتج
نتيجة
- أشرطة التمرير عبارة عن سلسلة من الإطارات حيث يمكن التمرير عبر كل إطار بالتسلسل.
- يتم استخدامها على العديد من المواقع الإلكترونية اليوم لعرض التعليقات أو الشهادات.
- لبناء شريط تمرير، يجب أن يكون المستخدم على دراية بمفاهيم مثل علامات HTML، ومفاهيم CSS مثل التكديس، والتحديد، وما إلى ذلك، وJavaScript الأساسية مثل المتغيرات والتلاعب بـ DOM.
- تعمل أشرطة التمرير من خلال عرض فئة نشطة. أما بقية الإطارات، فتُعرض مغلقة. عندما يمرر المستخدم مؤشر الماوس فوق زر أو نقطة، نغير العنصر الذي يحتوي على الفئة النشطة باستخدام معالجة DOM.
- إذا لم يكن لدى المستخدم JavaScript ممكّنًا في المتصفح، فلن يعمل شريط التمرير.
- يمكنك استخدام HTML وCSS فقط لإنشاء شريط تمرير. هذا يوفر ذاكرة المتصفح ووقت الحوسبة. كما أنه يعمل مع أي متصفح يدعم HTML وCSS.